Transistor combat guide
Basics of Combat
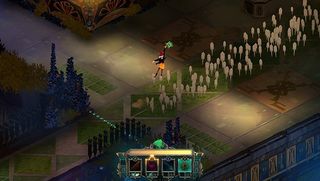
The combat in Transistor is designed for strategy and the ability to frequently chop and change your loadout allows for a huge amount of freedom and experimentation, keeping it fun and frenzied. Sure you could run around mashing the attack buttons if you like, but we’d all be secretly judging you…
Topics
Turns
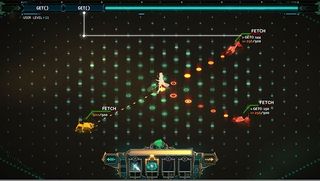
The Turn system is very similar to Fallout’s V.A.T.S in that you can plan your moves, noting the cost of each action and the damage it will cause to your targets. The cost in this case is memory. You can undo actions and take as long as you like trying out different scenarios to view the various possible outcomes before committing to a course of action.
After the Turn is finished, there’s a cooldown period while the Turn bar regenerates and you’re unable to use the Transistor sword during this time, although there are exceptions if you’ve been wily enough to tweak your loadout accordingly. You can read more about that in the recommended loadout section.
Function Slots

The Transistor sword is best thought of as a conduit of sorts that deploys the various functions you acquire as opposed to a weapon in and of itself.
There are a total of 16 functions each with an associated cost in the form of memory. As you level up, you can upgrade your memory capacity and equip more functions at a time. Functions can be allocated to one of three available types of slots and the effect will change depending on how they’re used.
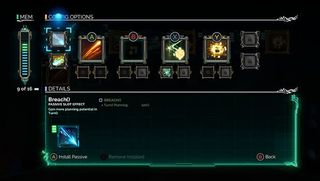
The active slots basically map the function to one of the four attack buttons. So the Cull function for example, will damage nearby enemies and send them soaring into the sky when mapped to one of the four active slots.
The upgrade slots need to be unlocked as you progress and there are two per active slot. It’s best to unlock one upgrade per active slot initially because everything sucks up memory and in the field, you don’t want to rely on one or two high cost attacks for a number of reasons that I’ll explain momentarily, after you’re up to speed with all of this new jargon, so just hang in there.
Using the example of Cull again, if you map this to an upgrade slot, it would increase the impact or effect duration of the function in the active slot, so if you used Cull to upgrade Tap (siphons HP from targets around you), Tap would deal more damage and also send enemies flying up into the air.
The last slot is the passive slot and popping a function into one of these will give you a buff of some kind. There are four passive slots in total and you’ll have to unlock them as you level up. Using Cull as a passive function would enable you to damage enemies on contact during your Turn as you move around the field.
Overload
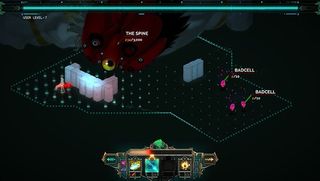
So you tried your best but things are looking dire. Dying isn’t as straightforward as squeezing out a dramatic death rattle before a very final collapse eclipsed by a line of text reading ‘Retry? Y/N’. As expected, your health bar will deplete as Red takes a pummelling but when it empties completely, rather than getting front row seats to the story of your life, you’ll be notified of an ‘overload’ and have your health bar magically replenished.
Each function essentially gives you a life bar and when it’s empty, it will overload and become dormant in exchange for giving you a new lease on life. In theory you could be completely reckless and have Red ‘die’ 3 times without ever glimpsing a game over screen. Here’s why that’s a bloody silly idea.
Overload will take out your highest cost function first, and then continue in descending order of cost if you continue to run around like a headless, masochistic chicken. So any fancy loadouts you set up for maximum carnage will disappear in descending order of brilliance. It gets worse.
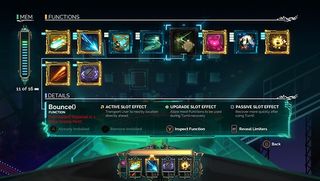
You'll be unable to use any overloaded functions for a certain period of time, which differs between functions. What makes this risky is that actual time has sod all to do with it. You can only access the loadout screen at aptly named ‘access points’ throughout the map. An overloaded function will only be repaired when the requirements are met and they’re measured in access points. A function might state that it will be repaired in 2 access points but there may not be any around for some time and who knows what’s lying in wait between here and there.
On a related note, that’s why focusing on unlocking a single upgrade slot per active slot is recommended as you begin levelling up; if a function overloads through carelessness or sheer bad luck, you can bolster existing functions through upgrades to make up for the loss of the more powerfulm higher cost functions.
Combos
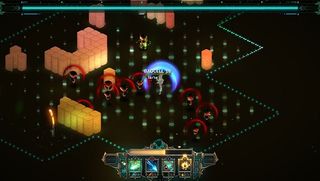
With that being said, we want you to stay alive and unharmed for as long as possible. That’s where combos and backstabbing come into play as utilising both of these tactics increases the damage of your attacks.
You can find a full list of which functions can be used to backstab and combo and which can’t in the functions section, but you can only begin a combo with the Crash function as it leaves enemies vulnerable, allowing you to begin the combo chain. Any function that has the facility for a combo attack can then be chained to it for extra damage.
Backstab is pretty self-explanatory, as you’ll need to manoeuvre yourself behind an enemy to pull it off. If you backstab with Crash first, you can chain combos, but you’ll notice even more added damage as any subsequent attacks will count as both a combo and a backstab.
Jump to Section:
- Basics of Combat
- Functions
- Limiters
- Backdoor Tests
- Recommended Loadouts
Sign up to the 12DOVE Newsletter
Weekly digests, tales from the communities you love, and more

