Things I wish I knew before I started Xenoblade Chronicles X
Load up on as many missions as possible

The best way to get the most out of Xenoblade without getting frustrated with it is to load up on as many quests as humanly possible before striking out into the field, and keeping an eye on the more boring fetch or kill quests while you complete the more interesting Normal, Affinity, or Story missions. You can accept 20 Simple missions at a time, as many Normal missions as you want, and you can only accept one Affinity or Story mission at a time - and there's no way to cancel an Affinity or Story mission in progress once accepted, so keep that in mind.
Because Xenoblade only points out specific locations to you when you have a tangible objective, hunting for items for fetch quests can be a crapshoot at best. That's why you should avoid loading up on these quests at the BLADE terminal and instead check in every now and then to see if you have the required amount of items you need before taking them on. Accept the quest, exit the terminal, and voila - mission complete and instant reward.
For the love of God, level up your Mechanical skill first

As you gain XP, you'll level up your BLADE rank in addition to your class and character levels. Each new level of your BLADE rank gets you additional customization options in your barracks, as well as the opportunity to increase one of your field skills. These are skills you need to interact with the various artifacts and salvage you find out on the field (effectively acting as Xenoblade's version of treasure chests) as well as planting data probes. You don't gain these abilities right away, though - you have talk to Eleonora next to the BLADE Terminal in the Administrative District to acquire them.
For the love of God, max out your Mechanical field skill as soon as you can. While you'll miss out on a few various treasures until you level up your Archeological and Biological field skills, you need the Mechanical skill to plant data probes - which unlock fast travel points and additional sources of income and a vital mineral called miranium - and you can only plant a data probe if you have a high enough level for that particular spot. Data probes are incredibly important, so make the Mechanical skill your highest priority.
Pay attention to Mira's ecology, and plan accordingly

Mira is huge, and it has its own unique ecology. Level 55 dinosaurs will march in the grass, minding their own business, while level 20 monsters will slice you up if they catch wind of you. Animals of all shapes, sizes, and strength co-exist together, and you need to quickly learn how everything works if you plan on making any headway.
Most animals won't attack you unless they're threatened, so it's possible to stroll through areas that are filled with ridiculously powerful beasts without worry. But if there's an icon of an eye or a lighting bolt hovering next to them, watch out. That means they're likely to attack if they see or hear you walking near them, and you'll have to be much more careful maneuvering around them. Running away is a perfectly viable option if one ends up sniffing you out - simply mash the B button to exit completely out of combat, and sprint as fast as you can until it loses interest.
Pay attention to the weather and time of day, too

The weather and time of day will also affect your travels. Monsters are typically stronger at night, and certain monsters are only found at certain times of day, so finding a spot where you can fast forward time (denoted by a clock icon on your mini-map) will help you here. Also, certain weather patterns can enhance or detract from your stats - rain makes you more susceptible to lightning damage, dust storms can impact your health, etc. Keep the weather in mind when you're attempting to take on a particularly powerful beast.
Sign up to the 12DOVE Newsletter
Weekly digests, tales from the communities you love, and more
Use your mining and data probes

Early on in the game, you'll learn how to plant data probes at various locations throughout Mira. Data probes can be planted by visiting sections denoted by a green survey icon on your Gamepad's map, then finding a beam of light jutting out from the ground and mashing the A button when you get there. Data probes are very useful - they open up convenient fast travel spots throughout Mira, and they allow you to gather additional funds and resources at regular intervals simply by playing. Adjacent data probes link together, eventually forming a web that sprawls across the globe, and you can increase their output exponentially by linking like probes together.
By using the map, you can choose which types of probes are planted where. Doing so allows you to customize your overall output, whether you want to focus on earning money or additional resources and miranium.Make use of this feature and exploit it as soon as you can, as it's a great way to keep your pockets lined without selling off all your items. You can earn additional probes by completing quests and finding treasure out on the field, and you should be changing your less potent probes for more effective ones as soon as you find them. Put a little effort into your probe map and you'll rarely (if ever) find yourself completely broke.
Spend miranium to level up your weapon and item shops
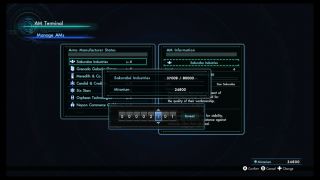
You earn miranium by setting up mining probes, and it's useful for a variety of reasons. Certain citizens require miranium to complete quests, you can use it to refuel your giant mechs - called Skells in Xenoblade's world - and most importantly, you can use it to upgrade the weapon and item shops you have access to.
Completing Normal missions can sometimes unlock new arms dealers, and their items are accessible at a terminal back in the Administration District in New Los Angeles. While these dealers will gain experience by simply using their gear, you can spend miranium at another terminal nearby to upgrade them faster. Doing so unlocks all new sets of stronger armor and weaponry, while upgrading items already available. There's a cap on the amount of miranium you can hold at a given time, and you earn miranium at set intervals thanks to your mining probes, so make sure you stop by frequently and funnel some to your favorite shop.
Don't just use the same couple of party members
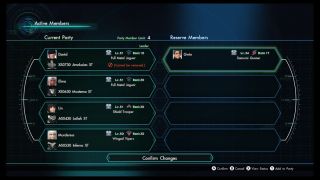
It's really easy to stick with the same handful of characters in your party, especially since most of the Story missions require that you bring Lin and Elma with you. But changing your party isn't just a great way to keep combat from getting stale - it's also vital for accessing many of Xenoblade's late-game quests.
Each potential party member has an Affinity level with your protagonist, and it goes up incrementally as you complete quests and fight monsters with them, or choose different dialog decisions. Certain story and Affinity missions require the use of specific party members, and your relationship with them needs to be at a specific level for you to be able to undertake those missions. If you haven't used them at all, that usually means you'll have to grind for a while until that character likes you enough. Plus, it just helps to rotate your party often, as they don't gain XP when they're sitting on the bench.
If you don't want to get stuck near the end of the game, use Gwin for a bit

A specific ProTip in reference to the last slide: if you don't want the main story to come to a screeching halt near the end of the game, make sure you take Gwin until you build up at least one heart's worth of Affinity points. There's a particular Affinity mission centered on him that needs to be completed before accessing a certain story mission near Xenoblade's climax.
As soon as you're able, drop what you're doing and complete your Skell proficiency exams

After you finish chapter six, you'll finally receive a group of Skell proficiency exams. They're a huge pain in the ass, but complete these as soon as possible so you can start roaming around Mira in your gigantic transforming robots. After finishing chapter nine, you'll also find a mission in New LA that will grant your Skell the ability to fly, so finish that one right away, too
Some general Skell tips

Piloting a Skell is a vastly different experience from running around Mira on foot, and there are some things to keep in mind. Your Skell's abilities are tied to the weapons you equip, and you'll likely need to shop for a few upgrades when you get one, otherwise you're only going to have access to the default auto-attack. When you use one of your skills, you expend fuel. Run out of fuel, and your Skell becomes useless until your fuel recharges - which can take a long time. Also, when your Skell runs out of health, a QTE prompt appears on the screen. Fail the QTE prompt, and you lose an insurance point. Lose three insurance points, and you'll either have to part with a salvage ticket or pay a hefty fee to get your Skell back.
New Skells and Skell upgrades can be purchased via the the computer terminal in Armory Alley in the Administration District, and Skells can be assigned to your party members or reclaimed after destruction at the terminal in the BLADE Barracks. Try to buy at least three additional Skells when your party members reach the appropriate level, as there are missions later in the game that all but require their combined firepower.


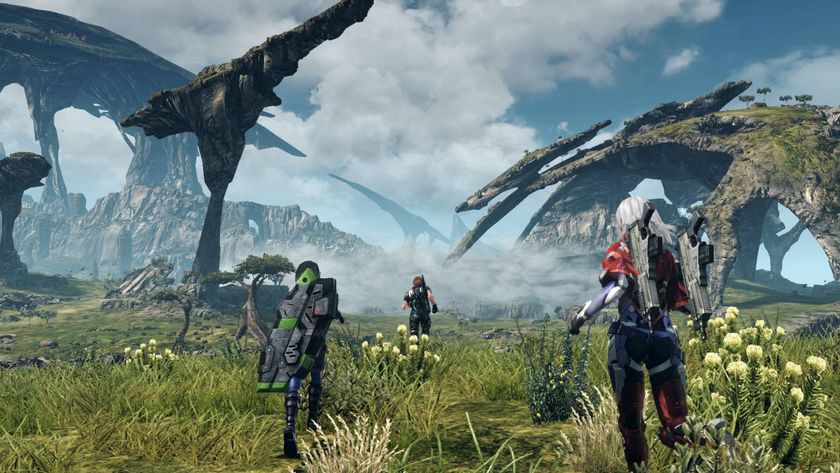









Xenoblade Chronicles X: Definitive Edition looks like an incredible revival of one of the best Wii U JRPGs, but fans might be most excited about one simple thing – the larger text size

After pumping out Xenoblade Chronicles games for a decade and helping out on Zelda: Tears of the Kingdom, Monolith Soft is now fully owned by Nintendo

