How to beat the Darker Side challenge in Super Mario Odyssey
***WARNING BIG SPOILERS FOR THE SUPER MARIO ODYSSEY END-GAME***
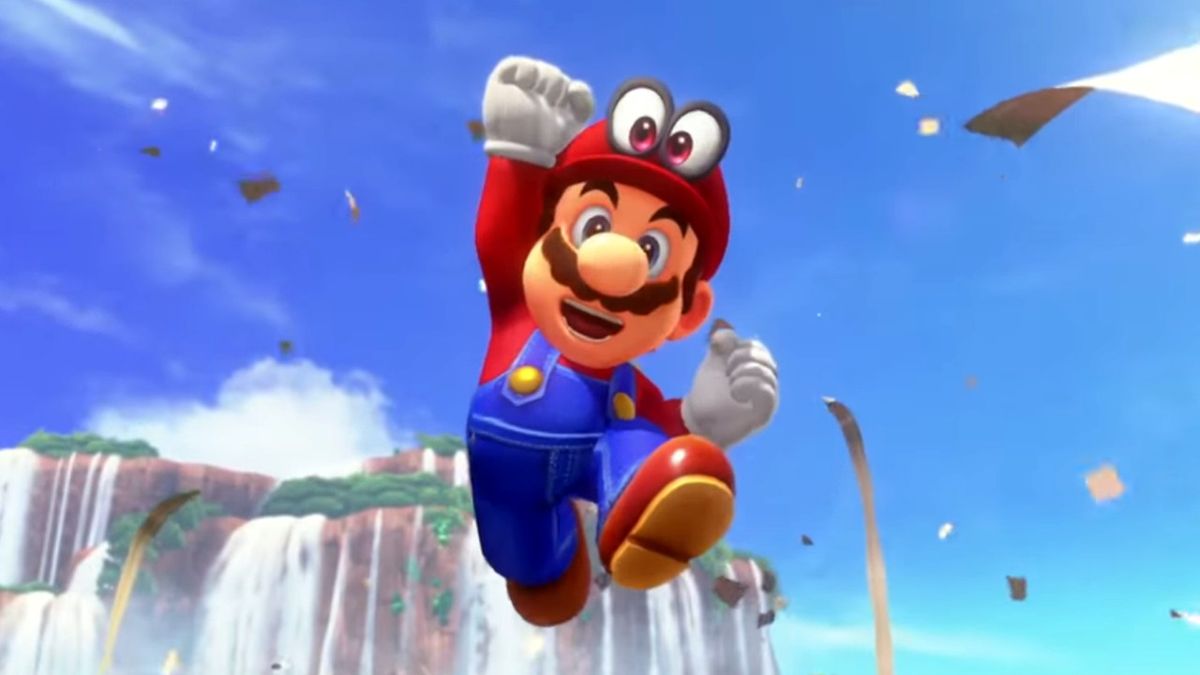
If you thought collecting the 500 Power Moons needed to get to the second secret Kingdom in Super Mario Odyssey was hard enough, by the time you actually get to the Darker Side of the Moon you’ll be thinking again. Even as you enter this new land there are myriad characters waiting to wish you good luck, reminding you they’re proud of your bravery, which just a warning as to how hard the Darker Side challenge is going to be.
It’s a test composed of 14 - yes, 14 - different sections, all geared to making sure you’ve honed all the skills you’ve acquired throughout the game. And trust us, each one is more testing than the last. Plus, if you die at any point, you’ll have to come all the way back to the first stage again.
But we’ve done it, we’ve beaten it and we’ve got some tips that should help you beat it too and get the special reward.
- Super Mario Odyssey guide: everything you need to know to save Peach
- 17 things I wish I knew before playing Super Mario Odyssey
- Hidden mechanics that Super Mario Odyssey never tells you about
- How to answer Pauline’s quiz in Super Mario Odyssey
Stage 1 - Goombas and the Hat
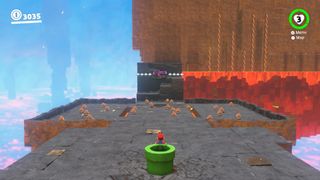
The first stage will need you to stack Goombas in order to jump on a floating hat enemy equipped with rotating blades. You have to hit it twice in order to beat this section.
Start by going to the right and collecting 10 Goombas. If you’re finding it a bit tricky, stand still and wait until they come to you before you jump. Stay near the steps and wait for the hat to come to you, and then leap out of your Goomba stack to hit the hat for the first time. You’ll then get put back into the central area.
Be quick to fling your hat on another Goomba and then jump over to the left hand side of the section to collect all the Goomba waiting there. You’ll need around 10 again, so collect some from the top part if you need to. But then come back to the centre point at the edge of the left-hand side to get in a good position for the hat’s return. Run towards it, avoiding the blades and then jump on it again.
You’ll be rewarded with a three-heart container that’ll boost your health to six hearts, which are basically precious jewels on the Darker Side. You won’t get any more until Stage Four.
Stage 2 - Columns and Poles
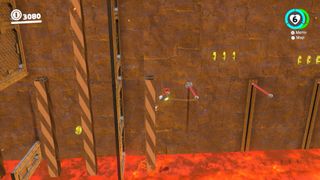
Then it’s a test of your timing and agility, as you’ve got to navigate your way across a series of columns and poles suspended over lava. All of them eventually dunk you in the hot stuff, so you’re going to have to be quick.
In the column section try not to stop until you reach the poles. Shimmy around the right of the first two columns and the wall jump between the second and the metal fence until you can jump to the third. Move around to its right side and then wait a second until you can jump through the gap to the fourth column. Again shimmy around to the right, jump to the fifth and then wall bounce between it and the fence until you can reach the sixth. Shimmy to the right and, when you can, jump to the first red pole and then wait.
The next three poles move up and down into the lava, so you absolutely have to time your jump. Wait for them to go into the lava, start winding up your swing and then leap when they’ve just emerged from the red stuff. Don’t stop swinging until you hit the pole that’s set slightly higher than the rest. Do the same thing again with the last two poles - swinging and waiting until they’ve gone into the lava and are coming back up before you move.
Stage 3 - Lava Jumps
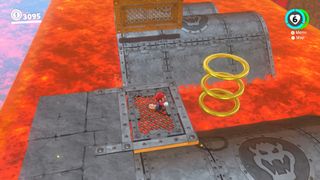
The next stage is, again, all about jumping and timing. You’ll have to make your way across the lava by leaping between fast-moving metal platforms with Bowser’s face on them. But rather than being an annoying reminder of your nemesis, these icons are actually quite useful.
Position yourself on the little jetty and wait for the highest platform to come along - they go in sets of three, moving from shortest to tallest. Then keep jumping forward but only leaping when Mario’s roughly level with Bowser’s face on the platform. There are some high fences in the way of you simply just moving forward, so first you’ll have to keep right, then left until you’ve passed by two fences and then move to the right in order to climb onto the platform and get the heck out of this stage.
Stage 4 - Lava Bubbles
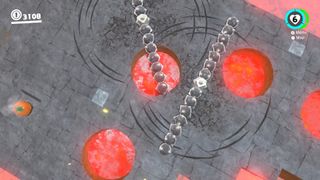
Stage Four entails becoming one of those fire balls - officially known as a Lava Bubble - and leaping from magma pool to magma pool while avoiding roaming spikes. But, before you start this section, recoup some health by hitting the three yellow boxes to find one, single, heart and a few golden coins.
Then it’s time to fling Cappy onto one of the fire balls and make your way through the lava until you hit the platform. You’ll need to keep the dash button - Y - held down the entire time in order to successfully make each jump and keep the camera angle looking down from above.
Move into the first pool and then wait for the spikes to be perpendicular to you before you move into the second. Leap into the third as soon as the spikes pass above the second pool. You’ll want to aim for the pool to your right for your fourth move, and again move as soon as the spikes have passed overhead. Do the same for the fifth pool, which you should make the one in front of you rather than the one to the right as there’s only a coin in that box. After that it’s just a case of leaping to the lava platform and dropping your flamey self into the cannon.
- How to get gold coins fast in Super Mario Odyssey
- How to get Power Moons fast in Super Mario Odyssey
- How to smash the big metal blocks in Super Mario Odyssey
Stage 5 - Onions and Platforms
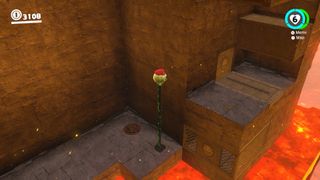
The fifth stage is all about becoming an onion - officially called an Uproot - and making your way up a series of moving platforms. If you need a health boost, move around to the right hand side of this whole platform while you’re still a Lava Bubble to find a single heart. After that, nab yourself an onion and start moving up the platforms. The first one is easy enough, but watch out for the hedgehogs that spawn in when you land. In the next bit jump on the first block and stretch out to leap onto the second as soon as you can. Then extend your legs again to push up the platform above and move onto the metal mesh.
Here wait by the bottom platform until it recedes and then move into the gap and extend as far as you can. Flick onto the bottom platform when it moves out and then extend all the way to push up the platform above, before jumping onto the next mesh platform.
Try to move quickly again as those hedgehogs are following you, flicking onto the bottom platform, extending your legs all the way to move the platform above and then landing on the mesh above.
Extend yourself to flick over the hedgehogs that spawn and then move onto the Bowser platform. Extend all the way to move the platform down and then toddle your way over to the hole in the wall where you can see a gold ring.
Stage 6 - Ice and Spikes
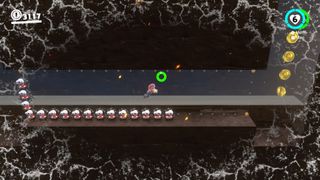
This section isn’t long, but it is chilly. You’ve got to avoid getting hurt by the super icy waters and the weird spike balls with faces. Stretch yourself up into the gap in the wall to reveal the steps while you’re still an onion. You’ll change into Mario as soon as you hit the water, so swim fast up and over the steps before ground pounding into the gap on the other side.
Wait for the water to rise and then position yourself by the bottom yellow dot. Don’t worry, the spikes won’t get you. As soon as the water starts to drop again, immediately jump up and swim to the right, and sink into that next gap. Once the ice disappears from around your screen, jump up and move to the right to exit this section.
Stage 7 - Yoshi and Flowers
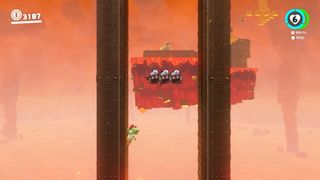
The next stage sees you reunite with an old friend - that’s if you haven’t worked out how to find Yoshi in Super Mario Odyssey already - and work your way, as Yoshi, across some fast-moving flower bridges.
But first, fling Cappy on that familiar egg and become Yoshi. Avoid the spikes and attach to the right hand column of the section ahead. Make sure to only press Y in this section, as if you try and move Yoshi you’re in danger of falling out the back to your fiery death. Keep right until you get past the first spike creatures, then press Y to move to the left. Feel free to collect all the coins, but make sure you’re back on the left by the time the coins run out. Now it might seem scary, but just stay there and don’t move until you’ve passed both spike chains. They won’t get you, I promise. Then just leap to the platform once you’ve reached the very top of the conveyor belt.
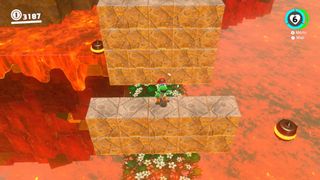
Hit the P button and then run along the flower bridge that appears. Remember though, that Yoshi runs faster than the bridge appears, so don’t go too crazy. One drop and you’re back to square one. Ignore all the fire pulse beacons and just jump over the blocks here. Continue along the path, ignore the blocks on your right and the fire thing again. Continue on and again, ignoring the fire things, jump on the first set of blocks and then to the second. Use Yoshi’s flutter jump to get you to the third, highest set of blocks and then leap back on to the flower path beyond. Here, either follow the road ahead to the next section or head to the left quickly to chat to the Sphynx and unlock a heart container that will always be there. Then head to the next stage using the flower bridge.
- Where to find all 14 Captain Toads in Super Mario Odyssey
- Where to find all the hidden portrait warp holes in Super Mario Odyssey
- Where to find every hidden Goombette in Super Mario Odyssey
Stage 8 - Metal Blocks and Lava
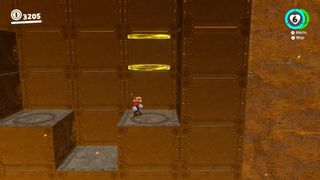
Here it’s about big metal blocks and getting your positioning and timing right in order to work your way up to the top without becoming lava bait. So jump out of Yoshi, jump down through the gold rings and fling your hat on the scarecrow hanging under the metal box behind you. When the boxes start popping out, move over to the third column and wait under the gold rings. Then when the two boxes above emerge, wall jump from the right column to the left. Once you’re up on the platform, again wait on the block under the two gold rings above.
Wait for the block above you to pop and then wall run from the column ahead and then up onto it. Leap over to the next block under the gold rings and then wait. You’ll want to wait until the single block just above and to the left pops, and then wall run off the column ahead up onto it.
Again run onto the block and wait under the gold rings until the column ahead and above pop. Wall jump between them and continue up until you reach a platform on the right. Keep on running, through the gold rings until you get to the solid stone platform.
Stage 9 - Wings and Wind
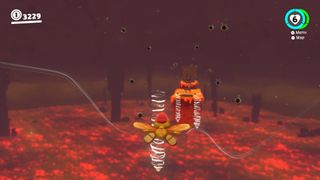
Now it’s time to fly, and although it might be short there are also flies, which can hamper your progress. Possess the flying lizard and then double tap B to glide, but only right at the edge of the platform. After that aim straight for the first air jet. Try not to adjust your direction between jets because you’ll loose altitude and you’ll need it all to get to the end. Change direction when you’re in the jetstream and then only use the tiniest nudges on the joystick if you really have to realign.
If the game really wants to make you suffer, it’ll throw the flies at you. Just power on through, take the hit and fingers crossed you’ve got enough health for the rest of the challenge. There are only four jetstreams to go through here and then you’re on the next platform.
Stage 10 - Forks and Lava
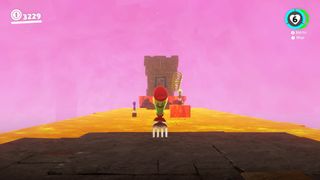
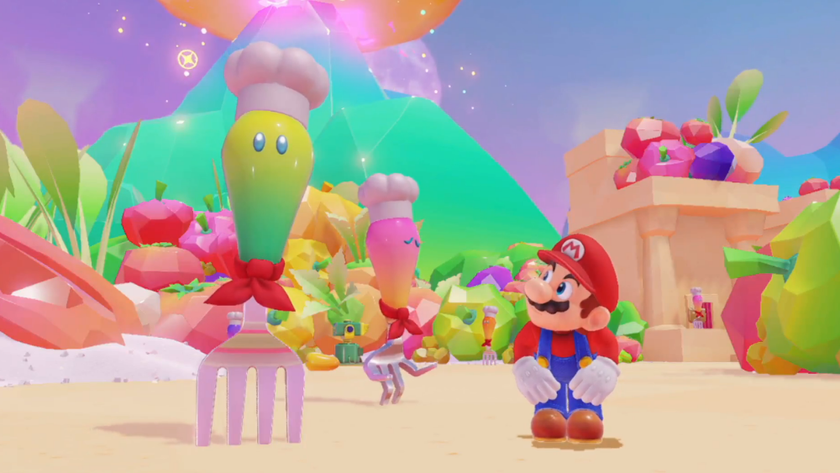
And we’re onto stage 10, where you’re avoiding the lava again, but as a fork this time. The camera is your friend in this one, so make sure you align your angle before you fling, as every precious millimetre counts in this one. Fling your hat on the first fork and then line yourself up for the next. Just before you hit it, fling your cap again. At the second fork you’ll get a choice, and I’d suggest going left as it’s a lot easier to judge the gaps. So line yourself up again, catapult yourself and fling Cappy onto fork three.
Pull the left Joy-Con back and wait until the moving fork comes over to the left and then let it fly, launching you forward and then fling Cappy again. Then there’s just one more flick before the last platform. When you land on solid ground again, head down the green pipe. Just be aware Mario might be a bit speedy when you land, so be prepared to do a little spin so you avoid the lava.
Stage 11 - Hedgehogs and Fire Rings
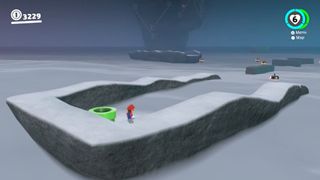
Welcome to my least favourite part of the whole challenge. The hedgehogs. But there’s a way to make things a lot easier, as long as your Cappy aim is true. Whatever you do, try and avoid hitting any of the fire ring machines because doing so will start a chain reaction that makes your life very difficult indeed.
Get onto the first platform and go to the top right-hand corner. First aim to the left and take out all those hedgehogs. Then move to the bottom right-hand corner and aim up to take out the spiky monsters. When it all gets a bit frantic, go back up to the top right-hand and aim down.
Stay in that spot as the platform turns the corner, but as the hedgehogs start to spawn in, run to what is now the top right-hand corner and aim down. Then just keep flinging Cappy until the platform reaches the end and you can leap up to safety out of the fog.
Stage 12 - Birds and Swings
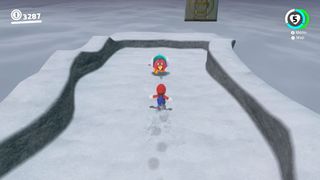
Now it’s time for the Pokio to shine, the little extending beak bird from the Bowser Kingdom. Capture him at the end of the platform and then stand on the ledge. And before you get started remember to only use the poke beak button - Y - and the left joystick to fling. Once you’re airborne, don’t touch that joystick because you’ll change direction - and when you’re above a bottomless valley, you don’t want to do that.
Jump to the first swinging board and press Y to poke in. You don’t have to keep holding Y, but start preparing your fling. Wait until the board swings to the right and aligns with the next on before you jump and poke again. Do the same thing again to get to the third swinging platform.
Here, wait until the third platform goes all the way to the right - ignoring those other swings - and fling yourself up to the board along the rock face. Now, fling yourself up to the top as fast as you can, because if you get hit by any of the other swinging boards you’ll fall. But you should make it up to the top for Stage 13 in one piece.
Stage 13 - Mario and Donkey Kong
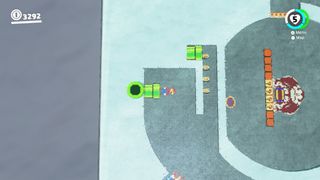
For Stage 13, it’s all going a bit old school. It’s a massive 2D section where Mario has to go up against Donkey Kong and his rolling barrels. Sound familiar? But what makes it tricky is that it’s a spiral design level, so camera angles and control directions can get a little confusing. Thankfully, the actual stage is easy enough if you’re just patient with it and use the dash button liberally.
Head right, leap over the flaming barrels and get yourself over the incoming rollers. Keep heading right until you hit the second moving platform and jump on board as it gives you a better position. Go under the yellow blocks and only jump up to hit them with your head when Donkey Kong is grounded. Do it four times and he’s down, leaving you to escape through the gap that opens below into the green tunnel.
Stage 14 - Bowser and Boulders
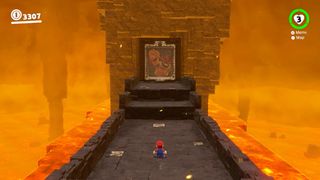
Stage 14 might make you panic and think you’ve got to face Bowser because of that big portrait of him at the end of the corridor. But thankfully, you’ve just got to be Bowser instead and the game gives you the full six hearts of health again.
Head through the portrait, become your spiked shell nemesis and then smash through the rocks ahead. Work your way up the platforms, dodging left and right to avoid the boulders. Turn left and bounce across the platforms with more boulders - there’s no tricks to doing it apart from a bit of luck - until you get to the section with the blocks. You can attack the incoming boulders if you want.
The second to last section is the trickiest, as it sees you attacking your way through a mass of stone blocks. We just smashed our way through, but the best option is to attack a block then turn and hit the ball coming behind you. Rinse and repeat.
The last section is fairly easy if you keep just to the left of centre until you’re on the third platform, when you can move into the middle a little more, smash through the last set of blocks and then run to freedom.
Stage 15 - Electric messages

There’s just one more section to go and it can’t actually kill you unless you press the wrong button and send Mario hurtling to his death. Don’t do that. Instead, just move along the electricity cables and read the sweet message.
And then you’re out of all the danger, at last. Give yourself a pat on the back, mop your brow of sweat and have a chocolate biscuit. For all that, you earn yourself a lovely little exchange with Cappy as you frog jump up the tower. But also a Multi-Moon and a very special outfit - the Invisibility Hat. As for what you’ll use it for, we’re still trying to work out but it’s kinda cool, right?
Sign up to the 12DOVE Newsletter
Weekly digests, tales from the communities you love, and more

Sam Loveridge is the Brand Director and former Global Editor-in-Chief of GamesRadar. She joined the team in August 2017. Sam came to GamesRadar after working at TrustedReviews, Digital Spy, and Fandom, following the completion of an MA in Journalism. In her time, she's also had appearances on The Guardian, BBC, and more. Her experience has seen her cover console and PC games, along with gaming hardware, for a decade, and for GamesRadar, she's in charge of the site's overall direction, managing the team, and making sure it's the best it can be. Her gaming passions lie with weird simulation games, big open-world RPGs, and beautifully crafted indies. She plays across all platforms, and specializes in titles like Pokemon, Assassin's Creed, The Sims, and more. Basically, she loves all games that aren't sports or fighting titles! In her spare time, Sam likes to live like Stardew Valley by cooking and baking, growing vegetables, and enjoying life in the countryside.
