The Sims 3: World Adventures Shang Simla Guide
Complete key missions, collect rare items, and get a whole lot of treasure in this Sims 3 Shang Simla Adventures guide
Adventure awaits in The Sims 3 World Adventures! In this Shang Simla guide, you’ll find out how to complete the key missions, get the rare and valuable Pangu’s Axe, raise your China Visa to level three, and make a whole lot of simoleans collecting treasure! Are you ready to raid some tombs?
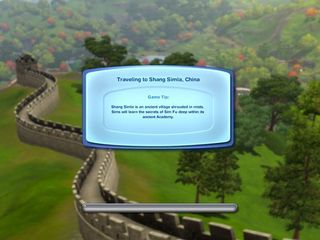
At $1,300 for three days, this is the cheapest option for the solo traveler. Before setting off on any adventure, you’ll want to head to the market and pick up plenty of dried food and showers in a can, as well as a tent—you’ll be doing lots of camping out in tombs! You may also want to pick up unique items like the training dummy and boards, which let you increase your martial arts skills. Later missions in Shang Simla require you to be highly skilled in martial arts, so it’s a good idea to train in between trips.
While there are dozens of missions you can partake in by checking the adventure board at base camp, here are some that will quickly increase your Visa level, allowing you to stay longer in Shang Simla and eventually buy a vacation home there. You’ll also receive Ancient Coins, which can be used to buy special items, and sometimes simoleans. The number of Visa Points, Ancient Coins, and simoleans you’ll receive depends on your Visa level, and can vary.
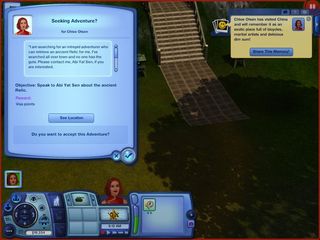
Seeking Adventure
Generally, this will be the first mission available when you check the Adventure Board in Shang Simla. Check your map to find Abi Yat Sen, and report in when you’re ready to start. She’ll give to the Keystone of the Neophyte, which opens the Halls of the Lost Army, your first tomb. Find it on the map and head over.
Halls of the Lost Army
Step on the slab with footprints on it to reveal a hidden staircase, and go down the stairs. Use the key to open the door. Grab the Ancient Coins on the floor, then click on the statue and the option to pull comes up. Pull (or pull far) until the statue is on the panel in the middle of the room. Go through the unlocked door. Push the statue onto the left panel in this room, and stand on the foot slab that was underneath to unlock the next door.
There’s an electrical trap in this room, but you can disable it by pushing a statue onto it. Clear the rubble in one corner of the room, then step on the slab underneath to reveal a secret door behind you. It also reveals a hole in the wall near the locked door. Inspect the hole and the other door will unlock. Before entering it, though, head through the secret door and you’ll find a room with more statues and some treasure chests. Loot the chests, then go through the newly unlocked door.
You don’t have a star keystone yet, so explore the pool in the room. There’s a secret tunnel at the bottom—swim through it. You’ll emerge in another room with a chest, which has the star keystone. Grab it and swim back out the way you came. Insert the keystone and go through the door. Congratulations, you’ve just completed the Halls of the Lost Army! Grab what you came for and check those other chests on your way out. Use the foot slab in this room for a shortcut out.
Deliver the relic to Abi Yat Sen to finish the adventure. At this point, you should have reached Visa Level 1, which means you can stay in Shang Simla longer on your next trip and purchase more items from the Special Merchant with your Ancient Coins.
You There! Stranger!
Dragon Cave
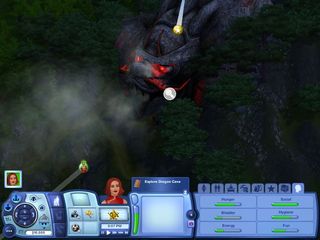
Shing Hong wants you to explore the Dragon Cave to find something so mysterious, not even he knows what it is. Find it on your map and head over. When you get there, you’ll be greeted with a solid wall; click on it to inspect it, and you’ll gain entrance. Walk down the stairs.
You can’t go in the section to your right just yet, so head to the right and pull the statute furthest from you forward. This will allow you to get behind the row of statues to pick up some Ancient Coins. You’ll also see a wall behind the Coins with different flooring; inspect this to reveal a secret door and slip through. Grab the ancient coins and inspect the other mysterious-looking wall to find another secret door. Now you’re behind the opposite row of statues! Inspect the wall at the end of the row for, surprise, another secret door. Slip through and remove the pile of rubble in the corner to find a hole in the floor. Examine in and you’ll trigger another door, which leads to a new room.
Here, you can grab some mercury from the table, and take the treasure from the chest in the corner. After that, take a careful look around. Notice how the bookshelves in the upper-right corner are arranged kind of haphazardly? Inspect the wall behind them. You guessed it; another secret door. Enter the room and go down the stairs. There are some Ancient Coins to collect in this room. After you pick them up, enter the only door. Right off the bat, you can get some Ancient Coins, a money bag, and a relic over by the statues. Then inspect a wall on the opposite side of the room for yet another hidden door.
Clear the piles of rubble and you’ll see that you’re in a room full of tombs. Check out the four you can access now, but look out for mummies! Turn around and face the statues. Pull out the two in the middle, giving yourself room to pull out the two behind them. When all four are out of the way, you can investigate the two tombs behind them. Go back up to the first room and go through the door across from the entrance. Before going through the next door, inspect the wall near it; there’s another secret door. Take the treasure and Coins, then go back and use the door you haven’t entered yet.
In this room you’ll have a startling vision, and need to report back to Shing Hong. Before you leave, though, step on the panel to your right. This will reveal two holes in the wall behind you; check them out. You can walk around the fire at the other end of the room to find more loot and Ancient Coins; go ahead and take those. Against the back wall, there are three statues; push or pull the one in front aside to reveal another plate to step on. It reveals a secret room with a treasure chest full of Ancient Coins. Take them, and then leave the temple and report to Shing Hong.
Shing Hong will tell you that you need two pieces of platinum to construct a Vision Statue. Look for their locations on the map, and pick up the materials you need. Deliver the platinum, and you’ll be told to pick up three pieces of lapis lazuli. Repeat the process. After you deliver the gems, Shing will want a relic. After exploring the Dragon Cave, it’s likely you’ll already have one. If not, go buy one from the relic merchant in town, and give it to Shing to complete the mission.
Sign up to the 12DOVE Newsletter
Weekly digests, tales from the communities you love, and more
Sarah is a freelance writer, editor, and consultant. Her work has appeared on websites including IGN, Polygon, Variety, NBC News, Nerdist, Ars Technica, GamesRadar, and more.

Following "mistaken" DMCA from D&D publisher Wizards of the Coast, Stardew Valley player behind Larian-approved Baldur's Gate 3 mod assures work will "resume as scheduled"

After just 4 days of inZOI early access, The Sims 4's most notorious NSFW mod has come to the hyper-realistic life sim

