9 essential Rainbow Six Siege Outbreak tips to know before you play
Conquer this co-op mode (and maybe Pandemic difficulty) with these helpful tips
You've managed to survive shootouts against the talented Operators of Rainbow Six Siege - but how will you fare when hundreds of parasite-infected freaks are charging directly at you? That's the typical combat situation in Outbreak mode, the limited-time event running from March 6 to April 3 (that's right now!) in celebration of Siege's Year 3 content plan. As detailed in our hands-on Rainbow Six Siege Outbreak preview, this PvE mode is quite the change of pace from Siege's standard 5v5 gameplay - and you'd be shocked at how much fun you can have when it's you and two teammates against an angry swarm of mutants hellbent on shredding your flesh.
If you need a rundown on the basics of Outbreak mode, the official Ubisoft video above does a great job on getting you up to speed, from basic pointers (like the importance of making space with melee attacks) to breakdowns on the five enemy types: Grunts, Breachers, Rooters, Smashers, and Apex. But if you want any hope of surviving your first run through these quarantine zones - or eventually conquering the brutal Pandemic difficulty - you'll need to come prepared. These tips will ensure that you and your teammates make it out alive, mostly unscarred, and with a triple-digit alien-zombie bodycount to brag about later.
1. Don't freak out if the objective gets interrupted
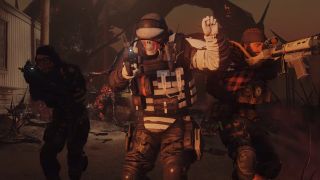
With the stakes in Outbreak mode being so high - potential for global infestation and whatnot - it might initially seem like any failed objective would spell instant doom for the whole mission. Not so. You might end up learning this on the job, but certain objectives - that is, any time you're forced to guard an explosive before it detonates a key obstacle - can be completed even if a runaway herd of Grunts manages to smash it before time's up. If the infected destroy your precious explosive, just play it safe; you don't have to kill everything in sight and restart from scratch. Instead, clear out any infected in the immediate vicinity and simply plant the explosive again when the coast is clear. The timer will resume from where you left off, and you'll soon complete that objective in a jiffy.
2. Always bring a healer (or two)
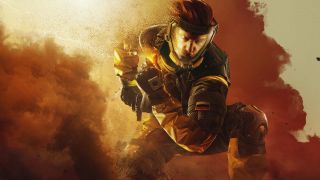
The three Operators you and your team choose to bring into battle aren't exactly the archetypal RPG Holy Trinity, but there's always value to a support role in any team-based game. In the case of Outbreak, both of your options - Doc and Finka - can easily make the difference between survival and a swift end to your mission. Doc's ability to revive himself when he's downed ensures that he's never a liability when the action gets intense, and being able to rejuvenate his teammates (or objective-based VIPs) from afar prevents the group from clumping up and getting trapped in a fatal corner. Same goes for Finka's health-boosting nanomachines, which can revive both of her teammates for a miraculous save when all seems hopeless. Either Operator will be a huge asset for your team no matter what map or encounter you're taking on - and if that includes Pandemic difficulty, you may just want to bring both healers for their incredibly clutch gadgets.
3. Leave Glaz on the bench
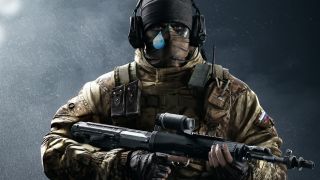
Whereas Operators like Finka and Doc will always be useful to your Outbreak squad, Spetsnaz sniper Glaz is sadly at the opposite end of the spectrum. Simply put, his super-scoped sniper rifle just doesn't serve much purpose against the infected hordes. The thermal view on Glaz's Flip Sight isn't useful when most enemies run at you in a straight line, and the slower rate-of-fire on the OTs-03 rifle mean that a single missed shot can result in a Grunt (or worse, a Breacher) jumping right up in your face before you can react. It's elementary, really: a sniper just isn't in his element when hundreds of enemies are charging directly at him.
4. Explosive grenades are all but useless
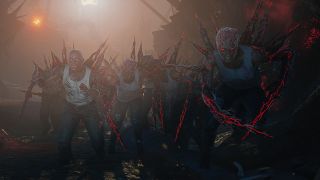
Let's talk grenade choice for a moment, because this is one of the most crucial steps of equipping your Operator for Outbreak. First off, don't even bother with frag grenades, impact grenades, nitro cells, or claymores. They sound great in theory: a horde of monsters is headed your way, so blow up a bunch of them in an instant! But in actual combat, you'll often find that explosives only tend to kill three to five enemies at a time, which doesn't do much when dozens are descending on your position. With nitro cells and claymores, you'll be so focused on detonating your traps at the proper time that you might miss baddies incoming from another direction. Maybe if the explosives could kill an Apex in one hit, they'd be worth it - but as it stands now, they barely make a dent. You're way better off using the utility grenades, for the following reasons...
5. Smoke grenades are amazing for defending objectives
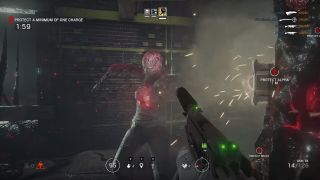
The infected must have really sensitive lungs, because any time they encounter the noxious fumes of a smoke grenade - or Smoke's Remote Gas Grenades, for that matter - they immediately stop in their tracks and helplessly wave at the air until the cloud dissipates. The extra survivability that a well-timed smoke grenade can provide often makes all the difference, whether your team is being swarmed and you need to escape, or the objective you're defending is being overrun. If you're part of a really coordinated squad, you can chain smoke grenades in sequence to create a small radius where infected can't move or attack, let alone destroy that precious explosive you're protecting. You can use that extra time to maneuver to a better position or simply blast lead into the smoke cloud and rack up some more kills.
6. Stun grenades can make quick work of a Rooter
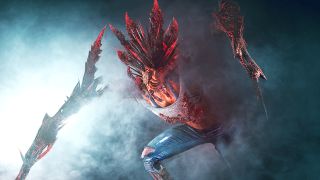
As you'll quickly find the further you get into Outbreak, Rooters are often the straw that breaks the camel's back and gets everyone eaten by parasite zombies. Their ability to lock a player in place can spell instant death, once those Grunts start bashing you and Breachers blow up in your face. The only thing worse than a Rooter is multiple Rooters, so they should always be your kill-on-sight priority. Trouble is, they can take a decent amount of hurt, and they'll typically teleport away from harm just as you're about to shoot them. The solution: stun grenades. Catching a Rooter in the flashbang of a stun grenade or Ying's Candelas will leave them dazed, giving you an opportunity to rush up and perform an instakill melee takedown (complete with snazzy animation). This is a surefire way to deal with one of your deadliest foes, but be wary: stun grenades won't blind nearby allies on the regular difficulty, but they will disrupt your teammates like usual on Pandemic.
7. Suppressors are overrated
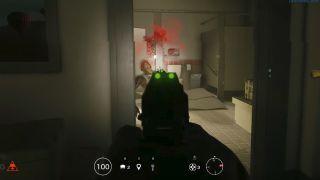
Screwing a suppressor attachment to your primary weapon is always a trade-off in Siege - namely, quieter firing noise at the cost of some damage. And while the suppressor makes sense in theory, letting you pick off distant Grunts with a single headshot without alerting the masses, the overall damage loss just isn't worth it. You might not notice it right away, but that little skull icon in the bottom left will be a white circle when things are calm, and an orange triangle when the infected are aware of your presence. Any time your skull is in the white, where a suppressor would work best, you can just as easily get the job done with a pistol and some steady headshot aim. Oh, and putting a suppressor on a shotgun is just silly.
8. Use reinforced walls to create chokepoints
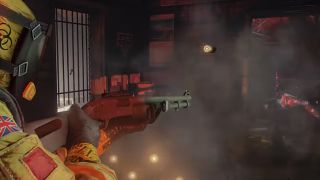
To keep the action chugging along a smooth clip, Outbreak mode does you the kindness of making barricading and wall-reinforcing way, way faster. When you come to what will clearly be a holdout point against a swarm - usually near an objective - don't hesitate to grab wall reinforcements and start boxing your team into an anti-infested fortress. Just be sure to leave one slot in the wall relatively unprotected, preferably by shooting a sightline through it with a shotgun. Unlike human players, who will recognize this funneled defense as an obvious trap, the infested will simply charge the weakest point mindless, letting you shoot them all like fish in a barrel, tower defense style. Breachers will eventually try to foil those plans, but you can easily chew through the majority of a massive horde before your defensive chokepoints are rendered ineffective.
9. Don't bother shooting a Smasher's back - just stab them to death
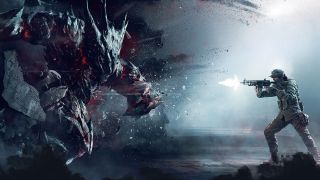
Smashers are an interesting take on the typical 'big brute' enemy: they're blind, so they'll simply walk and eventually run at whoever's making noise by shooting at them. Their thick skin is impervious to bullets but, like so many game enemies, they have an obvious, constantly glowing weakness: the bright red patch of exposed innards on their backs. You might think that spraying clip after clip into that soft, fleshy section would be the best way to put a Smasher down, but it's far more effective to let your knife do all the work. Someone in your squad should be the designated kiter who attracts the Smasher's attention with gunfire (everyone needs to keep their distance, lest they get splattered with one swipe). Pester the Smasher enough, and he'll charge your position; make sure you're near a wall, and the Smasher will rhino-headbutt itself into a stupor, giving you a momentary chance to stab it in the back for maximum damage. Repeat this process a few times, and the Smasher will fall without your team wasting tons of ammo.
If you're just starting out with this fantastic FPS, be sure to check out our Rainbow Six Siege Operators guide for beginners!
Sign up to the 12DOVE Newsletter
Weekly digests, tales from the communities you love, and more
Lucas Sullivan is the former US Managing Editor of 12DOVE. Lucas spent seven years working for GR, starting as an Associate Editor in 2012 before climbing the ranks. He left us in 2019 to pursue a career path on the other side of the fence, joining 2K Games as a Global Content Manager. Lucas doesn't get to write about games like Borderlands and Mafia anymore, but he does get to help make and market them.
Nintendo says the Switch 2 "isn't simply an improved Nintendo Switch, we redesigned the system from the ground up," and after 8 years, I'd sure hope so
Japan's "multi-language" Switch 2 costs 20,000 more yen, or $130 more dollars, than the Japanese-only version
Elden Ring is getting a fancy new name on Switch, new weapons and armor, and new horse clothes on all platforms

