Luigi's Mansion: Dark Moon gem and boo locations guide
How to find every gem and boo
SECRET MINE D-2
Welcome to Secret Mine D-2, Hit Rock Bottom. If you've been following our guide, there will be 5 Gem Stones that we recommend grabbing here that you haven't already found, as well as one Boo to track down.
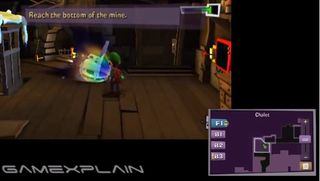
And in fact, the Boo just happens to be in the very room you start in. Cast your Dark Light just right of the fireplace to reveal a rocking chair, and this mission's Boo.
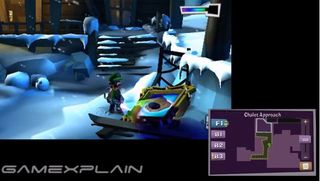
There's also a gem nearby you can now collect. Head outside into the Chalet Approach area, then suck up the snow piles on the left. You'll find a grill you can activate using your strobe light, which can be used to ignite the turkey here. Take the lit turkey with you away from the cabin to find a painting covered by ice near the snowmen. Use the turkey to melt the ice, then cast your Dark Light on the painting to reveal the mansions' 6th gem.
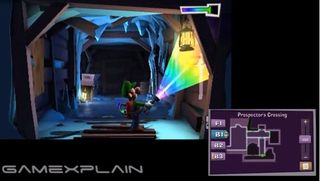
Now head back inside the cabin and take the lift down to the Airway. Now before we continue with the mission, there's a gem you can now grab, but it's a bit out of the way. To get it, head left after disembarking and use your strobelight on the light sensor up high to activate the wire-transportation system. Now catch a ride on the wire and ride it over the door on the right side, leading into the Terminal. Take the southern door here into the Prospector's Crossing. Here, you'll notice a gem has been frozen within the icy floor here. To free it, continue to the south end and use your Dark Light along the right wall to reveal a pickax. Use your vacuum on it to spin it around, revealing a hidden compartment containing two logs. Place both of them on the icy floor then step onto it too to have the combined weight shatter the ice, allowing access to the mansion's 7th gem.
Alright, now let's get back to the mission. Return to the Airway via the western door in the Terminal, and then use the wire transportation system to arrive back on the lower level. Now cross the bridge and head left through the door into the Crossroads area. Use your strobe light to activate the ring-shaped thing nearby, which actually turns out to be a portal--cool! Head on through to reach the other side of the room where you'll find a frozen key. Suck up the snow around it so you pick it up, then carry it back through the Portal. Use the the lantern there to melt the ice, allowing you to actually collect the key proper. Now take the portal again and use that key to unlock the nearby door, leading into the Skip Slope. Yeah it's another slide--weeee. Like before, you can use your vacuum to speed up, or the blow function to slow down, which you probably will want to use. And you'll probably want to take it slow since there's both a key and a gem to collect. For the key, head right up the ramp to grab it--and no, it doesn't matter how slow you go. Immediatly after, you'll see a large spinning wheel on the left. Adjust your speed so you can fit through the gap when it spins into view, allowing you to collect the mansion's 8th gem hiding behind it. Now if you happened to miss either of those two things, or hell if you just want to take the slide again, use the portal at the bottom to head back to the top and try again.
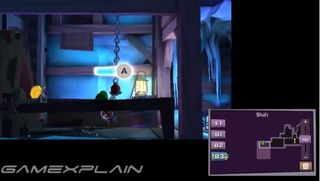
Once you have everything you need, check the barrel at the bottom to reveal a wind spinner. Use your vacuum on it to open the gate on the right revealing a door you can unlock with your key. It leads into the Smuggler's Hideout. Inside, grab the flaming log from the fire and use it to begin melting the ice blocking the northern door. But before you can finish, the nearby window will fling open causing the breeze to put out the log's flame, while some ghosts enter the room. After you take them out, use your vacuum's blow function to shut the window. Now reignite the log using the fire and use it to finish the job melting the ice. Now head on through the door into the Shaft. Use your vacuum's blow function on the rotor to begin your long descent to the bottom. Along the way, you'll pass by a closed compartment with a long chain attached. Continue to the bottom of the shaft, where you then pull the chain, which will open the compartment. Now use your vacuum on the rotor to raise the lift back up to it where you'll find the mansion's 9th gem inside.
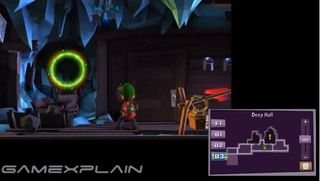
Return to the bottom and suck up the snow around the door allowing you to head through into the Coward's Chasm. Although it seems there's no way across, there's actually a passageway behind the mirror along the back wall. Continue through the door on the right into the Deep Hall. Inside, use your vacuum on the nearby chain, left of the door, to release one of the latches blocking it. Unfortunately, the other, to the right, is encased in ice, so for now, exit out the door on the right into the Pit Mine. Use your vacuum to lower the lift to the ground level. Now tug on the chain attached to the machine here to start up the conveyor belt. Watch out for the bugs that appear as you work your way to another machine on the right. Use your vacuum on the rotor to spin the large wheel until you drop three pieces of coal onto the conveyor belt, that will then be taken through a portal that leads back into the Deep Hall. Return to that room via the lift. Back in the Deep Hall, grab one of the pieces of coal and ignite it with the fire, then launch it at the ice just above to melt it, releasing the mansion's 10th gem.

Now ignite another piece of coal and launch it at the frozen chain by the door on the left to melt the ice, allowing you to give the chain a tug and fully unbar the door, then head on through into the Cinder Mine. Inside, use the vacuum on the valve ahead to ignite a flame on the right. Now grab the log by the tipped over mine cart and ignite it with the fire. Use your burning log to melt the ice at the end of the tracks on the left, then check one of the bags inside to find a piece of coal and ignite it using either the log or the open flame. Once it's lit, launch it at the frozen key in the ceiling to melt the ice, causing it to drop where you can grab it. Now exit back into the Deep Hall. There are a few ghosts lurking about now, so take them down, then use your key to unlock the door just right of the conveyer belt. It leads into the Crystal Quarry, where there's some strange things a-brewing. Now each of the three ghosts you see trapped inside the crystals have been supercharged, making them both stronger and more resilient to attack, and you're going to have to fight all 3. Fortunately, not at all the same time, as whichever crystal you peer into first determines which ghost you'll take on initially, and the other two won't emerge from their crystals until you've defeated the first one. Now because the sneaker's a pain to deal with when paired with another ghost, we recommend peering into his crystal first--which is the first one on the left--to take him on as your solo battle. That way, when he's defeated, you'll only have a Greenie and Slammer to deal with. Once you've captured all three, the mission will be complete
Sign up to the 12DOVE Newsletter
Weekly digests, tales from the communities you love, and more
