The Legend of Zelda: Link's Awakening walkthrough: A step-by-step guide to get you through the 2019 remake
Everything you need to get from start to finish with this Link's Awakening walkthrough
Getting the Bow and Boomerang
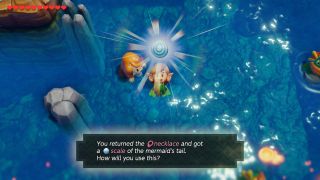
Before the next dungeon, we can get two very powerful items – the Bow and the Boomerang. The Bow is available in Mabe Shop and can be bought for a measly 980 rupees. It may seem like a lot, but we’ll make that money back in no time. Bow in hand, head up through the Mysterious Forest to the house just north of the forest exit. Trade the letter for a broom, then give that broom to the old woman in Mabe Village. If she isn’t here, travel to Animal Village and she’ll be located in the top right corner. She’ll give you the fishing hook, which you can then trade with the fisherman in Martha’s Bay. To reach him, enter the water to the right of Animal Village and swim down under the bridge. You’ll get a necklace, which you can give to the mermaid chilling in Martha’s Bay for a scale. Get out of the water, walk down the left side of Animal Village and hookshot across the water to place the scale on the mermaid statue. Head downstairs and dash straight up to the magnifying glass, which will now reveal invisible enemies.
Travel to Toronbo Shores and bomb the wall right beneath the Banana Shack building. Inside you’ll meet Goriya, who will trade the Boomerang for whatever item you have on either X or Y. Set the Shovel to either and trade with him. You can buy the shovel back off him for 200 rupees later, but for now you’ve just gotten the Boomerang!
Ancient Ruins
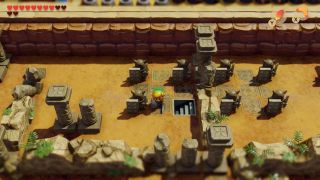
Back in Animal Village, let’s make our way to the next dungeon. Leave through the west exit and walk north past the staircase. Once you’ve reached the north wall, head east and you’ll stop to listen to the owl’s guidance. He tells us that we need to visit the Face Shrine next, which is split up into two separate areas.
Continuing along this path east leads us to a maze of rocks and shrubs. Continue to the right and walk up to find another owl statue. Pegasus Dash into the tree beside this owl to uncover a fairy hiding in the leaves.
Walk south and you’ll enter the Ancient Ruins, where we’ll encounter a new enemy – the Armos. These enemies don’t move until you come close to them, and are resistant to sword attacks. The best way to dispatch these enemies is either one hit of an arrow, or two hits from the Boomerang, which will stun the Armos and kill them. Taking care to kill the slimes that appear, continue down and eliminate the Armos blocking your path on the left. Kill the Armos at the top left of this section and continue North until you’ve reached the area with four Armos standing in a square. Destroying the bottom right one reveals a staircase, under which a chest with a Secret Seashell lies. Back on the surface, make your way to the top left and follow the path down and left which will lead you to the entrance of the Southern Face Shrine.
Armos Knight
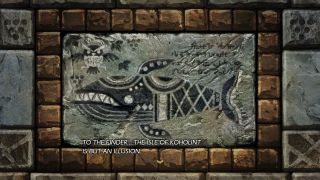
Once inside, enter the room before you where you’ll find the Armos Knight miniboss. Walking up to the enemy will awaken it, and from there its only method of attack is by jumping up and landing on you, shaking the ground and stunning Link as a consequence. Jump using Roc’s Feather as he lands, keep your distance with the Bow, and you should be fine. The Armos Knight drops the Face Key, which allows us to make our way into the Northern Face Shrine. Before we leave, enter the northern room which opened upon us receiving the key. Light both lamps with some magic powder, and read the mural of the Wind Fish at the top of the stairs. It reads:
‘TO THE FINDER... THE ISLE OF KOHOLINT, IS BUT AN ILLUSION... HUMAN, MONSTER, SEA, SKY... A SCENE ON THE LID OF A SLEEPER’S EYE... AWAKE THE DREAMER, AND KOHOLINT WILL VANISH MUCH LIKE A BUBBLE ON A NEEDLE... CASTAWAY, YOU SHOULD KNOW THE TRUTH!’
Leave the Ancient Ruins the way you came and make your way through the mess of rocks and bushes to the path up to the North East. Here you’re met with three paths; head into the Northern cave to reach a Great Fairy Fountain, enter the top path into the water to find a nearby cave containing a piece of Heart, or get into the water on the southern side to swim to the nearby platform containing two Armos. Kill the left one and enter the staircase underneath it. Hookshot across the gap, head up the steps and place the key in the keyhole on the wall to the right, which will cause the Face Shrine to appear.
Face Shrine - West
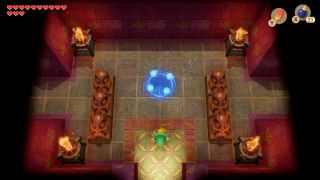
This dungeon is less linear than the previous ones, meaning we can tackle whichever side we prefer. Heading through the left door, we encounter three new enemies; Wizzrobes. They are immune to most types of attacks and disappear after a few seconds. Your best bet is to stun them using the Boomerang and plant a bomb in the middle of the room. Follow the path up to the left and up a screen sees you land in a room with a Mask Mimic and a switch in the middle. Defeat the mimic and stand on the top right orange tile, then use your boomerang to hit the switch.
In the next room, bomb the wall on the right to reveal a hidden room. Inside, defeat the four Zols to unlock a staircase in the upper right corner. Before we go down here, head into the previous room and go up the stairs. Following this path to the right leads us to an owl statue, which we cannot talk to yet. Heading back down the staircase in the previous room brings us to another 2D room. In the next room, you’ll find two Wizzrobes and a Mini Moldorn, whose deaths cause the door at the top of the room to unlock. In the next room, there are two statues guarding the next entrance, with a stairs either side. Breaking the pot on the right side of the room releases a Fairy, however the chest on the left holds something much more important to our quest — the Power Bracelet level 2. With these, we will be able to dispatch those statues that have been plaguing us throughout this dungeon. Head through the door in the middle and you’ll re-enter the room with the switch in the middle. Break the door on the right with the statue and inside you’ll find a chest with 100 Rupees.
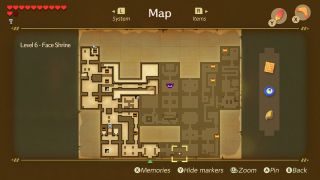
Take the left path this time, by boomeranging the switch while standing on the orange tile. Continue upwards and destroy the pot in the top left corner, which will reveal a switch and open the door to the left. Hit the switch in the bottom left corner, which drops a chest containing the Treasure Map. Head north through the next two rooms, then right. Open the chest, collect the compass, and hit the switch at the top of the room. Return back the way you came and take the right exit in the room with pots in the bottom right corner to find this dungeon’s Beak. Go back up the stairs with the switch on it and follow the path all the way along to the room with the Bubble and two Wizzrobes. Defeating these three enemies gives you a key. Heading back the way you came, hit the switch again and move one screen to the left to the room with two Sparks. Destroy the northern door with another statue and head through.
Here you’ll find a room with two horse statues, a Star, a switch, and a chest. The chest contains 100 rupees and by heading up the stairs in the top right corner you can find another secret seashell. Back in the room, you need to throw these statues and get them to land face up in the podiums on either side. These statues travel in the same movement a knight does in chess, so you’ll need to stand on the centre black and white squares in the bottom row in order to land them properly. To escape the room below, ensure the switch is blue before leaving. Head to the room on the right, hit the switch to turn it orange, and make your way left and down two screens to where the three Wizzrobes are. You need to hit the switch and exit at the same time, so the best strategy is to stand on the most southernly orange block (which should be down), throw your boomerang at the switch and make a run for the door while the boomerang is in flight.
Head back up the stairs and follow the path to where the owl statue is, who we can now talk to. Backtracking along the path and down the right exit of the room leads us back to the area with the Mimic and the switch. Ensure all four blocks are up, then break the door on the right with a statue to find a chest with 50 rupees in it. Continue along this path until you reach the dungeon entrance again.
Face Shrine - East
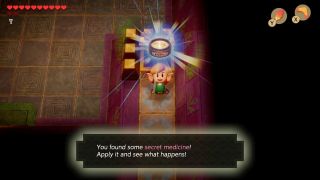
Head east, making your way across the moving platforms. In this next room, another series’ staple, Floor Tiles, begin to attack you. Camp in a corner holding your shield out until all 16 have been destroyed. In the next room, before going through the locked door on the north wall, break the eastern door with a statue and continue through. Defeat the enemies that appear and head south. After defeating the two stars in the next room, talk to the owl statue in the right-hand corner. Climb the stairs, drop onto the orange block and jump across the gap to the other orange block. Climb the stairs, avoiding the Blade trap, and follow the path along to find a chest with some Secret Medicine in it. Jump down and head north. Defeat the enemies and continue north. Take the small key from the chest and head back towards the room with a locked door in it. Defeat the two enemies in this room and blow up the cracked wall to find the dungeon’s miniboss, Smasher.
Smasher
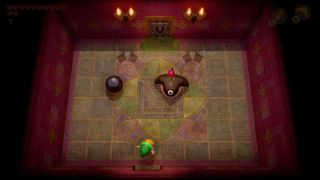
Smasher is one of the game’s easier mini-bosses, as he only takes four hits to kill. He’ll throw his large cannonball at you and your aim is to pick it up before he can and throw it back. Simple, really. You’ll be rewarded with a fairy and a warp point for your troubles once he’s dead.
Ignoring the portal, head north to find yourself back in a previous room. Lift the left statue to reveal a hidden staircase and head down it. Make your way across this portion, over to the furthest ladder on the left. Once you’ve arrived in the next room, more Floor Tiles begin to attack, so wait them out with your shield until a key drops, which we’ll use to open the lock in left corner and continue up a screen. Destroy the door on the right using the statue and make your way into the next room, which contains two more horse statues. Using the same principles as before, throw each statue from the tile underneath the other placeholder, then continue west and down the steps. There are Thwomps ready to drop on you in this room, so Pegasus Dash to avoid these and make your way up the ladder. Three Pols Voice reside in this room, but all can be dispatched easily by playing the Ballad of the Wind Fish on the Ocarina.
Head up a screen through the door. Make your way through this room using the Boomerang, Use the same principles as before to land the horse statues in their holes, hit the crystal switch and open the chest to find a Golden Rupee, worth a whopping 300 rupees. Make your way back to the room which had the Pols Voice in it and continue south. Feed bombs to the two Dodongo Snakes here, who both drop Fairies, and continue left. Cross the gap with your Hookshot, unlock the gate and continue North. This chest can only be unlocked by throwing a pot at it, and doing so reveals the Nightmare Key.
Head south, jumping off the ledge and heading out through the southernmost door. Head one screen east here, past the Wizzrobes, and North to the room with the staircase in it. Once you resurface to the tiled room, head south to a room with a Vacuum. There are four hidden Zols here, so walk around and uncover them, which will open the door on the right.
Push the bottom block to the right, and use your Boomerang to defeat the Wizzrobe. The Beamos in the corner will shoot you if it spots you, so cross the gap when it isn’t looking, push the left block up and continue through the door. Kill one of the Sparks to drop a Fairy and enter the boss room to fight Façade.
Facade
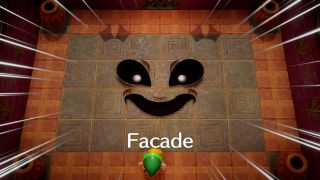
At first, Facade will throw every single red tile and pot in the room at you. Wait these out with your shield up until he moves to his second phase, where he eliminates most of the blocks in the room, except the ones under his face. Plant a bomb on these and after six hits, Facade will be defeated. He’ll leave you with a cryptic message about how if the Wind Fish awakes, everything will be lost, before self-destructing. Accept your well-deserved Heart Container and continue North to pick up the Coral Triangle. Upon leaving, you’re met with a message calling you to the mountains, and the owl returns to tell instruct you to go to the mountain tower.
The Legend of Zelda: Link's Awakening walkthrough - Start of the game (Part 1)
The Legend of Zelda: Link's Awakening walkthrough - Tail Cave (Part 2)
The Legend of Zelda: Link's Awakening walkthrough - Bottle Grotto (Part 3)
The Legend of Zelda: Link's Awakening walkthrough - Key Cavern (Part 4)
The Legend of Zelda: Link's Awakening walkthrough - Angler's Tunnel (Part 5)
The Legend of Zelda: Link's Awakening walkthrough - Catfish's Maw (Part 6)
The Legend of Zelda: Link's Awakening walkthrough - Face Shrine (Part 7)
The Legend of Zelda: Link's Awakening walkthrough - Eagle's Tower (Part 8)
The Legend of Zelda: Link's Awakening walkthrough - Turtle Rock (Part 9)
The Legend of Zelda: Link's Awakening walkthrough - Wind Fish Awakening (Part 10)
Current page: Link's Awakening walkthrough: Face Shrine (Part 7)
Prev Page Link's Awakening walkthrough: Catfish's Maw (Part 6) Next Page Link's Awakening walkthrough: Eagle's Tower (Part 8)Sign up to the 12DOVE Newsletter
Weekly digests, tales from the communities you love, and more





"I can't go through [with] this": The weirdest Zelda ad didn't get Nintendo's approval, but it probably happened anyway because the marketing execs were already on-site

A Zelda movie is finally happening, but Nintendo's Shigeru Miyamoto used to adamantly oppose the idea even "if Steven Spielberg himself" wanted to do it
