The Legend of Zelda: Link's Awakening walkthrough: A step-by-step guide to get you through the 2019 remake
Everything you need to get from start to finish with this Link's Awakening walkthrough
Tidying up before the next dungeon
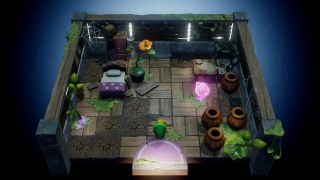
Before you enter the next dungeon, there are a few objectives you should check off our list. You might notice that you have a ghost following us now, so you need to put it to rest. First take it into the house just east of Toronbo Shores, then to its grave left of the cemetery. You’ll be rewarded with the fairy bottle, which you can use to entrap fairies for later use.
In Mabe Village, enter the northern house that has rocks covering the entrance. Here you’ll receive the Ocarina, which is vital to your quest, as well as 100 rupees. You can currently get two songs; from the entrance of Angler’s Tunnel, swim west into the cave to learn Manbo’s Mambo, which lets you teleport without being near a warp point, as well as return to the entrance of a dungeon. Next, talk to Marin in Animal Village, and she’ll teach you the Ballad of the Wind Fish. Trade the hibiscus for a letter in the house second from the right. Enter the water of Catfish’s Maw by heading up and left from Animal Village. Swim all the way around and enter by diving from the southwest.
Catfish's Maw
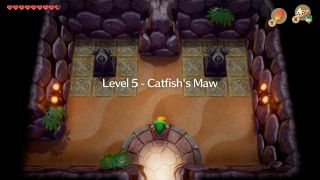
In this dungeon, there’s a brief mini-boss that you'll have to face multiple times. Before then, head two rooms west. Defeat all the enemies, collect the Compass in the next room and head down the stairs. Make your way across the 2D platforming section by jumping from weight to weight. Upstairs, defeat all the enemies and destroy all the crystals so you can push the wooden blocks inwards, forming a square and spawning a key. Head back the way you came and open the first locked door you encounter on the northern wall. Head west two rooms, avoiding the Blade traps and killing all the Helmetsaurs on the way. Take the Stone Beak that spawns. Walk one room left and up one room. Defeat all the Stalfos in here and head north for the first of this dungeon’s four mini-boss battles.
Master Stalfos
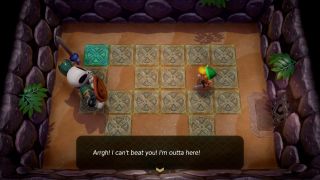
Although this is only the first of four times we’ll face him, Master Stalfos can be harmed and subsequently defeated in the same way. You’ll need to try and attack him either on the side his shield isn’t on, or else nab him from the side or behind. Once you hit him, he will fall apart and be stunned for a few moments. While stunned, place a bomb near him, causing massive damage. Repeat this a number of times and Master Stalfos will run away, before being defeated the final time.
In the next room, there’s a chest. Unfortunately, the contents have been stolen by Master Stalfos. Head north, push the middle block up, and duck into the east room and back out again to reset the blocks. Push the centre block to the right, stand on the switch and do the same going north to reset the blocks. Push the centre block down and defeat the mini-boss for a second time in the east room. Head back up north from the room with the blocks and through the west door at the top of the room. Defeat all the enemies, including the one at the far side of the blocks, to unlock the door. Head through the door and defeat the mini-boss again, then move through the west door to get the dungeon’s Treasure Map.
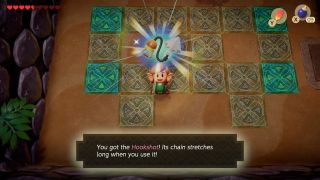
Walk back to the room with the five blocks. You need to go down the southern path, so push the blocks whichever way necessary and continue south one room, west one room, south three rooms, and west one room. In the room where you found the Compass, head down the stairs. Make your way across the 2D section again and then move one room west at the top of the stairs. Defeat Master Stalfos for the final time and claim the Hookshot.
Make your way back the way you came. Follow the top right path from the room with four statues in it, hookshot across the gap and claim 100 rupees from the chest. From here, go left one room, up, left, up, and left again. Hookshot across the room to avoid the blade traps and in the next room hookshot across the gap to get a key from the chest. From here, head back to the room with the five blocks in it. Go through the west path and then north through the next room. Defeat the enemies here and dive down in the square of deep water. Make your way through the underwater passage and use the hookshot to pull the bridge to you. Collect the Nightmare Key and head back the way you came.
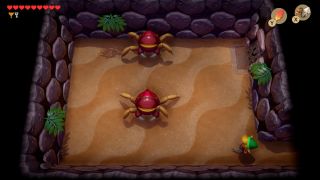
Gohma
From the room with the five blocks, head north. Jump diagonally to the square and hookshot across the gap to get 50 rupees. Then head east and travel across the gap to get another key. Back in the previous room, use the hookshot to pull the bridge towards you again, revealing another 50 rupees. Walk back to the room with blocks in it again. You want to head through the southern exit, so push the block and leave the room until you can make your way south. From this room you need to go left one room, down two, left one, and up two. Pull the bridge on the right towards you and unlock the keyblock.
Here you’ll face two Gohmas. You need to use the hookshot to attack the open eyes of the monsters. They will walk precisely behind each other and open their eyes to shoot fireballs at you. This is your chance to hookshot the eye and wail on them with the sword while they’re stunned. If you get to close to one, it’ll rush forward and charge you instead of shooting fire. My advice is to defeat the one in the back first, as trying to take on both at the same time leads to the front one blocking your hookshot attacks to the back one. When they’re dead, a warp spot and a fairy will appear.
Slime Eel
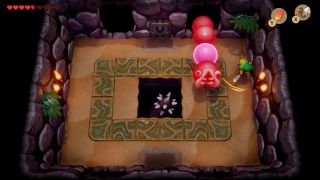
Head northeast out of the Gohma room and down the stairs. Make your way across the 2D section, using the hookshot to propel you up towards the ladders. Upstairs, unlock the keyblock and hookshot across the gap. Open the Nightmare Door.
Use the hookshot to pull the Slime Eel out of whichever hole he appears from and attack the red exposed part behind his head. All the while, you need to avoid the tail that’s spinning in a circular motion around the room. When he pops his head out, look at the eyes to tell whether it is his actual head or a duplicate. The duplicate has beady eyes and will explode around the room if dragged. After damaged the exposed heart of the Eel a couple of times, it will die. Collect your heart container and head to the next room to claim the Wind Marimba.
The Legend of Zelda: Link's Awakening walkthrough - Start of the game (Part 1)
The Legend of Zelda: Link's Awakening walkthrough - Tail Cave (Part 2)
The Legend of Zelda: Link's Awakening walkthrough - Bottle Grotto (Part 3)
The Legend of Zelda: Link's Awakening walkthrough - Key Cavern (Part 4)
The Legend of Zelda: Link's Awakening walkthrough - Angler's Tunnel (Part 5)
The Legend of Zelda: Link's Awakening walkthrough - Catfish's Maw (Part 6)
The Legend of Zelda: Link's Awakening walkthrough - Face Shrine (Part 7)
The Legend of Zelda: Link's Awakening walkthrough - Eagle's Tower (Part 8)
The Legend of Zelda: Link's Awakening walkthrough - Turtle Rock (Part 9)
The Legend of Zelda: Link's Awakening walkthrough - Wind Fish Awakening (Part 10)
Current page: Link's Awakening walkthrough: Catfish's Maw (Part 6)
Prev Page Link's Awakening walkthrough: Angler's Tunnel (Part 5) Next Page Link's Awakening walkthrough: Face Shrine (Part 7)Sign up to the 12DOVE Newsletter
Weekly digests, tales from the communities you love, and more






"I can't go through [with] this": The weirdest Zelda ad didn't get Nintendo's approval, but it probably happened anyway because the marketing execs were already on-site

A Zelda movie is finally happening, but Nintendo's Shigeru Miyamoto used to adamantly oppose the idea even "if Steven Spielberg himself" wanted to do it
