The Legend of Zelda: Link's Awakening walkthrough: A step-by-step guide to get you through the 2019 remake
Everything you need to get from start to finish with this Link's Awakening walkthrough
Secure the Maze Route
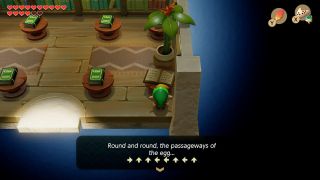
Before we go to the Wind Fish Egg, head to the Library in Mabe Village first. Read the book in the bottom right corner and take note of the pattern it shows you — this will be the route we use in the Maze in the Egg, and is different for every game.
The Wind Fish Egg

Warp to Dampé’s shack and make your way up the steps of Mt. Tamaranch to the Wind Fish egg, where you’ll need to play the Ballad of the Wind Fish on the Ocarina. After a brief musical interlude, the Egg will crack, and after another riveting conversation with the Owl, we can finally go inside. Head north and embrace the abyss by jumping into it. Here you’ll need whatever directions the book in Mabe Village’s library gave you, so use those. If you follow these correctly, you should reach a giant hole in the ground. Jump in. What follows are a series of Nightmare boss fights.
Giant Bot & Agahnim
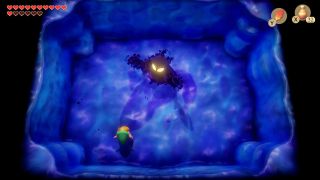
The first boss, Giant Bot, is easy enough to handle. Once it starts bouncing around, use your Magic Powder on it three times. It will transform into Agahnim. Agahnim shoots projectiles at you, and like any good Zelda game, you deflect them with your sword. However, the four-balled projectile cannot be deflected, and will bounce around the room after hitting a wall. After a few hits, the Nightmare changes again.
Moldorm & Ganon

Moldorm is like its non-Shadow counterpart — hit its tail to cause damage. After doing it, it may start to move erratically, so wait for it to slow down and keep your shield up. After five or six hits, Moldorm transforms into Nightmare Ganon. Ganon is the hardest of the lot — he fires six flaming Keese at you, throws his twirling trident and then follows it. Dodge the Keese, move aside of the trident and hit him with a spin attack before he grabs his weapon. Five or six hits should do the trick.
Lanmola & Dethl
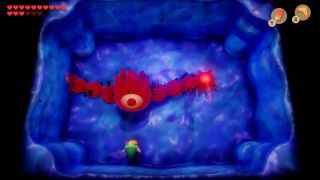
Lanmola isn’t that threatening and it just rushes you in the form of a Rope. Hit it with the Magic Rod a couple of times and it will go down easily, before transforming into Dethl. Dethl has two swinging arms and the aim of this fight is to jump over the arms while hitting its open eye. The best tactic is to jump once and jump immediately in the opposite direction, so you land where you originally jumped from, as the arms can rotate quite quickly. Dethl’s eye will take upwards of ten hits however, so just keep jumping and you’ll be fine.
Climb the stairs that appear and enjoy the ending cutscene of the game. Congratulations!
The Legend of Zelda: Link's Awakening walkthrough - Start of the game (Part 1)
The Legend of Zelda: Link's Awakening walkthrough - Tail Cave (Part 2)
The Legend of Zelda: Link's Awakening walkthrough - Bottle Grotto (Part 3)
The Legend of Zelda: Link's Awakening walkthrough - Key Cavern (Part 4)
The Legend of Zelda: Link's Awakening walkthrough - Angler's Tunnel (Part 5)
The Legend of Zelda: Link's Awakening walkthrough - Catfish's Maw (Part 6)
The Legend of Zelda: Link's Awakening walkthrough - Face Shrine (Part 7)
The Legend of Zelda: Link's Awakening walkthrough - Eagle's Tower (Part 8)
The Legend of Zelda: Link's Awakening walkthrough - Turtle Rock (Part 9)
The Legend of Zelda: Link's Awakening walkthrough - Wind Fish Awakening (Part 10)
Current page: Link's Awakening walkthrough: Wind Fish Awakening (Part 10)
Prev Page Link's Awakening walkthrough: Turtle Rock (Part 9)Sign up to the 12DOVE Newsletter
Weekly digests, tales from the communities you love, and more









"I can't go through [with] this": The weirdest Zelda ad didn't get Nintendo's approval, but it probably happened anyway because the marketing execs were already on-site

A Zelda movie is finally happening, but Nintendo's Shigeru Miyamoto used to adamantly oppose the idea even "if Steven Spielberg himself" wanted to do it


