How to 3D print miniatures for D&D and tabletop RPGs
Learn how to 3D print some kick-ass models with our step-by-step guide
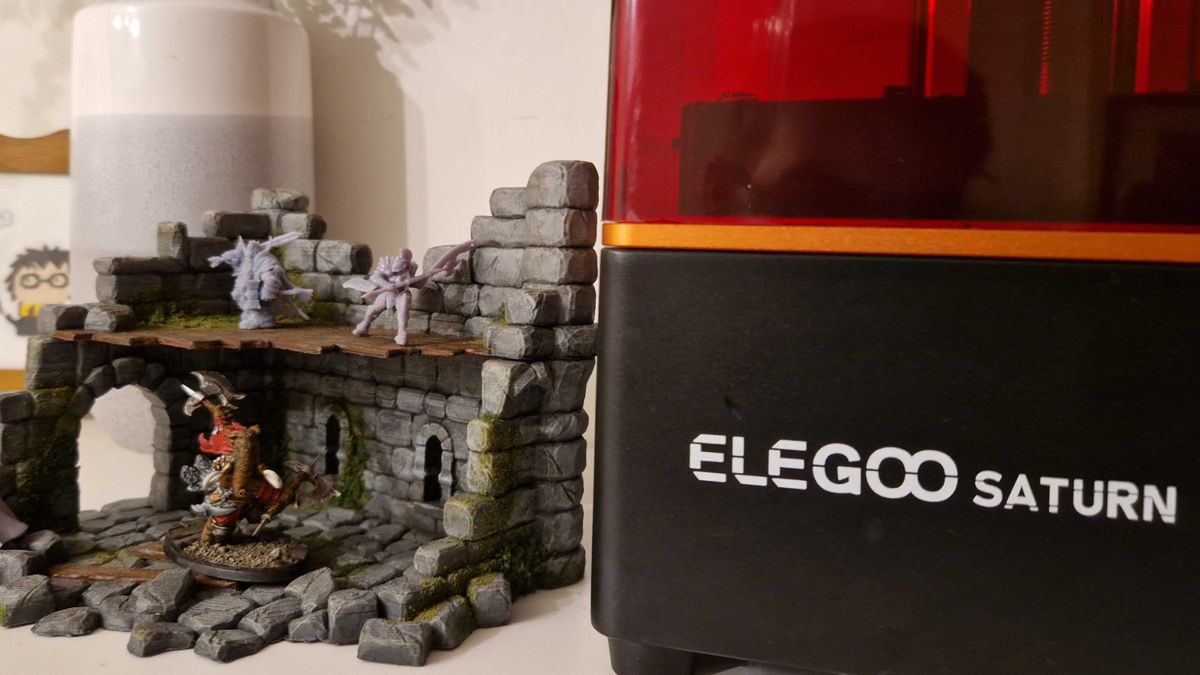
So, you wanna know how to 3D print miniatures? A word of warning first: this isn't the easiest process. It can also be infuriating, offering moments where it all goes wrong for no obvious reason and you're seized by an unshakeable urge to punt your printer out the window. But if you stick with it, you'll discover something that can best be described as magic.
Seriously, the feeling of getting a successful print is unlike any other. I've been messing about with this tech for a while now, and seeing models emerge from a vat of resin is still borderline sorcery. If you have patience, learning how to 3D print miniatures is a properly satisfying hobby as a result. It's much cheaper than buying ready-made figures in the long run too.
To give you a leg up, I've listed all the advice I wish I'd known before I started my own journey on how to 3D print miniatures. That includes what you need to get going and the software you should use, not to mention which of the best 3D printers is ideal for you (because seriously, there are a lot of them).
Decide which kind of 3D printer will be best for you
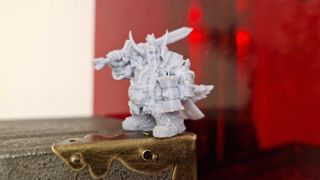
Before you do anything else, you'll need to establish which kind of miniatures you're hoping to print. Do you want to create character models for the best tabletop RPGs like D&D? A resin printer is the way to go (it excels at rendering minute detail at a high resolution). Meanwhile, those eager to construct scenery, props, and large monsters are better off with a filament printer instead. They often have a greater capacity, and the material they use isn't as expensive.
Here's a quick breakdown:
3D printer differences
Resin printer
- Dips into a vat of resin that is hardened layer by layer via UV light
- Excels at high detail at a small scale
- Fast and efficient
- Resin is expensive, toxic, and smells bad
- Requires a mask and neoprene/nitrile gloves
- Often uses smaller build plates
- Quite complicated to set up
- Can print multiple figures simultaneously
- The process can be messy
- Wash and cure kits needed
Filament printer
- Uses a reel of filament that's melted by the nozzle and laid out in layers
- Less detail, but great for large objects
- Slow and loud
- Very little mess or cleanup
- No extra material needed
- Capacity is usually greater
- Easier to learn and use
- Can't print multiple miniatures simultaneously
- Very little mess or cleanup
- No extras required
Now, I should point out that is is possible to get Warhammer-sized models from a filament printer, just as it's doable to make a castle with resin. But that doesn't mean the results will be as good. There's a limit to the detail filament printers can offer, so small minis with macro textures might look smudgy. Similarly, resin printers need lots of an expensive liquid to create large figures. It's simply not cost-effective to create sizable models with it, even if you've got a machine big enough to accommodate them in the first place.
Basically? Either printer can be used as a jack of all trades, but they'll struggle with some tasks more than others.
Sign up to the 12DOVE Newsletter
Weekly digests, tales from the communities you love, and more
Which 3D printer should you buy?
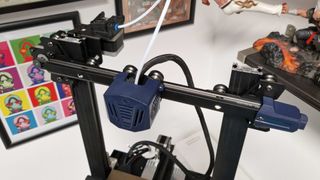
If you're new to the idea of 3D printing, tread carefully - you're not necessarily better off getting a cutting-edge product that's wowed both critics and fans alike. While you're still learning the ropes, I'd recommend choosing something a little cheaper and less flashy. Although these budget options aren't as dazzling, they'll still provide you with amazing figures at the end of it all. You'll also find the process of how to 3D print miniatures easier, mainly because there are less features to juggle.
To point you in the right direction, I've listed a couple of options below.
1. AnyCubic Photon M3
Specifications
Reasons to buy
Reasons to avoid
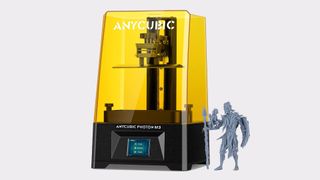
Resin printing can be a complicated process, so you want a machine that'll allow you to take things step by step. Enter the Photon M3, a compact device that's perfect for learning the ropes.
While the build plate is fairly small, it's still big enough to handle most miniatures and mid-size monstrous figures. The M3's petite form means it'll fit into most workspaces as well (so long as they're ventilated - again, be aware that resin stinks), and the touch-screen interface is easy to get your head around. Plus, it's capable of printing minis at 4K resolution so they'll be plenty detailed enough to impress.
Just remember, you'll need nitrile or neoprene gloves to keep you safe when handling resin - this stuff can be quite toxic. It's also a good idea to pick up a wash and cure kit too. Although you can do without them, it'll make life a lot easier.
2. AnyCubic Vyper
Specifications
Reasons to buy
Reasons to avoid
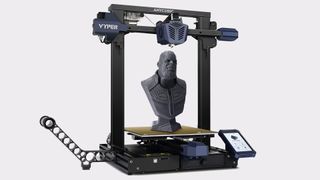
This is the filament printer I started with, and it's a dream to use. Straightforward and beginner-friendly, it'll get the job done with minimal fuss. Thanks to a large build plate, it can also accommodate bigger builds like model buildings or even parts of a cosplay helmet (so long as you're printing it bit by bit, anyway).
Due to the Vyper's auto-leveling system, there's very little in the way of setup either. It handles the hard bits so that you can focus on the fun stuff, and that's exactly what you need if you're new to all this. The same is true of the flexible, magnetic build plate. Simply bend it to remove your figure.
More importantly, you don't have to get anything else - it isn't necessary to cure your models once they're printed, and filament isn't toxic so specialized gloves aren't required.
Prepare your 3D printer
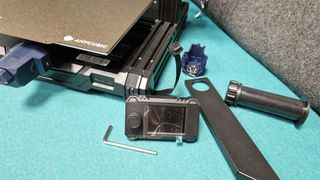
Before we get to glorious minis, we need to go over the basics. Unfortunately for us, you can't just rock up and print amazing models from the get-go; you need to do some housekeeping first. Here are the essentials.
Leveling
This is an essential step regardless of whether you're printing on a resin or filament printer, but it's arguably more important for the former (many filament printers have an auto-leveling function these days). That's because a wonky build plate will cause your models to fall off mid-print, fail, or not stick at all.
- Resin printers: Remove the vat and put a sheet of paper (one is often provided with your machine) onto the screen. Then, keep lowering the build plate until it is pressing down on the paper. Try and wiggle the sheet; if it comes loose easily, lower the plate slightly more. If it doesn't move, you're good to go. Just make sure you don't have the plate pressing down too much - that'll crack the screen.
- Filament printers: Even if your printer auto-levels, you may still have to fiddle with it slightly for the best results. If the filament is only coming out in bits or seems thin, the nozzle is too close to the build plate - raise it up. If it's not sticking to the plate or is coming away from it in places, on the other hand, the nozzle is too high. Lower it slightly.
Download 'slicing' software
3D print files (known as STLs) can't be plugged straight into your machine; you'll need to 'slice' them with dedicated software first. This prepares the file for printing. There are a few options to do this, but the two most popular ones are listed below.
- Chitubox (for resin printers): If you want reliable free software for slicing your resin 3D prints, get Chitubox. It's easy to use, straightforward, and can automatically add supports to your miniature if it doesn't come with some already (these stop parts of the model for collapsing under their own weight).
- Cura (for filament printers): For more classic filament printers, this is by far the best piece of software. Set it to your brand of printer and the rest is easy - you can quickly change settings, adjust position, and slice your STLs with minimal hassle. It's not quite as user-friendly as Chitubox, but it's still great.
Run tests and adjust your settings
I know, I know. Once you've gotten your shiny new printer, the first thing you'll want to do is print something cool like a dragon on a skateboard or your longtime D&D character. But hang on. If you don't do some tests first, your miniatures will look dreadful (if they work at all). Trust me. I've learnt this at the expense of wasted resin and tangled filament.
It all comes down to your settings. If certain scores are off, you might end up with squished details, models that refuse to come away from the build plate, or a giant mess that makes you want to have a little cry. Here's how to avoid those issues.
- Resin printers: This is by far the fiddliest bit of learning how to 3D print miniatures. Sadly, not all resins are the same - they respond better or worse to different UV exposure times. Luckily, some clever souls have put together test prints - called a Validation Matrix by Photonsters, available on Thingiverse - that allow you to check all of these settings and adjust them as needed. Keep raising or lowering the exposure time by small increments with each print, and see what happens. The best setting will have the points of both triangles in the infinity loop touching perfectly without bleeding into each other's space (you'll probably need to zoom in with your phone camera to see it properly). There are other parts of the matrix to consider, but this is the main one.
- Filament printers: Luckily, filament printers are much easier to grapple with on the whole. While some adjustments can be made to nozzle height as described in the levelling section above, it mostly comes down to preset modes like layer height. The smaller the layers, the higher the detail - and the longer it'll take to print. Equally, the amount of infill density you use (to make sure it stays upright and strong) and print speed will of course influence the result.
Make sure your miniatures are ready for printing
Filament printers are nice and simple - so long as you've sliced the model, you should be able to send it to your printer and wait for the action to start. But with resin printers, you'll need to make sure your mini has supports… unless you want to court disaster, anyway. These hold up flimsier parts of the model and make sure they don't collapse in on themselves under their own weight, so they're pretty crucial.
Don't panic if your miniature doesn't have them, though. Software like Chitubox allows you to add supports manually, or automatically insert them.
Where to find models
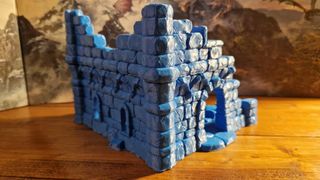
There are plenty of different sites where you can find miniatures, but they all fit different needs. First up, let's get your eye in with some free models.
- Thingiverse: This is usually my go-to for free miniatures on a filament printer. Fielding thousands of community-made figures for you to browse, it's a treasure-trove that will suit almost any need you can imagine. A plant-pot Bulbasaur? Absolutely. Towering fortress walls? You betcha. That obscure monster from Dungeons and Dragons books you like? Yup, it's here too. Unfortunately, the downside is that quality varies. The search function isn't perfect either; unless you have a specific creator in mind, the only way to find what you're looking for is trawling through countless, sometimes-questionable user-uploads. It isn't great for resin minis either, mostly as these files have been designed for a filament printer so will need manual supports added.
- MyMiniFactory: In my opinion, this might be the best site for high-quality resin 3D-print miniatures. While you have to pay for most of the items there, the majority have been created by seasoned veterans who've got years of experience under their belt. As such, their models are usually very impressive. They're also designed to make printing as easy - and successful - as possible.
- Cults3D: Offering both free and paid files, Cults3D is well worth checking out regardless of what you need. It's similar to Thingiverse but boasts a site that's easier to navigate. Despite its selection not being quite as strong as the two options listed above, it's still worth keeping an eye on.
How to 3D print miniatures - cleanup
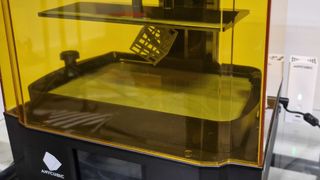
The final step is either very quick or a bit of a faff, depending on which printer you have. If it's a filament machine, you can usually remove your print from the build plate and simply need to clip off any brim that helped hold it in place. As for resin devices, you'll have to dip the model in isopropanol alcohol (or water, if you bought water-washable resin) to clean it. This is followed by removing the supports before curing the figure in a curing machine. Just be sure you're wearing nitrile gloves and a facemask when doing this - resin is toxic, so will irritate your skin upon contact. Be safe!
And that's it! You're ready to go. For more tabletop advice, don't miss the best board games, these board games for adults, or the top board games for 2 players.

I've been writing about games in one form or another since 2012, and now manage 12DOVE's tabletop gaming and toy coverage. You'll find my grubby paws on everything from board game reviews to the latest Lego news.

