8 Hitman Freelancer tips to take down the Syndicates
Use these Hitman Freelancer tips to upgrade your Safehouse, earn bonus Merces, and match contracts to your playstyle

Having some Hitman Freelancer tips to hand will give you an advantage as you set out into this new world, as the roguelike nature of the challenge means you'll need to approach contracts in a different way if you want to succeed. Without the safety net of saves and replays that you have to fall back on during the single player campaign, you'll need to react fast to any unexpected events that happen during a hit, and improvise if you have to as there are no second chances. Studying your target before making a move is key, so you don't have to deal with any chaotic fallout that could jeopardise the outcome of your mission.
This is extra important, as if your target escapes then they'll be able to warn others and there will be tougher security to breach in subsequent missions, while being wounded in action will result in losing the weapons and items you held along with a chunk of the Merces in-game currency. Failure is not an option, so follow these Hitman Freelancer tips to start your new career on the right foot.
1. Customize the Safehouse by completing Challenges and Mastery
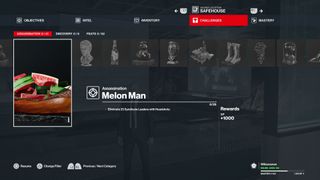
When you initiailly arrive in your Hitman Freelancer Safehouse it's pretty sparse and more than a little bleak, but thankfully there are several ways to spruce it up. The first is by completing Freelancer Challenges to earn Trophies to display, with almost 100 different items to unlock – though as the targets you need to hit are quite high it'll be a while before you start accessing these. The other way is by earning XP during missions, which will rewards you with plenty of cosmetics to improve your home base.
2. Unlock new areas of the Safehouse by increasing your Mastery Level
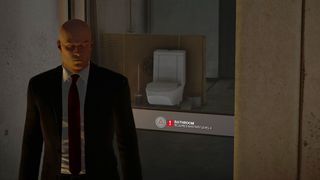
There are also plenty of locations within the Safehouse that you're locked out of at first, and these will gradually open up as you earn XP during missions to increase your Mastery Level. The full list of areas you can unlock is as follows:
- Wardrobe - Mastery Level 2
- Bathroom - Mastery Level 4
- Upstairs - Mastery Level 6
- Garage - Mastery Level 8
- Outside - Mastery Level 12
- Shooting Range - Master Level 13
- Vault - Mastery Level 16
- Practice Space - Mastery Level 18
- Office - Mastery Level 20
- Gym - Mastery Level 22
- Bedroom - Mastery Level 31
- Shed - Mastery Level 32
3. Target Syndicates based on your playstyle
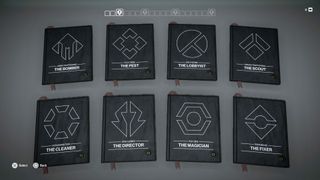
When you start a new contract, the first thing to do is choose which Crime Syndicate you're going to go after. There are eight of them in total, and each Syndicate has a specific type of Payout Objectives associated with it that are geared towards a certain playstyle. It's particularly important when you're starting out to complete as many Payout Objectives as possible, to build up your reserve of Merces to fund future purchases, so consider how your personal style matches the descriptions below then pick a Syndicate you're most suited to:
- Arms Trafficking: Gun and Explosive Kills
- Eco Crime: Trap and Accident Kills
- Big Pharma: Poison Kills
- Organ Trafficking: Melee Kills and Sedations
- Assassination: Silent Kills
- Sick Games: [variable, revealed when you start the contract]
- Psy Ops: Blinding and Avoiding Detection
- Espionage: Stay Undetected and use Stealth
4. Check your briefing for Location Intel and Payout Objectives
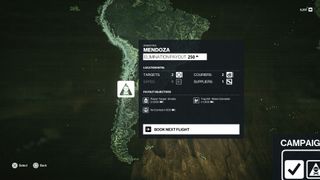
Before choosing where to head for your next mission, review the briefings for all available territories to see how many Targets you'll need to eliminate, what Couriers and Safes there are for bonus Merces, and if there are Suppliers to sell you new items. You can also see what Payout Objectives are on offer, and plan the equipment you take with you accordingly for the best chance of success. Bear in mind that the last location you visit is where you'll face the Syndicate Leader, so think ahead to decide which territory will be best for that showdown.
5. Unlock new weapons to build up your arsenal

There are several ways to get new Hitman Freelancer weapons to build up your available arsenal, and start filling in those bare walls covering a large part of your Safehouse. You can find them lying around during missions, retrieve them from Stashes, or purchase them from Suppliers if any are available, though they need to have a rarity attached and you must successfully exit the mission area to bring them back. After each mission you'll also be presented with a Supply Crate, from which you can choose one item to add to your collection for future use.
6. Take out Couriers and crack Safes for bonus Merces
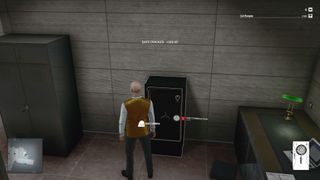
Building up your balance of the in-game currency Merces is important for purchasing weapons and items, and there are a couple of easy ways to do this depending on your Location Intel. If there are any Couriers, these are additional NPCs who can be taken out for a cash bonus, though you should take care not to compromise your mission objectives while doing so. Hitman Freelancer safes can also provide extra Merces if you crack them, so follow the map marker to the right area then use your camera to scan nearby clues to discover the code.
7. Remember your training
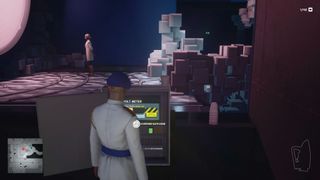
While working through your Hitman Freelancer contracts you'll be revisiting locations from the main campaign, with all of the same opportunities for 'accidents' depending on the route your target(s) are assigned to follow. You can also use the same Hitman 3 keypad codes as before, so it pays to have those handy for sneaking into otherwise secure areas. If you need a refresher, you can always go back to the campaign and replay contracts to remind yourself of the Hitman 3 Mission Stories and assassinations available to boost your knowledge.
8. You can pause if you need time to think
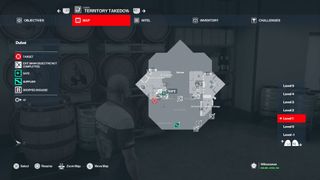
Although you have to be connected with the online servers to play Hitman Freelancer mode and each roguelike contract is a one-shot deal with no saves or replays available, the missions aren't completely 'live' and you can still pause the game. This gives you the opportunity to think about next steps, review the map and your objectives, then resume when ready to continue your work.
Sign up to the 12DOVE Newsletter
Weekly digests, tales from the communities you love, and more

Iain originally joined Future in 2012 to write guides for CVG, PSM3, and Xbox World, before moving on to join GamesRadar in 2013 as Guides Editor. His words have also appeared in OPM, OXM, PC Gamer, GamesMaster, and SFX. He is better known to many as ‘Mr Trophy’, due to his slightly unhealthy obsession with amassing intangible PlayStation silverware, and he now has over 750 Platinum pots weighing down the shelves of his virtual award cabinet. He does not care for Xbox Achievements.

The devs of a legendary indie Zelda-like have a new retro action game with "bumpslash" combat, and its Steam Next Fest demo is a gem: "Fans of Ys, take note!"
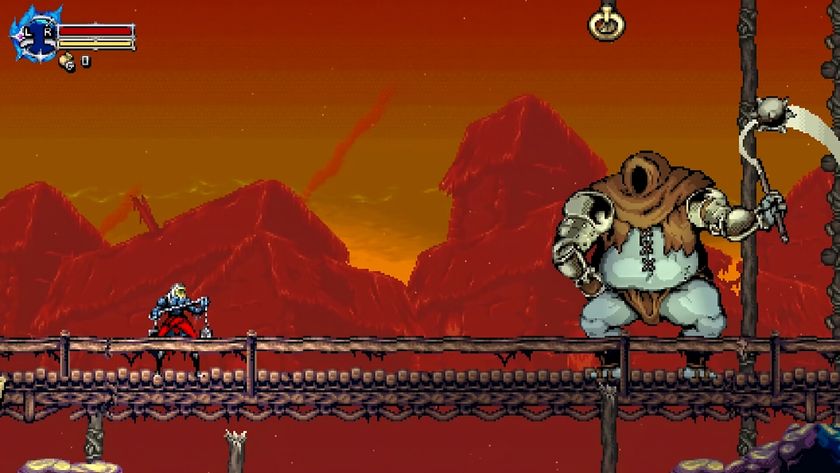
And you thought Hollow Knight: Silksong is late – 37 years in the making, this retro Metroidvania has a whip-smart Steam Next Fest demo that's as Castlevania as it gets

Razer has launched its Kuromi Collection in the US so I've turned my cozy gaming setup into a pretty purple Sanrio paradise