Halo: Reach Data Pad location guide
All Halo: Reach data pads, including the Legendary difficulty ones!

Forget skulls, Halo: Reach data pads are the hidden collectible to chase down. If you're new to the hunt on PC then finding all these Halo: Reach data pads is a lot easier with a guide like this. You'll want them all too because each data pad unlocks a different piece of Halo: Reach's mysterious side story. And some of these secret collectibles are so tricky to find, only the most hardcore Halo players will ever see them all.
So with that in mind here's how to find all the Halo: Reach data pads in the game.
- Data Pads 1-9 can be found on any difficulty. One per campaign mission.
- Data Pads 10-19 will only show up when playing on Legendary difficulty. One per mission, plus Lone Wolf.
Data pad 1: Winter Contingency (any difficulty)
You'll find some vehicles after you defeat some elites. Take a truck and head north east and cross a bridge, staying left until you reach a small group of buildings. The data pad is in a house on the right, on the floor next to some bodies.
Data pad 2: Winter Contingency (legendary difficulty)

By far, the hardest data pad to collect in Halo: Reach. As soon as the mission begins, an invisible Covenant Elite - with the data pad strapped to his back - will begin running from the circular base below you. You have to catch up and shoot him before he disappears completely. Jump out of the Falcon and immediately race downhill, through the tiered farm fields. Use the Sprint ability once or twice to close the gap before firing.
Once you feel comfortably within range, switch to your pistol and make... every... bullet... COUNT. Aim for the head, and switch back to your assault rifle instead of reloading your pistol. If you have a co-op partner, take turns shooting and reloading so that the Elite is ALWAYS losing health.
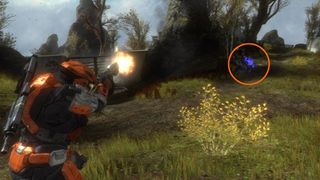
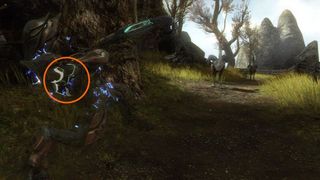
If he makes it around the corner with the ostrich-like creatures, he’s almost gone. Use one last Sprint and hope for the best. Otherwise, restart the mission - you can skip the cutscene, but yep, you’ll have to watch that Falcon land again every single time. Stay calm, and good luck!
Data pad 3: ONI: Sword Base (any difficulty)
Take the elevator up at Sword Base, kill everything and then find your way up to the forth floor where you'll find the data pad under the staircase up to the fifth floor.
Data pad 4: ONI: Sword Base (legendary difficulty)

When you first receive the Warthog, you’ll be given two possible destinations: a comm array or an artillery gun. Head for the comm array to the east - it’s a left turn if you’re facing the cliff.
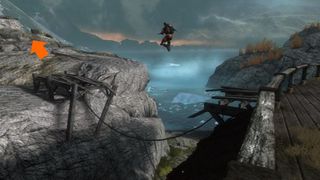
Clear the area of enemies, then climb stairs to the roof of the building pictured. You’ll find a broken bridge connecting the structure to the nearby mountain - use Sprint to jump the gap. It may take you several tries, which is why you want to kill all the Covenant beforehand. Made it? Walk forward across the rocks and you’ll see the data pad.
Data pad 5 : Nightfall (any difficulty)
When the level starts stay to the right hand side of the wall and look for a side path that will lead you to the data pad. It'll be lying on the ground on the left hand side of the path.
Data pad 6: Nightfall (legendary difficulty)

Load up Rally Point Alpha and fight - or run - through the mission until you reach the section pictured. It’s immediately after you encounter the planet’s indigenous troll creatures, and immediately before rendezvousing with some friendly troops. Skip the combat here and enter the empty riverbed with glowing green lights on either side. Look for a small rock on the right side, and jump on top. The rest of the path is fairly obvious, but also very lengthy and windy. You’ll need to climb up and down several more rocks, as well as leap over a couple gaps.



Data pad 7: Tip of the Spear, Rally Point Alpha (any difficulty)

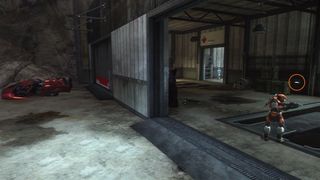
This data pad’s located in the mining facility - to skip directly there, simply load up the mission’s Rally Point Alpha. Soon after you hear the Spartans discussing the optional Elite Zealot objective, you’ll drop through this hole in a building’s roof. Continue through to the last interior room and look for the data pad on a shelf behind some boxes. If you end up back outside with the red Revenant vehicle, you’ve gone one door too far.

Data pad 8: Tip of the Spear (legendary difficulty)

Load Rally Point Alpha and work your way through the mining facility. Upon exiting the final room and procuring a Revenant (or Ghost), you’re almost to the data pad. Just drive downhill until you reach a collapsed highway ramp. See the Warthog, stuck and abandoned in the middle? The data pad is there - climb the nearby pillars and you’ve got it.
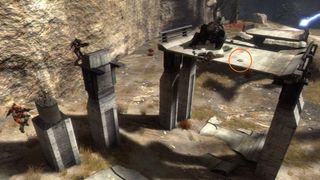
Data pad 9: Long Night of Solace (any difficulty)

Start the mission, cross the beach, enter the launch facility. When you reach the final room before the launch pad - you know, the one with the big blue hologram table in the middle? - check the glowing red area to the side, up a tiny set of stairs. The data pad is on the floor, in front of the computer console.
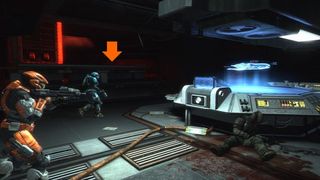
Data pad 10: Long Night of Solace (legendary difficulty)

Stop halfway up the stairs to the launching Sabre ship. Turn around. Jump to the platform with the scaffolding and light bulbs. This part’s a little tricky... you have to get your Spartan to stand on one of the metal bars halfway up the scaffolding, then leap over to the opposite support beam. It might take several attempts for your footing to hold properly. Once you reach the beam, simply run up and grab the data pad.

Data pad 11: Exodus, Rally Point Alpha (any difficulty)
Wait until the Bullfrog squad gives you a jetpack, then jump across the chasm with them. On the other side, fight through the Grunts, Jackals and Brutes and climb the stairs. Moving forward, you’ll encounter a dark corner with three Brutes (one in gold armor), two fenced columns and a small L-shaped catwalk near the ceiling. Jetpack up there for the sixth data pad.


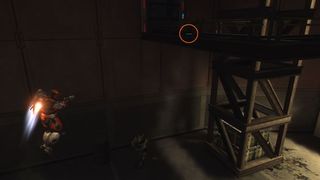
Data pad 12: Exodus (legendary difficulty)

This mission is very difficult on Legendary, so definitely load Rally Point Alpha to save some time. Grab your jetpack from the Bullfrogs, fight through the area and, when you’ve emerged back onto the great wide open, turn around and look for the vents pictured below. If you reach the impossible hallway filled with hammer-toting Brutes and Grunt-operated turrets, you’ve gone too far. Okay, now just follow the step-by-step instructions detailed here. Jetpack to a beam, then up to another beam, then up to a final beam and over to the dark ledge. Now you’re a single well-executed jetpack ride away from reaching the vents and the data pad.

Data pad 13: New Alexandria (any difficulty)

Start the mission, jump in the Falcon and rise into the air. See the yellow mission marker ahead of you? Turn away from that, to the right, until you spot a very tall sloped skyscraper in the distance, with three antenna sticking off the top. The data pad is located on the roof of the building behind that one. Land on the balcony and find the data pad right next to the door.


Data pad 14: New Alexandria (legendary difficulty)

Start the mission, and spin the camera around 180 degrees. See the skyscraper behind you, with the striped windows? Fly towards that. Start dropping altitude - the data pad is near the very bottom of the building, so close to the cloud layer that you’ll hear a danger warning.

Watch for the data pad on the window sill, near the left side of the building. You’ll need to jam the nose of your falcon right up against the windows, then abandon ship - jump out of the cockpit and do your best to land on the ledge before the vehicle drags you down with it.
Data pad 15: The Package, Rally Point Alpha (Any Difficulty)

You can’t miss the location of this data pad, though you might miss the data pad itself. When you’re working your way back through the destroyed Sword Base, you’ll access an elevator panel that triggers a cut scene. Before you hit that switch, look directly across from the panel. Yup, it’s the data pad, hidden in plain sight.
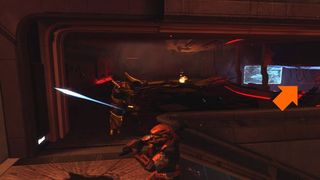
Data pad 16: The Package (legendary difficulty)

Skip the rest of the mission. Rally Point Bravo will take you exactly where you need to go - the underground cavern where you must defend Dr. Halsey’s secret lab. Instead of worrying about enemies, race to the outside of the lab and grab a jetpack, then race back in the direction you came from. Don’t go up the ramp, though... make your way through the rocks pictured below until you reach a small glass structure behind a turret. This is where you’ll embark on a very long, very precarious jetpack ride.

Use your jetpack fuel sparingly on this trip across the chasm, and you should make it to the data pad waiting on the other side.
Data pad 17: The Pillar of Autumn, Rally Point Alpha (any difficulty)

Load Rally Point Alpha and fight your way across the giant shipping yard (which should be familiar if you played the Boneyard multiplayer map). After two huge areas, you’ll enter a room full of Grunts, with a door on the back wall. Through there, down the hallway and around a corner, you’ll see a couple of glass windows with offices behind them. The data pad is in the second of these offices - melee to break the glass and jump through to grab the data pad.
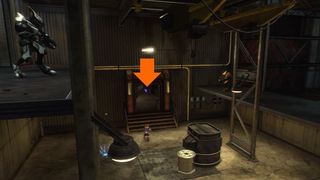
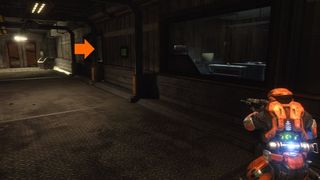
Data pad 18: The Pillar of Autumn (legendary difficulty)
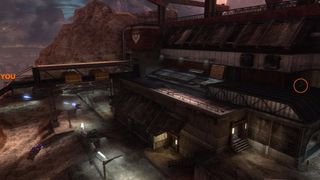
Survive through the first gigantic shipyard building and you’re almost done. As you approach the second gigantic building - preferably by moving along the connecting conveyor belt - look for the data pad on the roof, way over to the right. You can grab it without having to fight a single enemy.
Data pad 19: Lone Wolf (legendary difficulty)
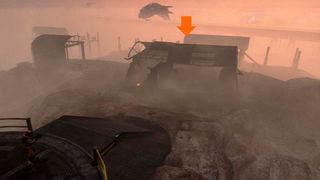
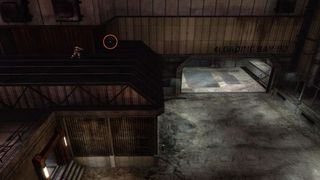
Compared to the rest of the Legendary data pads, this data pad is easy. Start the mission and run to the large pipe you see in the image. The sooner you get there, the less you’ll have to worry about Covenant killing you while you’re trying to make the next few jumps. The data pad is tucked inside the left end of the pipe. Just climb the ramp, cross the gap and hop from pillar to pillar until you can reach it.
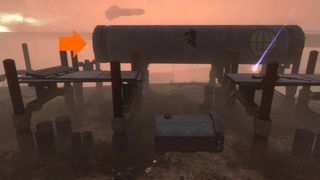

The data pad is behind a fence, but you can still access it from this side.
Sign up to the 12DOVE Newsletter
Weekly digests, tales from the communities you love, and more


