Every Halo Infinite Skull location in the campaign
Here are all the locations for the 12 Skulls in the Halo Infinite campaign
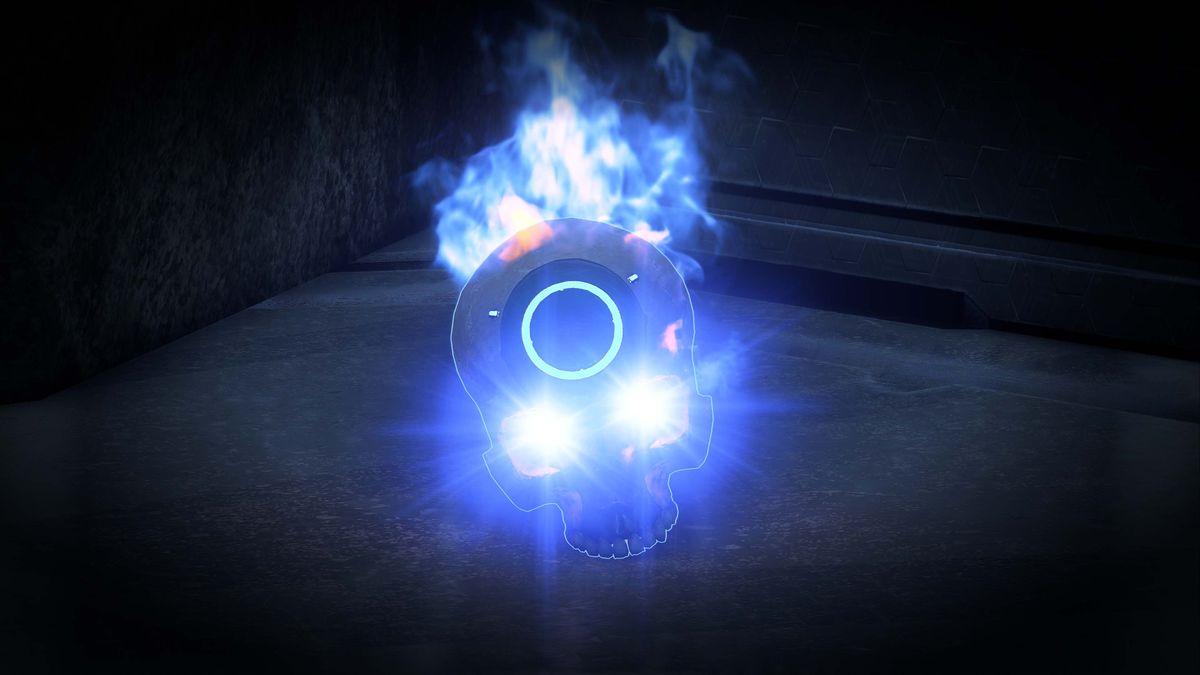
Halo Infinite Skulls are extremely difficult to find since they’re usually hard to reach, incredibly well-hidden, or a combination of the two. Skulls are a classic collectible found in the campaign modes of most Halo games, and Halo Infinite is not exception. Finding and picking up each one will unlock a particular modifier that can applied in the campaign menu to make things more fun and/or challenging. Skull modifiers range from making rare dialogue lines more common or increasing the size of all explosions, to fully removing the HUD or halving the amount of ammo found in weapons, so quite the extremes. Here’s how to get every Skull in the Halo Infinite campaign and what each one does.
Halo Infinite tips | Halo Infinite length | Halo Infinite story | Halo Infinite ending explained | Halo Infinite Targets | Halo Infinite Spartan Cores | Halo Infinite Mjolnir Armories | Halo Infinite Warship Gbraakon collectibles | Halo Infinite Foundation collectibles | Halo Infinite Conservatory collectibles | Halo Infinite Nexus collectibles | Halo Infinite Repository collectibles
How to use Halo Infinite Skulls

To be able to unlock and use the modifiers that each Skull unlocks, you must first find each of the Skulls in the Halo Infinite campaign and pick them up. When you’re back in the Halo Infinite main menu, you can select the Campaign mode and then choose ‘Load Game’. Choose your save file and you’ll be presented with a screen that shows your total progress, including your current time played, as well as difficulty and Skull options. Select the Skulls option and choose any Skulls that you have unlocked that you want to apply for your current campaign.
Halo Infinite Skulls locations
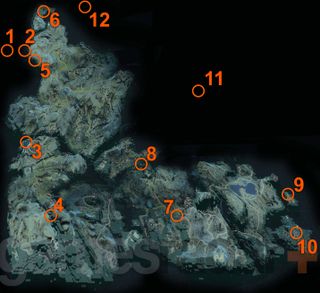
Of the 12 Halo Infinite Skulls, you can find seven in the open world and five in linear, closed-off missions. With no way to replay Halo Infinite campaign missions yet either, you must make sure you don’t miss the Skulls in the closed missions. However, you can come back to the open-world Skulls at the end of the campaign. Skulls also make an echoey, groaning sound when you’re nearby so listen out for that too.
We’ve got details on how to find every Skull below, but you can use the above Halo Infinite map to see roughly where the 12 Skulls are on Zeta Halo. We’ve ordered the Skulls in a way that you can get them reasonably easily as you play through the campaign, assuming you spend some time exploring between missions. Note that Skulls 1, 2, 10, 11, and 12 are all found in missions and their markers on the above map correspond to the mission waypoints found on the in-game TacMap.
Most of the Skulls are generally not easy to reach, and for most of them you’ll need the Grappleshot with the Quickshot upgrade to give it a rapid cooldown. A Wasp or Banshee will be very useful for flying around the map and getting to some hard-to-reach Skulls without the need for the Grappleshot, if you can find one. Banshees can be found and hijacked on the southern Ring fragment which is unlocked after the ‘Pelican Down’ mission, but you won’t get a Wasp until the later stages of the game as a Valor reward for Halo Infinite FOBs.
Halo Infinite Boom Skull in Warship Gbraakon
Boom Skull: Doubles the radius of all explosions
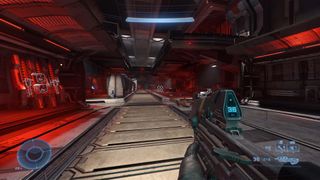
You can get the Boom Skull in Halo Infinite’s first campaign mission. Since you can’t travel back to the warship later, you must make sure you don’t miss this Skull. After fighting your way through a several rooms of Banished foes, you’ll reach one with some large containers on the left, three container lifts on the right wall, and some upper walkways.
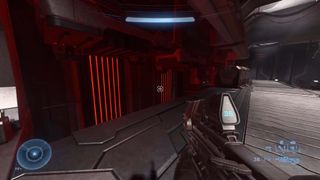
To get the Skull in this room, you need to head up onto the walkway and stand in front of the middle container lift. Jump onto one of the containers before it gets lifted so that you can ride it up.
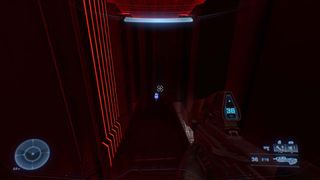
As it rises, turn to the right and walk onto the adjacent container, which is not moving, to easily find the fiery, blue eyes of the Boom Skull.
Halo Infinite Cowbell Skull in Foundation
Cowbell: Increases the acceleration objects gain from explosions
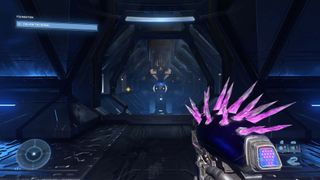
To get the Cowbell Skull in the Foundation mission, which is another missable Skull, you need to have picked up the Weapon and taken the lift to the room full of holographic children (don’t ask). You’ll then have to walk down a corridor with a window in it and turn left to get inside a large, open room with a walkway on the left.
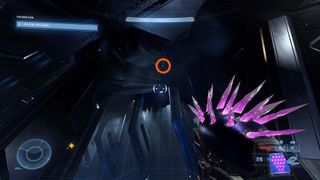
The Skull is hidden up in the Forerunner ceiling rafters of this room. You can use Master Chief’s Scan ability to temporarily reveal the Skull so that you know exactly where to go. To reach it, you must use the Grappleshot. First grapple yourself into one of the gaps in the nearby support structures that are on the walkway you should be standing on.
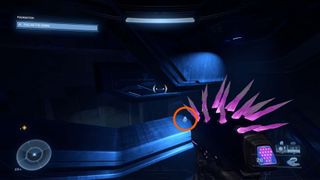
Now you need to jump, grapple, and swing up to the structure that the Skull is sitting on.
Halo Infinite IWHBYD Skull in The Tower
IWHBYD: Makes rare dialogue more common
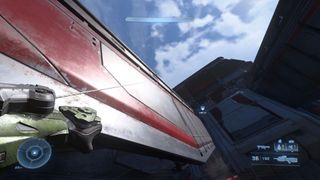
Here’s how to get the IWHBYD Skull – or I Would Have Been Your Daddy to give it its full name – in the Tower, which is the first of seven Skulls found in the open world. While The Tower is part of the Recovery mission, it is a free-roam location that you can fully explore at any time, so look out for these Halo Infinite Tower collectibles too. To reach the Skull, you need to climb up the Tower.
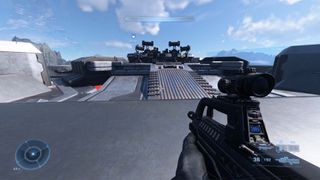
Pick one of the Tower’s legs and start climbing it with the Grappleshot. Master Chief can actually sprint up the legs since they aren’t steep enough. When you reach the end of the leg where the Tower becomes vertical, you’ll need to grapple and swing yourself vertically to get even higher and then repeat this until you’re able to pull yourself over the lip of the Tower.
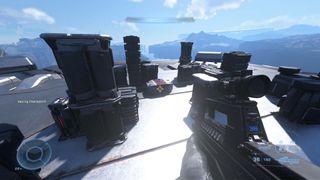
At the very top you’ll also find the Halo Infinite Craig Easter egg, so check that out too. Behind the music and concert equipment, you’ll be able to find the IWHBYD Skull.
Halo Infinite Blind Skull in southwest chasm
Blind: HUD elements and your current weapon are invisible
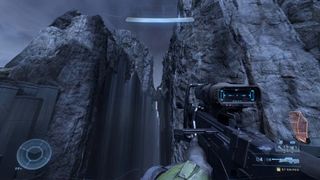
The Blind Skull can be obtained by traveling on foot, but it is much easier to find by flying directly to the correct spot. To reach it, you need to head to the southwest corner of the map towards the Starlight Squad of UNSC Marines in need of rescue. As you go further south, you’ll eventually reach a large chasm between two cliffs. If you’re facing south, you need to climb up the cliff on the right side.
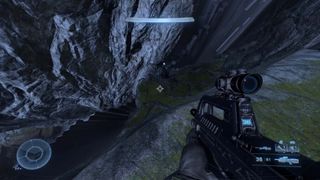
Once you get to the top, you need to look over the edge for a large chunk of rock wedged between the two cliffs. The Skull is tucked in a little nook within the cliff you’re currently standing on and this nook is directly under the wedged rock chunk.
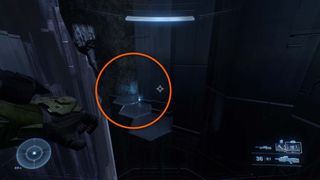
Jump off the cliff and land directly on the rock chunk, then turn to face south – the little arrow on the motion tracker acts as a compass, so use that to guide you. The cliff where the Skull is should still be on your right.
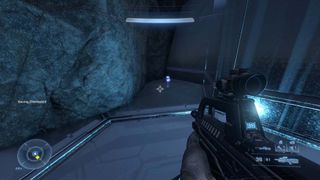
To reach the Skull, you now need to jump backwards off the rock chunk and look for a small nook within a cluster of hexagonal pillars that should have a light-blue glow to it. You need to grapple the nearby cliff and swing into the nook to grab the Blind Skull. This can be quite difficult, so you might need a few attempts to do this. With a Wasp or Banshee, you can just fly directly to the cliff nook, although there are some invisible walls that may hinder you a little.
Halo Infinite Fog Skull near FOB Alpha
Fog: Disables the motion tracker
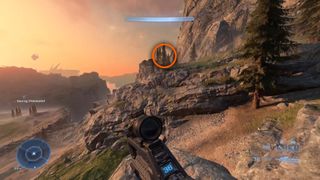
To get the Fog Skull, you should first travel to FOB Alpha for easy access. From there, head west towards the edge of the Ring fragment. Keep the large hill on your right and do not climb up it.
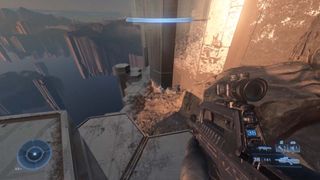
When you eventually reach the edge, you need to jump down onto a lower section of hexagonal pillars and follow them roughly northwest. You’ll notice that there are many more hexagonal pillars above you and the Skull is in a little cave within them.
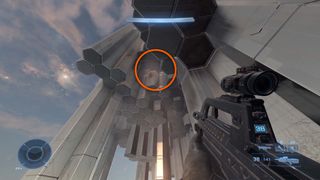
As you walk along the hexagons, look up to spot a gap between a cluster of short hexagonal pillars and the ceiling. You need to grapple up to this gap, which can be done quite easily by grappling the pillars on the right and swinging yourself up to the cave.
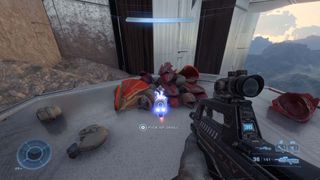
The Fog Skull will be on a slightly raised part of the floor with lots of Banished armor lying around.
Halo Infinite Catch Skull on north island
Catch: Enemies throw and drop more grenades
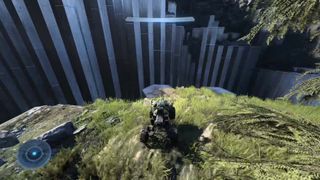
For the Catch Skull, you need to reach the small island in the northwest corner of the map. There aren’t any bridges or connecting points, so you can either fly to the island with a Banshee or Wasp, or get creative. We managed to reach it by driving a Mongoose off a cliff to cross the gap and then grappled onto the island.
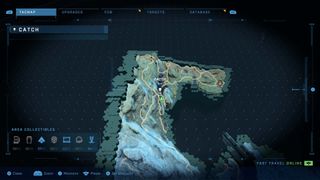
Now you need to head north to a dark forest area which is just southwest of a road circle on the TacMap. There are usually two Hunters and a few other Banished enemies in this area so be careful.
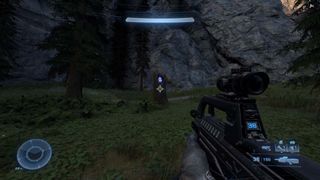
Search the western portion of this forest area to find a tree stump with the Catch Skull nestled inside. Its blue glow and sound effect should make it obvious.
Halo Infinite Black Eye Skull in waterfall
Black Eye: Shields recharge only when hitting enemies with a melee attack
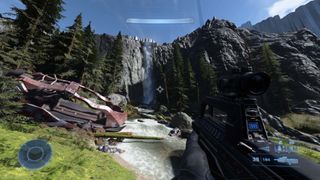
You can get the Black Eye Skull once you’ve unlocked the south and southeast islands of Zeta Halo after completing the Pelican Down mission. Head to a tall waterfall roughly southeast of FOB Juliet and west of the Riven Gate Outpost.
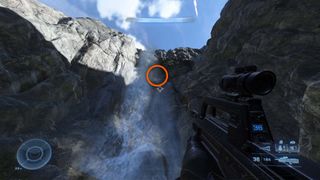
Once you’re at the waterfall, look for a small opening in the rock slightly to the right in the waterfall. The water pouring over the ledge is slightly lighter so that should give it away. You then need to grapple or fly up to this opening too.
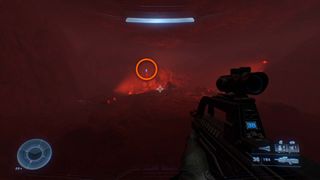
After crouch-walking your way through, you’ll emerge into a cave lit by red lights. The Skull will be on top of broken tree trunk at the back of the cave.
Halo Infinite Thunderstorm Skull near anti-air guns
Thunderstorm: All enemies are a rank higher than normal
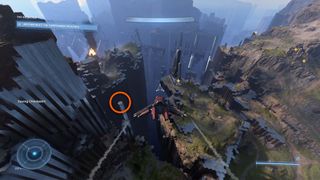
The Thunderstorm Skull is most easily reached with a flying vehicle, but there are plenty of Forerunner hexagonal pillars that you can grapple to reach this Skull. From FOB Juliet, travel north towards the small, central island where the Banished anti-air cannons are that shot down the Pilot’s Pelican. When you get close to the edge of the Ring fragment, you should notice a single tall hexagonal pillar near one pf the Forerunner beacon structures. The Thunderstorm Skull is on top of this pillar.
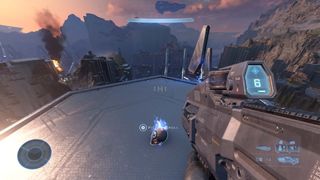
If you’re in an air vehicle you can land on the slightly lower pillars and grapple your way on top of the top to reach the Skull.
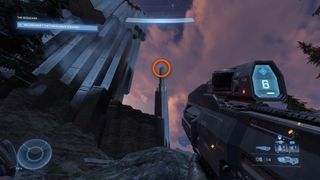
If you can’t find a Banshee to hijack and don’t have access to the Wasp, you can still reach this Skull. There is a bit of land and some pillars slightly to the west that you can use to get to the main pillar. You can also grapple and swing up to reach the Skull from there.
Halo Infinite Famine Skull on southeast island
Famine: Dropped weapons have half the usual ammo
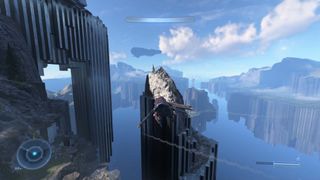
The Famine Skull seems to be the only Skull that must be reached with an aerial vehicle. Before you set off to get it, hijack a Banshee or requisition a Wasp from the nearby FOB November. Then fly to the east to the very small island just off the main Ring fragment.
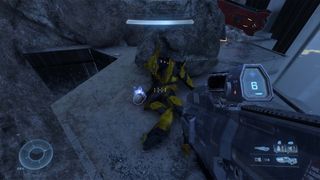
You need to look for a dead Elite General – a high-ranking Elite wearing gold armor – on top of a cluster of hexagonal pillars on the east side of this island. The Skull is right next to the dead Elite.
Halo Infinite Mythic Skull in Command Spire
Mythic: Enemies have more health
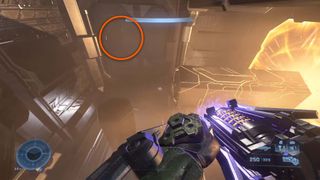
During the Command Spire mission, you’ll reach a point where some Forerunner hexagonal blocks are floating through orange gates and getting etched with lines. They’ll eventually turn to the right and go through another set of orange gates. To reach the Skull, you need to get into the ceiling area directly above the point where the pillars rotate.
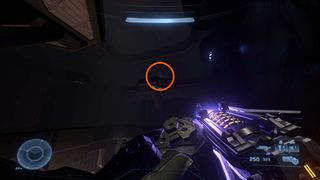
You must grapple on top of one of these pillars and then grapple into the large opening in the ceiling. Now look above you to spot a ledge with a door and grapple up to it.
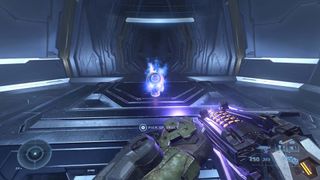
Go through the door, down a corridor, and through another door to reach a room that contains the Mythic Skull.
Halo Infinite Grunt Birthday Party Skull in Repository
Grunt Birthday Party: Killing a Grunt with a headshot causes it to explode with confetti
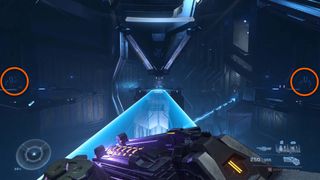
During the Repository mission, you’ll reach a large room with a hardlight bridge that leads to a console in the center of the room that is surrounded by several doors that do not have bridges leading to them.
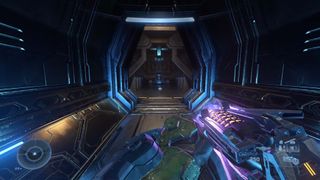
Activate the console, turn right, and grapple across the gap to reach the previously inactive door which should now be glowing blue to show that it’s active. Head through into a room that contains a Power Seed and carry it with you back into the main room.
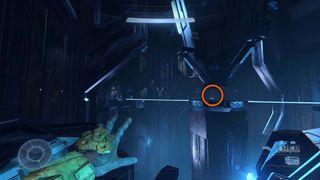
You now need to carry and throw the power seed to the door directly opposite, which was also previously inactive. You can do this by throwing the seed to the entrance door platform, carrying it across the bridge and then throwing it to the correct door. Remember, you can grapple Power Seeds so you might be able to rescue one that’s falling. If it does fall, it will respawn back where it started.
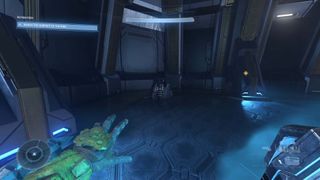
Once you’ve got the Power Seed to the opposite door, carry it through into the next room and deposit it into the receiver in the back-right corner. Now continue playing through the level normally.
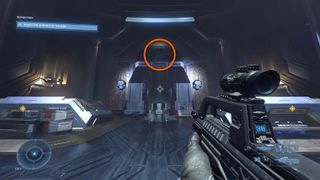
Eventually, you’ll reach a large, symmetrical room with some yellow lights on the far left and right corners, and a wide window high up on the back wall. You need to grapple up to this wall and head through the window.
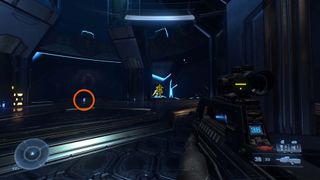
You’ll find the Grunt Birthday Party Skull in the middle of the room, although it is guarded by four stealth Elites, so look out of them.
Halo Infinite Bandana Skull in Silent Auditorium
Bandana: Infinite ammo and grenades, and no equipment item cooldowns
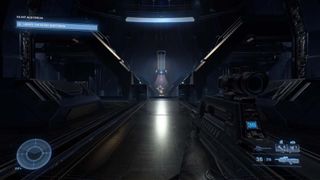
Getting the Bandana Skull in Halo Infinite’s final mission is quite straightforward. Play through the mission until you reach a very large room with lots of struts and support structures inside. Forerunner Sentinels will appear here for the first time in this mission when you reach this room. Do not kill any of them as this will prevent a door further into the mission from opening.
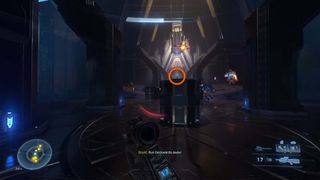
The exit door at the far end of this room is always unlocked, so trying to run past all the Banished and Forerunner enemies is advisable to avoid accidentally destroying a Sentinel. If you do choose to fight, use precision weapons only, do not throw grenades, and avoid exploding coils.
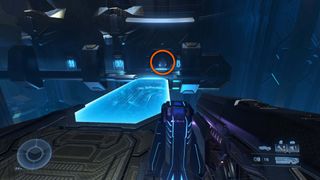
Continue with the mission, having not killed any Sentinels, and you’ll eventually reach a point where you need to activate a console to create a hardlight bridge that joins onto a long walkway. You’ll notice that a second hardlight bridge that leads to a door activates directly opposite.
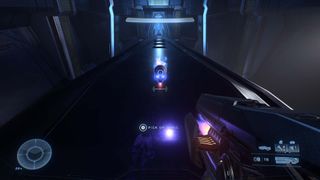
If you did not kill any Sentinels earlier in the mission, this door will be unlocked, and you’ll be able to get the Bandana Skull inside the room. The Skull is on top of a structure towards the back of the room.
Sign up to the 12DOVE Newsletter
Weekly digests, tales from the communities you love, and more

Will Sawyer is a guides writer at 12DOVE who works with the rest of the guides team to give readers great information and advice on the best items, how to complete a particular challenge, or where to go in some of the biggest video games. Will joined the GameRadar+ team in August 2021 and has written about service titles, including Fortnite, Destiny 2, and Warzone, as well as some of the biggest releases like Halo Infinite, Elden Ring, and God of War Ragnarok.
