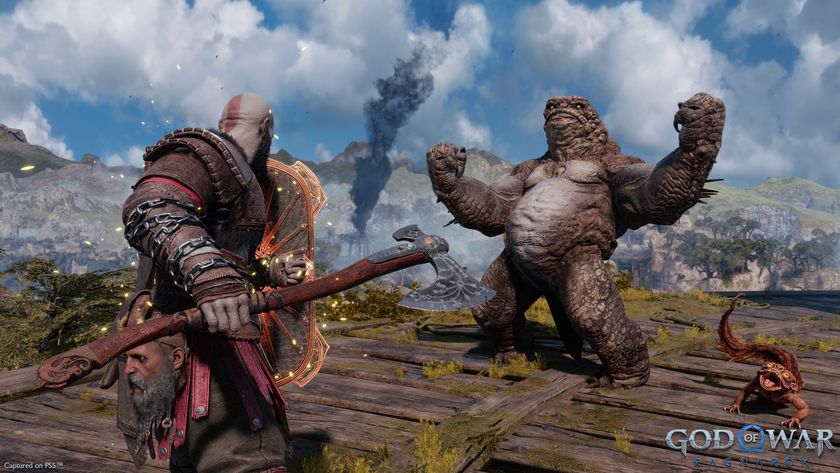
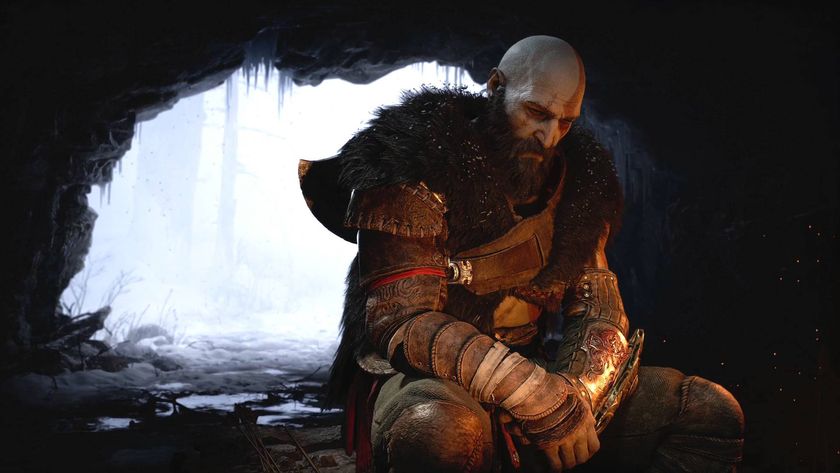
All God of War Ragnarok Ravens locations
There are 48 of Odin's Ravens across the Realms in God of War Ragnarok
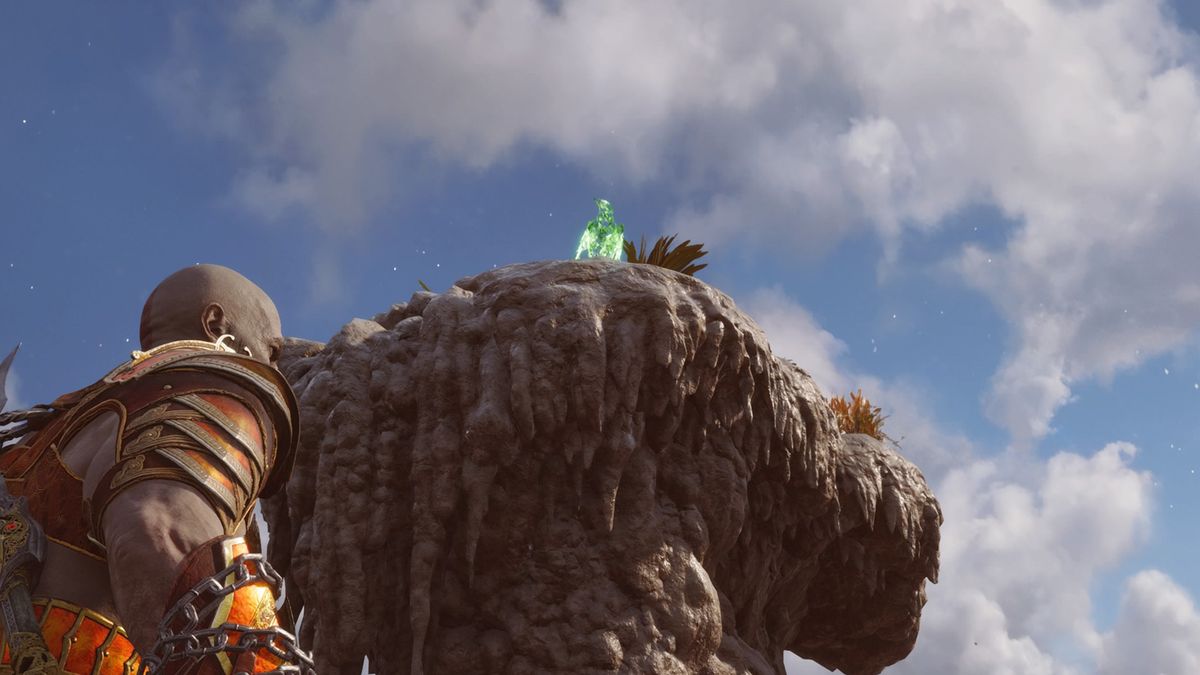
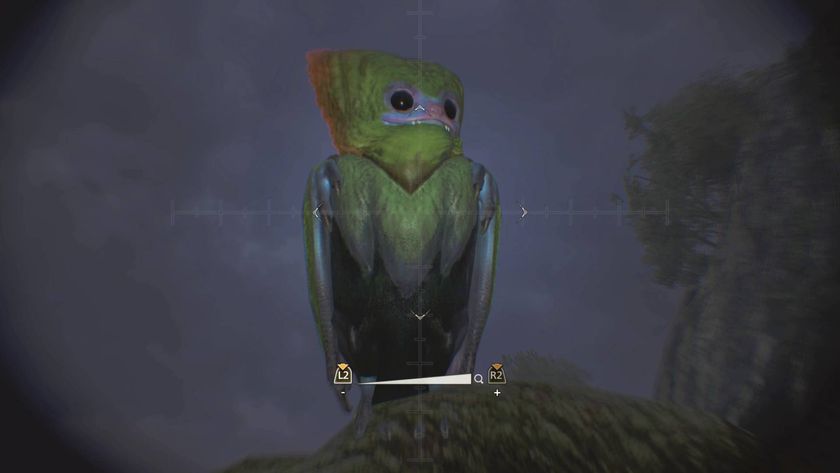
The God of War Ragnarok Ravens are Odin's spies, with locations around the realms that are difficult to find at the best of times. But if you want to find all of Odin's Ravens, there's 48 of the morbid corvids out there that you need to pop with a well-thrown weapon. It's worth it - with chests in Niflheim that players can open to get unique armor if they can do it. This "Eyes of Odin" quest is one that players might spend hours working through, but our guide has every one of the Raven's locations in God of War Ragnarok here.
Where to find all God of War Ragnarok Ravens
I've completed the game, found all the Ravens and listed them here roughly in the order you find them as you play through the story. You'll need to search far and wide in six of the Nine Realms – Midgard, Svartalfheim, Alfheim, Vanaheim, Muspelheim, and Helheim - to get all 48 of these green birds.
God of War Ragnarok Midgard Ravens
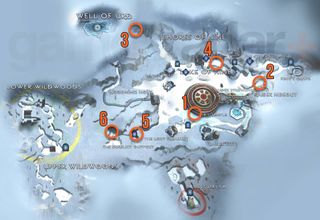
There's a total of six God of War Ragnarok Ravens in Midgard, largely around the main Lake of Nine area, rather than the Woods or around Freya's house to the South. None of these Ravens are difficult to reach once you know their locations.
1. Lake of Nine Raven 1
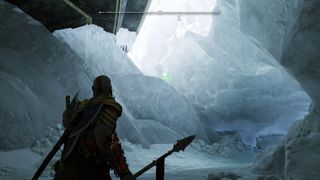
On the South side of Tyr's Temple is an icy alcove you can ride the dog sled into. The Raven is up on a perch at the East side, though it'll sometimes fly around a little. Just south of here you can also start of the quest with the God of War Ragnarok Mystical Heirloom and Troll locations.
2. Lake of Nine Raven 2
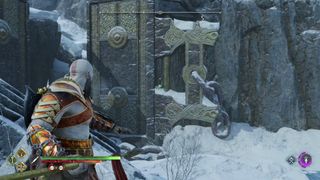
On the East side of the Lake there are two paths - a higher one to the North and a lower one to the South, leading to some giant metal doors. The Raven here is on the wall next to those doors, you can hit it by climbing up the higher Northern slope to get the angle.
3. The Well of Urd Raven
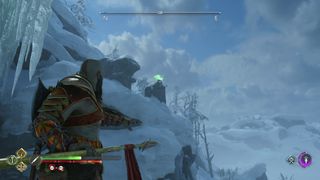
Reach the Well in the Northwest lake, and climb up to the top of the cliffs. Turn back round and you'll see a raven sitting on the ice.
4. The Oarsmen Raven
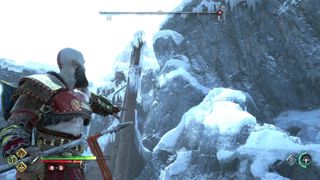
This raven is in the Oarsmen area to the North, but it's accessible from the Shores of Nine area if you have a good aim. Approach from the Lake, vault the icy barrier, and the bird is on the cliffside ahead, to the North. Aim slightly upwards to compensate for the distance.
5. The Derelict Outpost Raven 1
Our God of War Ragnarok tips and tricks will ensure you're ready to rage at a moment's notice!
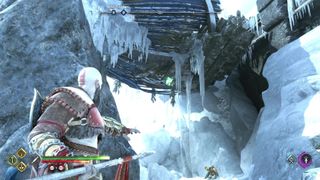
The Derelict Outpost is Southwest of the Lake of Nine, connected to a Favor regarding Sigrun the Valkyrie. The first of two God of War Ragnarok Ravens is just outside the area - before climbing the chain to the smith/shop at the entrance, look back at the path leading here where the damaged boat forms a makeshift ceiling on one side. The Raven is inside the boat, looking down at a corpse.
6. The Derelict Outpost Raven 2
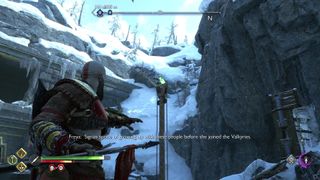
The second Raven in the Derelict Outpost - and the final one in Midgard - is inside the Derelict Outpost itself. Once you enter the first big area, it's on your right, balanced on a wooden post that supports one of the moving cranes.
God of War Ragnarok Svartalfheim Ravens
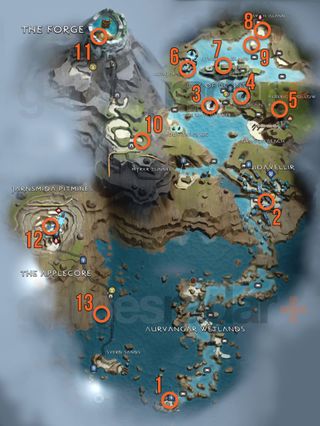
There are 13 God of War Ragnarok Ravens to find in Svartalfheim. It’s a big are with a lot of ravens that won’t be accessible until later in the game so be prepared to come back.
1. Auvangar Wetlands Raven
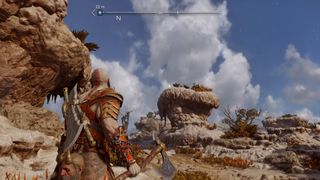
From the Auvangar Wetlands Mystic Gateway, go forwards and you’ll spot the Raven perched on a rock formation to the left. This is just before the God of War Ragnarok waterwheel block puzzle you'll need to solve before you can move on.
2. Nidavellir Raven
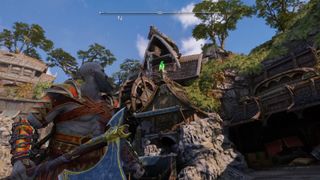
Go to the Huldra Brothers’ shop in Nidavellir and when you’re at the shop, look up and left and you’ll spot the raven perched on the roof of a nearby building.
3. The Watchtower Raven
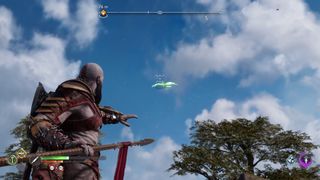
When you reach the Watchtower in the middle of the Bay of Bounty, look out to the water on the southwest side. You’ll spot the Raven flying in a loop over the water, up to the Watchtower, then back down to the water. The best opportunity to hit it is when it’s almost directly overhead on the Watchtower.
4. Radsvinn’s Rig Raven
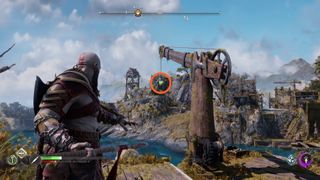
At Radsvinn’s Rig, there is a crane with a large hook at the end of its cable. The Ragnarok Raven is sitting on the hook, ready to receive an axe to the beak.
5. Alberich Hollow Raven
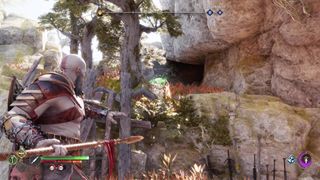
Walk through Alberich Hollow until you reach a section open to sunlight - the path ahead may also be blocked by gold metal that needs to be blown up if you’ve not been here before. The God of War Ragnarok Raven in this area is to the left of the path, sitting next to a tree on some rocks.
6. Althjof’s Rig Raven
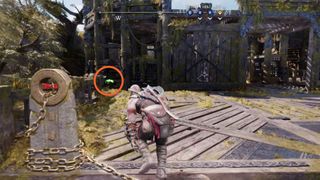
Sail over to the Althjof’s Rig dock and climb up the chain. As you clamber up the ledge, you can spot the Raven in a gap between some broken wooden planks on the left.
7. Lyngbakr Island Raven
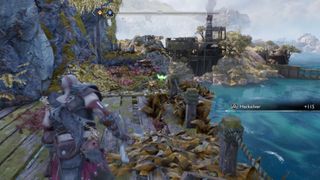
On Lyngbakr Island, there is a path that leads to a chest, blocked off by some gold material that can be destroyed with explosives. Grab a nearby charge and use it to clear the way. Now you can swing over to the chest, where you’ll find a small tunnel you can crawl through. As soon as you come out the other side onto the wooden platform, look left and you’ll see the Raven.
8. Alberich Island 1 Raven
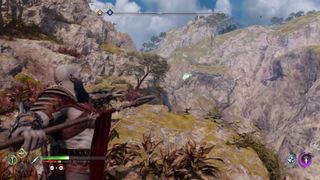
You'll need to have unlocked the Draupnir Spear for this raven. Dock your boat and climb up the rock wall to the right using the wind slot for the Spear. This will allow you to reach the upper area where the Raven can be found after you destroy the sonic stone blocking another path. With the way cleared, head down the short path and you’ll find the Raven circling over the water to the east.
9. Alberich Island 2 Raven
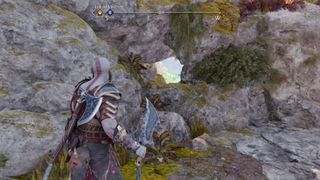
From the previous Alberich Island Raven, you can use the nearby contraptions to swing across to the wooden structure in the water and then swing onto Alberich Island itself. Once you’re on the island, head up the path to the gear that lowers the gate. You’ll spot a small hole in the rock wall on the left and the Raven is perched at the end of this hole.
10. The Forge 1 Raven
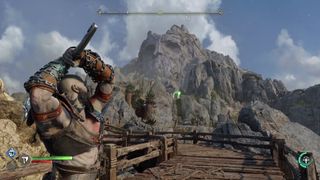
As soon as you reach The Forge by riding the mining wagon follow the wooden walkway and you’ll easily spot the God of war Ragnarok Raven circling overhead.
11. The Forge 2 Raven
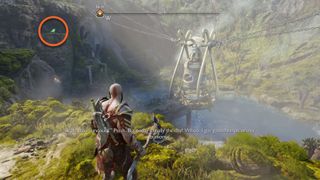
As part of the Forging Destiny quest you’ll return to The Forge and need to head up to a new area. You’ll walk through a cave tunnel and eventually reach a small lake area with a lift in the middle. As you walk along the path to head down to the lake, you’ll spot the Raven on the cliff wall.
12. Jarnsmida Pitmines Raven
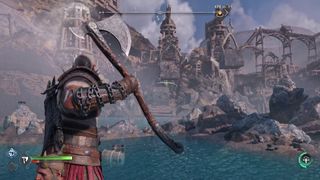
The Raven in the Jarnsmida Pitmines is circling above the water at the center of the area. From the north side of the mines, you can jump down at a few points to reach a chain that lets you descend to a small area right by the water. From here, you can easily kill the Raven.
13. The Applecore Raven
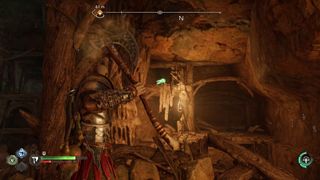
While working through the Applecore you’ll reach a puzzle where you freeze water channels with the axe and get Atreus to shoot soundstone chunks to get across the area on a moving platform. Once you step off the platform, look to your left and you’ll spot the Raven perched on a rafter.
God of War Ragnarok Alfheim Ravens
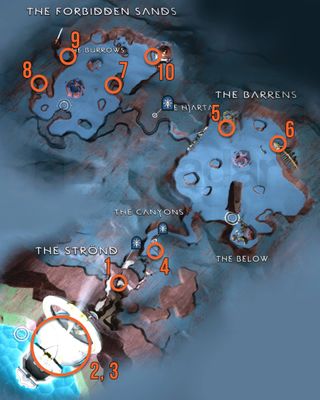
Alfheim has 10 Ravens to find and you’ll need to complete some of the Favors in here to unlock access to new areas. Here’s where to look:
1. The Strond Raven
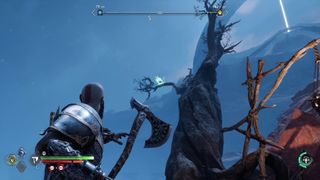
This Ragnarok Raven is easy to spot as you progress through the Strond towards the Temple of Light. Assuming you’re doing the “Groa’s Secret” quest, you’ll reach a quiet point where Tyr will mention Freyr and you’ll need to walk across a rock bridge and jump a small gap. There’s a large, withered tree to the left of the bridge, and you’ll easily notice the Raven sitting on one of the branches.
2. Temple of Light Raven 1
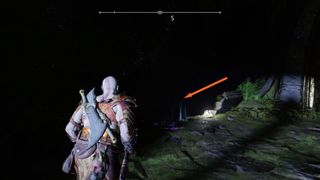
Early on in the Temple of Light in Alfheim, you’ll go through a doorway and up a stone spiral staircase. There’s a point about halfway up where you can drop down a quite well-hidden ledge and onto a new path. Walk along this path and you’ll find the Raven behind a gate.
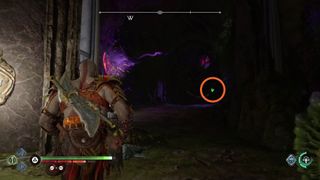
Stand back from the gate so that you can see the purple Twilight Stone fragment attached to the pillar on the left. Throw the Leviathan Axe at the right angle so that it bounces off the Twilight Stone, and another piece of Twilight Stone above the Raven to hit it.
3. Temple of Light Raven 2
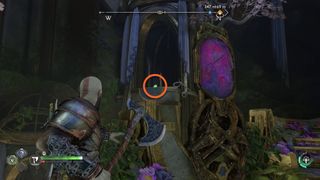
In the temple you’ll eventually reach a room where you’ll fight some Elves, with a pillar of light shooting through the middle and Twilight Stone panels on the edge and the middle. Look out to the northwest and you should spot a Raven sitting on a column.
4. The Canyon Raven
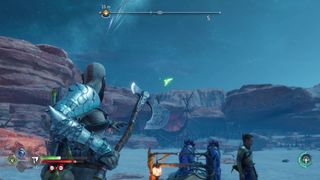
Head to the Huldra Brothers’ shop in the Canyon. There’s a fenced off area next to the shop and a Raven is flying over it.
5. The Barrens Raven 1
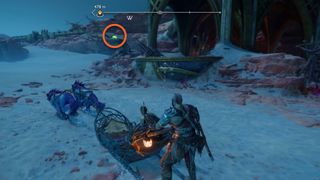
Head to the temple building on the northern edge of the Barrens. There’s an old tree very close to the building and a Raven is perched on the trunk, waiting to be hit.
6. The Barrens Raven 2
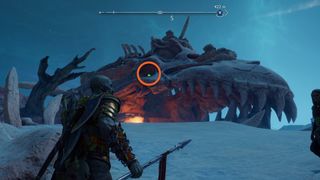
In the northeastern corner of the Barrens is a massive dragon-like beast’s skull on top of a sand dune, and you’ll find the second Barrens Raven here. Stand on the north side of the skull and look south. The Raven is hard to miss in the skull’s eyehole.
7. The Forbidden Sands Raven 1
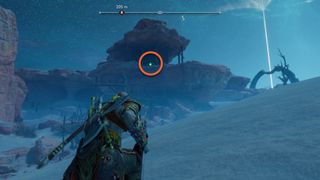
As you come out of the Hjarta cave tunnel and arrive in the Forbidden Sands area of Alfheim, you’ll notice that there’s a large rock formation sticking out to the right - it shows up clearly on the map and isn’t hard to miss. Walk around the north side of the rock formation and the first of the Forbidden Sands Ravens will be there.
8. The Forbidden Sands Raven 2
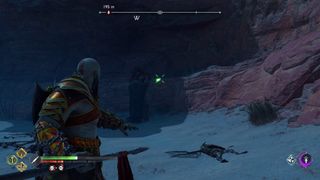
Head to the southwestern section of the Forbidden Sands and look for a small, raised area tucked away in the cliff, directly west of the large rock hole that the Hafgufa jellyfish creature comes out of if you’ve completed the Song of the Sands Favor. Head into the nook and then grapple up the wall on the right to reach a raised area. Look to the northwest corner and the Raven will be on the cliff wall.
9. The Forbidden Sands Raven 3
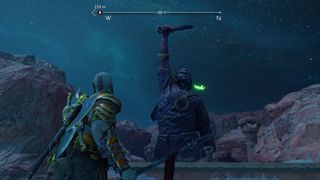
From the previous Raven, you can head north along the west rock wall to eventually reach the entrance to a monument to Freyr, and you should quickly spot the Raven gliding around the area in a figure of eight.
10. The Forbidden Sands Raven 4
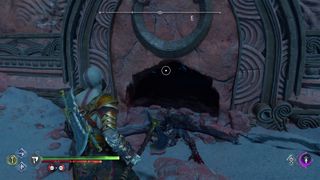
Head to the Elven Sanctum, a large building in the northeast corner of the Forbidden Sands area. Stand at the base of the building where there will be a stone door with a pile of rocks in front of it. Use your weapons to smash the rock pile to reveal a hole that you can crawl through.
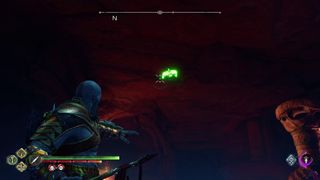
Go through the hole and down the cave path. You’ll find the Raven circling on the left side. Time your weapon throw well to hit the final Forbidden Sands Raven and the final Alfheim Raven!
God of War Ragnarok Vanaheim Ravens
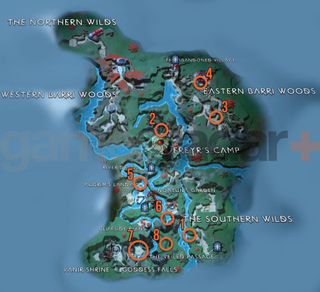
Vanaheim has 15 Ravens in total, the most of any realm. You’ll find eight in the jungles and swamps initially, with the other seven in a hidden area you won't unlock until later. We've separated this out into two maps to make it easier and avoid spoilers. Vanaheim also has a day/night mechanic that opens and closes certain routes and while the Ravens can be found at any time, looking for them at night should be better as it’s easier to get around. These are the Vanaheim Raven locations for the main jungle area:
1. The Southern Wilds Raven
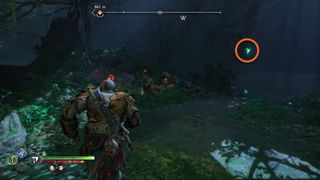
Looking at the Southern Wilds map, you’ll notice that a small path very close to the Mystic Gateway that leads west and goes to the river bank. Head down this path to the river and you’ll find the God of War Ragnarok Raven swooping over the water.
2. Freyr’s Camp Raven
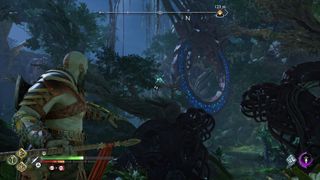
There's one Raven in Freyr’s Camp. Take the winding north path that leads to the Eastern Barri Woods and as you emerge from the cave into the jungle, look to the north to see a big stone ring hanging from the trees. The Raven is perched on a tree branch just in front of the ring.
3. Eastern Barri Woods Raven
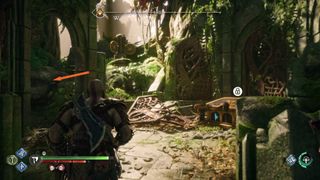
In the Vanaheim woods, you can find the God of War Ragnarok Raven here by going off the main path and taking a left up some stone steps that lead to a ruined structure with a Nornir Chest inside.
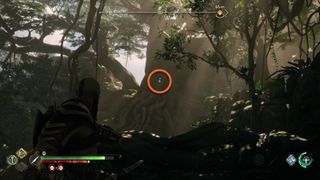
Opposite the chest above is a short path that leads to a slightly elevated position that you can see the Raven from - watch out for the Wulver though. Look west and you’ll spot it sitting on the roots of a huge tree.
4. The Abandoned Village Raven
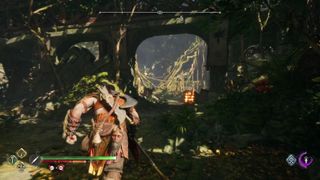
When you’ve reached the Abandoned Village from the Eastern Barri Woods, head inside the large, ruined building to the east. Once inside, go to the south of the building, through the archway and down a small path that leads to a stone gazebo.
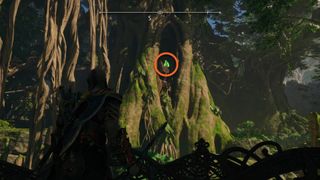
You can then walk up to an elevated section and the Raven is visible between two massive tree roots.
5. River Delta Raven 1
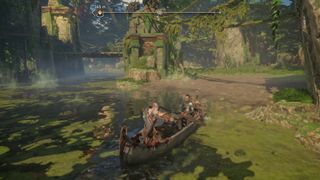
In the River Delta area of Vanaheim look for a small patch of land you can beach your boat on called Pilgrim’s Landing - it's on the western edge of the Vanaheim map. Once there, climb up the temple structure and cross all the bridges until you reach the end where there's a gold Legendary Chest.
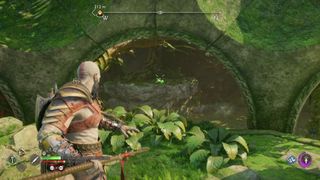
There's an archway to the left of the chest and you’ll be able to see one of the River Delta Ravens hopping about on a rock on the opposite river bank.
6. River Delta Raven 2
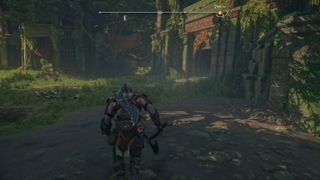
To get the other Raven in the River Delta, you need to head to Noatun’s Garden, east of Pilgrim’s Landing. Beach your boat on the bank of the garden and run to the easternmost building – if you’ve not been to this garden before, the main gate to this building will be closed and you’ll need to climb in through the roof.
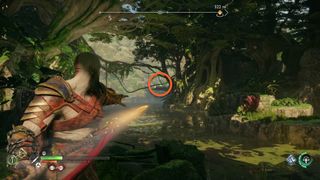
Inside this building, you’ll notice collapsed walls behind the loot chest. This allows you to see a raven perched far away on a branch that hangs over the river. You’ll have to aim above the raven quite a bit to compensate for the distance.
7. Goddess Falls Raven
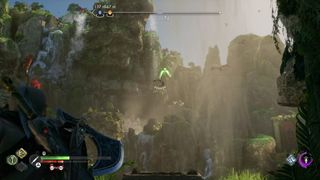
Once you’ve lowered the magic rock gate blocking the river at the Cliffside Ruins, you can row down the stream to reach Goddess Falls. There is one Raven in this area and it’s just circling around. Climb up the cliffs to get a better angle for hitting it as it flies by.
8. The Veiled Passage Raven
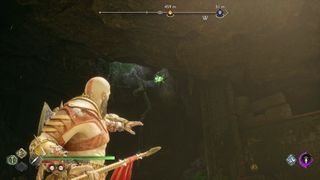
From Goddess Falls you can reach the Veiled Passage to get the next Raven. As you row through the area, you’ll spot a Nornir Chest on the right and just beyond that, you can see the Raven sitting on a tree branch hanging from the cave ceiling. To hit it, head to the next area where you can beach your boat ahead of the Raven, then turn around and lob your axe at the bird on the branch.
God of War Ragnarok Vanaheim Crater Ravens
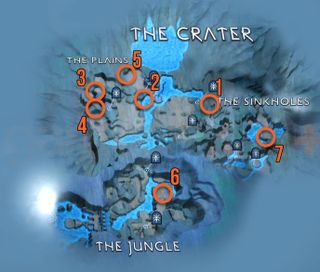
The Vanaheim Crater contains seven of the 15 Ravens in this realm overall but you can only unlock the Crater by completing a Favor called ‘Scent of Survival’, which appears towards the end of the main story. We recommend that you head to the area in the south of the Crater and open the dam as soon as possible (you'll get hints and chatter from companions if you're heading the right way). This will flood the area, allowing you to get around by boat and is necessary to access certain areas.
Here are the God of War Ragnarok Ravens for the Crater in Vanaheim:
1. The Plains Raven 1
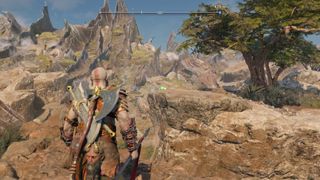
For this Raven, head to the shop towards the northeastern corner of the Plains. If you’re standing directly next to the shop, turn to face east and you’ll notice the Raven pecking around at the water’s edge (or cliff edge if you haven’t opened the dam).
2. The Plains Raven 2
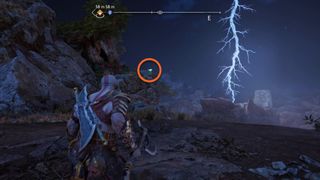
Go to the western section of the Plains and then run over to the northeastern corner of the main open area. You should be able to see the frozen lightning bolt ahead of you and a Raven sitting nearby on the cliff wall to your left.
3. The Plains Raven 3
From the previous Ragnarok Raven, head west and mantle over a collapsed pillar and then jump down into a wide open area which has a gate corrupted by a Scorn Pole on the right and a cave to the left.
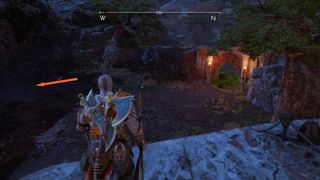
Head to the cave, but before jumping across the gap, look into the pit and you’ll spot the Raven perched on the rocks below.
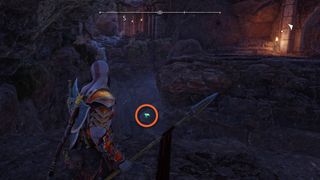
4. The Plains Raven 4
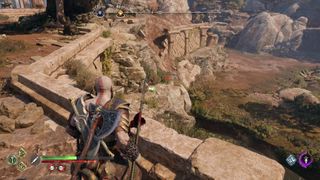
Carry on through the rest of this western cave in the Plains mentioned above. You’ll eventually climb up a wall and head down a path which leads to another shop, a Mystic Gateway and a Celestial Shrine. To find the next Raven, look over to the other side of the wall you just climbed up and the Raven will be sitting on the rocks.
5. The Plains Raven 5
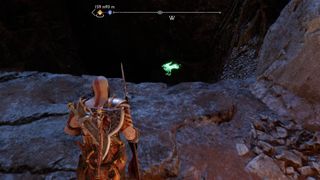
To reach this God of War Ragnarok Raven, you need to get to the open area in the north of the Plains. There’s a Mystic Gateway called the Overgrown Tower in the area and it’s also where you fight a dragon called the Crimson Dread. Once you’re in this area, there’s a pit you can look into on the western edge and there you’ll find the Raven.
6. The Jungle Raven
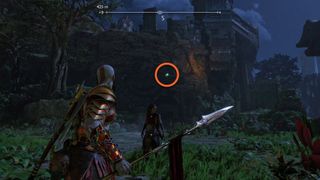
Once you’ve opened the dam, you can sail around the back of the main temple on the east side of the jungle (the roof of which serves as a boss fight arena for another dragon). Walk to the open area where you either will fight, or have already fought, two ogres and then look south at the temple building. You’ll notice the Raven sitting on a ledge above a chest.
7. The Sinkholes Raven
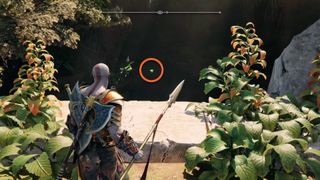
With the Crater flooded, you’ll be able to sail around parts of the Sinkholes and can open a gate that takes you to a dragon’s lair as part of The Burning Skies Favor. As you sail into the dragon’s lair, you’ll spot the Raven on a ledge on the left. You need to beach your boat just up ahead and carry on through the lair, climb up to the boss fight arena, and defeat the dragon. Now head to the southwest edge of the arena and you’ll be able to easily whack the Raven as it's slightly below you on the ledge.
God of War Ragnarok Muspelheim Ravens
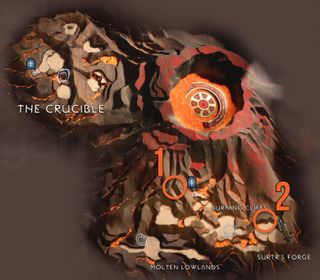
There are two Eyes of Odin Ravens in Muspelheim in God of War Ragnarok. Both of can be found during a quest called ‘The Summoning’ although you can revisit the area later, once the story's complete. Here’s where you need to look:
1. Burning Cliffs Raven
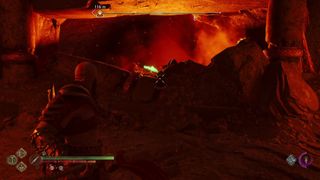
As soon as you arrive at the Burning Cliffs of Muspelheim, drop down the cliff and immediately turn right to follow the path that twists down into a cave with a golden Legendary Chest inside. To the right of the chest is a gap in the wall with some lava inside and a Raven.
2. Surtr’s Forge Raven
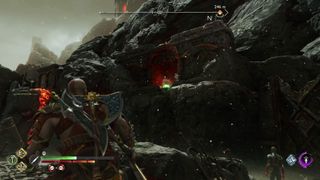
As soon as you’re done talking to Surtr at his forge, turn left and you’ll spot the Raven sitting in the archway of a broken building up on the cliff.
God of War Ragnarok Helheim Ravens
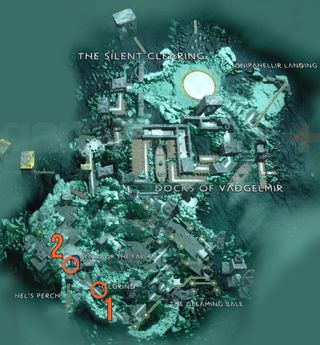
Two of Odin’s Ravens dwell in Helheim, and you can kill them during the ‘Reunion’ main quest, or when you can return after the story is finished. Both of them are very easy to spot. Here’s where you need to look:
1. Helgrind Raven 1
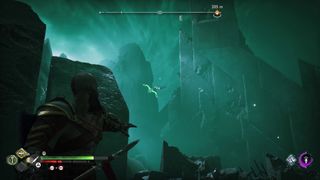
As soon as you arrive in Helgrind – whether that’s during the Reunion main quest or by using a Mystic Gateway to travel there – walk forward and you’ll spot the Raven flying around near the destroyed wall that Garm knocked down.
2. Helgrind Raven 2
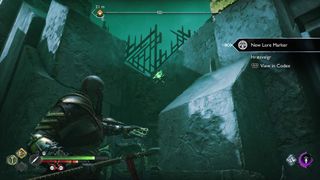
After resolving the issues with mega-wolf Garm, you’ll need to leave Helheim by solving a door puzzle that requires you to use the Leviathan Axe and Atreus’s Runic Arrows to freeze the hidden gear to hold the door open. On the other side of this door is a Lore Marker and the Raven is perched right above on the rock wall.
God of War Ragnarok Raven rewards and Niflheim chests

As you find Odin’s Ravens in God of War Ragnarok you'll be able to open reward chests in Niflheim. Travel to The Raven Tree in Niflheim where you'll see a creepy tree covered in the Ravens you killed, now free of Odin’s control. There are six gold Legendary Chests here that you can open depending on the number of Ravens you've killed. Here’s what you get in each chest working from left to right:
- Chest 1 - 6 Ravens to unlock: Girdle of Raven Tears waist armor - this has high defense and increases healing from Healthstones, using Rage, and any Gear by 15% (stacks with the bracers).
- Chest 2 - 12 Ravens to unlock: This contains the Bracers of Raven Tears wrist armor with some moderate strength and defense stats. It also increases healing from Healthstones, using Rage, and any Gear by 15% (stacks with girdle).
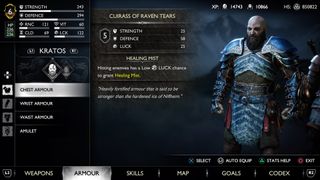
- Chest 3 - 18 Ravens to unlock: The Cuirass of Raven Tears chest armor is here, with a moderate Strength and Luck, and high defense. Hitting enemies also has a low Luck chance to grant Healing Mist. Unlocking this gets you the full armor set, which is part of our God of War Ragnarok Best Armor, so it's worth the work.
- Chest 4 - 28 Ravens to unlock: This chest contains the Breath of Thamur Leviathan Axe Heavy Runic Attack, which creates a massive area-of-effect ice storm that deals high damage. When fully upgraded, a good amount of Frost damage gets added.
- Chest 5 - 38 Ravens to unlock: In here is the Meteoric Slam Heavy Runic Attack for the Blades of Chaos, which inflicts damage and Burn by raining down fireballs in a wide area. Fully upgrade it to increase the damage and Burn effects, and add a small amount of Stun.
- Chest 6 - 48 Ravens to unlock: The final chest gets you the Finger of Ruin Draupnir Spear Heavy Runic Attack, which summons a large tornado that launches smaller enemies and deals good regular damage and Force damage. Upgrade it to max out the damage and increase the Force damage and Stun effects.
With all the chests open, you’ll then unlock the Raven Keeper boss fight in the nearby arena to fight them. Once this enemies reaches about a quarter health, they vanish and an ice dragon called the Pale One will appear instead. Defeat the Pale One and the Raven Keeper will reappear. Finish them off to complete The Eyes of Odin Favor and earn two Dragon Claws from the Pale One and the Hilt of Forsbrandr Relic from the Raven Keeper (use it to push enemies back and gain a temporary Aura of Protection), as well as the Niflheim’s Justice Enchantment for the Yggdrasil Amulet.
Of course, if you've got a taste for hidden loot now, check out our guide on all the God of War Ragnarok Treasure Maps!
© 12DOVE. Not to be reproduced without permission
Sign up to the 12DOVE Newsletter
Weekly digests, tales from the communities you love, and more

Will Sawyer is a guides writer at 12DOVE who works with the rest of the guides team to give readers great information and advice on the best items, how to complete a particular challenge, or where to go in some of the biggest video games. Will joined the GameRadar+ team in August 2021 and has written about service titles, including Fortnite, Destiny 2, and Warzone, as well as some of the biggest releases like Halo Infinite, Elden Ring, and God of War Ragnarok.
- Leon HurleyManaging editor for guides
- Joel FraneyGuides Writer
