How to get clearance in Genshin Impact Dual Evidence
Get full clearance in Genshin Impact by solving these Dual Evidence puzzles
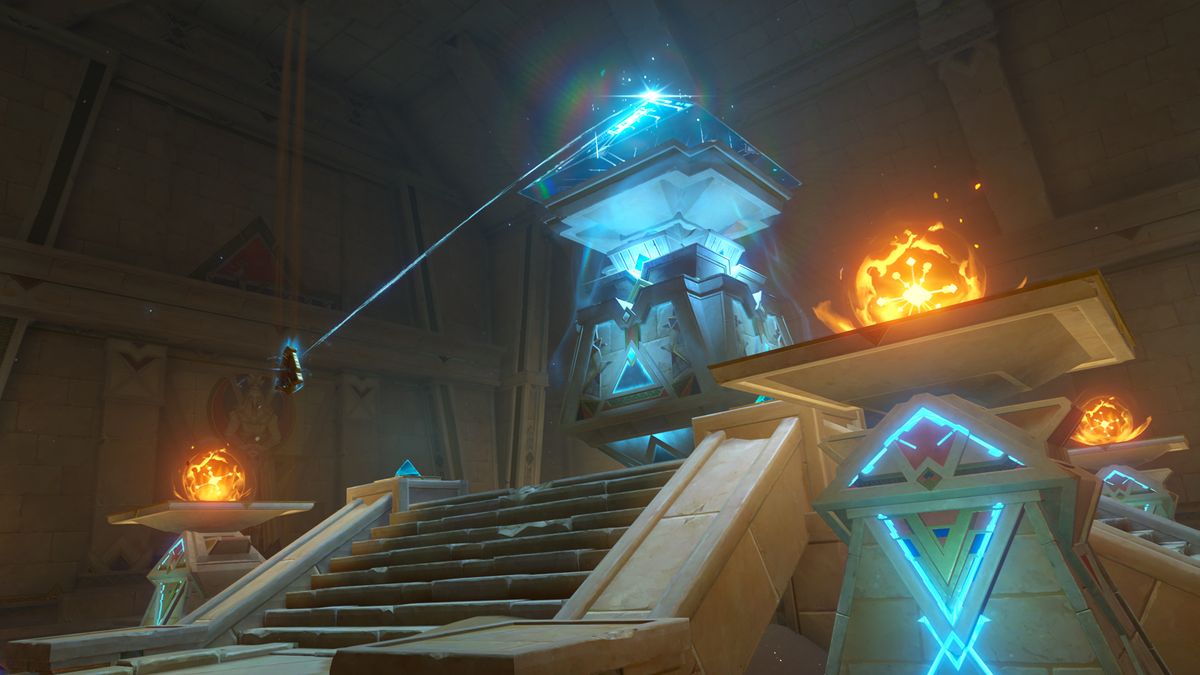
The Genshin Impact Dual Evidence quest is the only way to unlock the remaining underground Teleport Waypoints in the Sumeru Desert, which you've probably been exploring while looking for Genshin Impact scarabs. The Dual Evidence mission is essential if you want to upgrade the Scarlet Sands Slate, which will give you full clearance to open doors.
Naturally, Dual Evidence is full of puzzles and hidden objects. If you need some help, here’s a Genshin Impact Dual Evidence walkthrough. And if you're looking for Genshin Impact Fecund Blessings instead, we've got you covered there.
How to start Dual Evidence in Genshin Impact

The Dual Evidence quest starts in Aaru Village. If you teleport to the Statue of the Seven (east side), the first cutscene will start automatically. Dual Evidence comes with two quest requirements though:
- You must have completed the full Genshin Impact Golden Slumber questline (including four sub quests).
- After completing Golden Slumber, you must wait until the next real-time day (daily server reset) before you can start Dual Evidence.
Genshin Impact Dual Evidence part 1
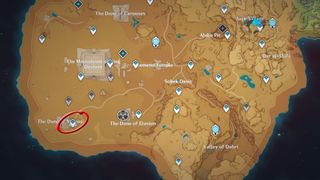
After speaking to the NPC’s in Aaru Village, the quest objective asks you to ‘go to the location indicated by the stone slate’. Open you inventory, go to Quest Items, and then open the Scarlet Sand Slate; you will see that the latest location entry is called ‘Duat Hall’. To find it, go to the Dune of Magma (red circle in the picture).
Once there, you will see two doors, left and right. Open both of them, then take the one on the right to find a blue orb. Guide it back to the entrance of the building (avoid the fan). After that, go through the door, drop down into the caves below, and keep following the tunnels until you reach a new Teleport Waypoint.
Genshin Impact Dual Evidence part 2
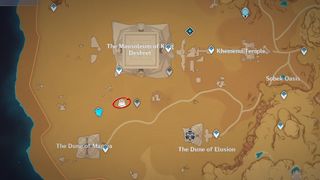
If you use the Scarlet Sand Slate again, a new location marker will pop up in the northeast (see red circle in picture). Go in that direction to find a second Teleport Waypoint, then use the Scarlet Sand Slate to open the sealed door. This will trigger a cutscene, after which the objective asks you to get “full clearance”.
To get full clearance, you need to find three clearance mechanisms and activate them using nearby blue orbs. If you open the Scarlet Sand Slate and click on the right tab, ‘delving deeper’, you will see three new locations: Place of Rebirth, Breath, and Swallowing. Here’s how to clear them:
Place of Swallowing full clearance
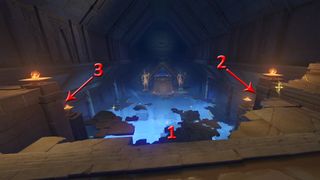
We’ll start with the Place of Swallowing, as we’re already in the right location (Teleport Waypoint south of the Mausoleum of King Deshret). If you stand next to the Teleport, you will see the same room as shown in the picture. The three blue orbs are right below you: one in front of you, one around the corner to the right, and the third one to the left.
Guide the blue orbs through the door on the right side of the room, but watch out for the large fans. Wait until the fan stops turning before pushing the orbs forward.
Place of Rebirth full clearance
Go to the Teleport Waypoint north of The Dune of Magma. In the east, next to a large staircase, you’ll see a cave opening with a Dendroculus floating in front of it. Follow the tunnels to reach the clearance location.
- Orb location 1: The first blue orb is on your path while walking towards the clearance mechanism, so you’ve probably seen it. If not; it’s east of the mechanism.
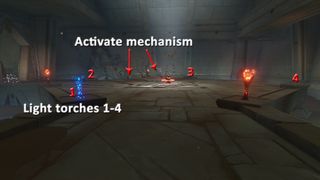
- Orb location 2: Starting from the clearance mechanism, take the door to the west. This will lead to a torch puzzle (see picture above). Activate the blue square behind the stone platform to materialize the remaining torches (number one to four), then light them up with Pyro. This will spawn the second blue orb and lower the water level.
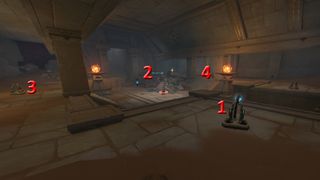
- Orb location 3: Starting from the clearance mechanism again, take the door to the north. Keep right to find another puzzle. The goal is to connect the lasers to the two floating orbs in the middle. To do so, you need to ‘move cells’ twice for both mechanisms in the room. Follow the same order as shown in the picture.
Obtain full clearance part three: Place of Breath
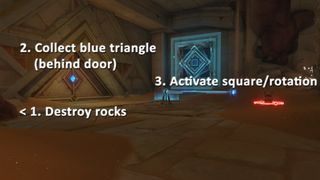
Go to the Teleport Waypoint west of Khemenu Temple. Proceed towards the west and then turn south. Unseal the door and go down, where you’ll find the first puzzle.
- Orb location 1: To solve this puzzle, you first need to destroy the rocks on the left. Go through the door and collect the blue triangle (on the right), then use it to activate the square and stop the fan. Use the rotation mechanism to safely release the orb (see picture above).
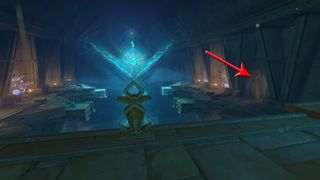
- Orb location 2: Glide down towards the tunnels to the west. Keep following the path until you unlock the final Teleport Waypoint. There’s another orb inside the large hall, right in front of you, but it’s not part of the clearance objective. Instead of following it, you can take the door to the right (see picture), and find the second orb location further down the hallway. It will lead you to the clearance mechanism.
- Orb location 3: On your way to the clearance mechanism, you came across another orb. If you missed it; it’s just west of the clearance mechanism.
- Orb location 4: For the final orb, go west once again, to the same room as the previous orb. This time, use the Scarlet Sand Slate to unlock the sealed door on the right. Then use the elevator to reach the orb (jump off halfway).
How to activate the giant device in Genshin Impact Dual Evidence
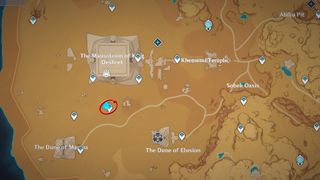
Now that you’ve got full clearance, you need to go to the Hall of Truths (see location in the picture). The doorway between the two statues is now open. To complete the next objective, ‘activate the giant device’, use the Scarlet Sand Slate on the four surrounding stone obelisks. In the next area, with the ‘light the primal torches’ objective, escort the three blue orbs to the middle of the room.
After this, the Dual Evidence quest will take you to the final boss fight against the Field Annihilation Array. If you have them, bring a high-level Dendro and Electro character to trigger Catalyze reactions, which will expose the boss during his invisible state. If not, don’t worry; the fight may take a bit longer, but you can still defeat the boss.
Travel back to Aaru Village to complete the Genshin Impact Dual Evidence quest.
Sign up to the 12DOVE Newsletter
Weekly digests, tales from the communities you love, and more
I’m a freelance journalist who (surprise!) kind of has a thing for videogames. When I’m not working on guides for GamesRadar, you can probably find me somewhere in Teyvat, Novigrad, or Whiterun. Unless I’m feeling competitive, in which case you should try Erangel. You can also find my words on PCGamesN, Fanbyte, PCGamer, Polygon, Esports Insider, and Game Rant.
Former Ultima Online and Star Wars Galaxies dev says MMOs have "been in a rut for a long time" after World of Warcraft's popularity narrowed down "a much more diverse genre"

4 years later, the League of Legends MMO remains a major project for Riot Games' co-founder who says it's "exactly the type of company" that should be making MMOs

