Gears of War 3 multiplayer weapons and maps guide
Learn how to keep all of your body parts attached with our guide to the weapons, maps, and gameplay of Gears 3 multi
Gears of War 3 is upon us, and with it, the most polished and varied Gears multiplayer experience to date. So it only makes sense that this is the game you should get halfway decent at, right? Well, that’s where we come in. We’ve got analysis of the weapons, layouts of every map, and general tips on how to make online play less intimidating. Together we shall overcome our fears and rise up against the roly-poly shotty fiends that haunt our nightmares! Or, you know, learn to become one of them...
Skip straight to the Maps Guide
Skip straight to the General Tips
Weapons
For reference, players have 600 hit points. Headshots do more damage than listed for certain weapons, but for others (like the Hammerburst & Retro Lancer) there is no bonus damage for headshots.

Damage: 55 (72 w/perfect reload)
Headshot Bonus: Yes
Fire Rate: 550
Magazine Size: 60
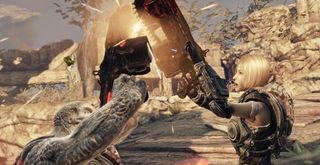
The Lancer is a COG’s bread and butter assault rifle. It sacrifices damage per round for a very high fire rate and decent accuracy, and as such should be the rifle of choice for open maps. In place of a standard melee attack, the Lancer has an attached chainsaw which will instantly kill anything in melee range. Just be warned: it takes a second to rev up, you cannot run or shoot when the chainsaw is revving, and any damage you sustain while running the blade will cancel the rev. The noise it makes also serves as a warning to any nearby enemies, so try to time it so that you rev just before, err, trimming the hedges.
When to use the chainsaw -
- You have the drop on someone
- An opponent is reloading
- To trump a Retro Lancer charge
- You are about to be chainsawed yourself
- Under cover of smoke
When NOT to use the chainsaw -
- The opponent has a shotgun drawn and has already seen you
- During an assault on a defensive position
- Trying to flank a position quietly
- All the freakin’ time

Damage: 90 (108 w/perfect reload)
Headshot Bonus: No
Fire Rate: 500
Magazine Size: 30
The Retro Lancer is significantly more powerful than its younger brother, and as such, kicks like an ornery mule. At a distance, this weapon should be fired in very short bursts. At close range, hold the trigger and keep your right thumb pushed forward (or back for you non-inverted weirdoes) to combat the recoil. This weapon is especially useful for taking out shotgun players before they get close enough to do any real damage. The Retro Lancer features a standard melee attack, but the bayonet can also be used to charge into and instantly kill opponents. Simply hold B to start the charge and watch the meter that appears in the upper right hand corner. When the meter turns red, you’ve gathered enough steam to skewer anyone.
Be warned that when in a full charge, enemies can hear you coming, seeing as a gratuitous bloodlust roar is unavoidable. While enemy fire will not cancel your charge, it will slow you down, so it’s best to use this move on unsuspecting opponents. In certain situations it is actually better to charge in place of the roadie run, especially when backed up by multiple team members.
When to use the bayonet charge -
- Your opponent is distracted
- To sometimes replace a roadie run
- Under cover of smoke
When NOT to use the bayonet charge -
- During an assault on a defensive position
- Your opponent is firing at you
- Your opponent is revving a Lancer
Sign up to the 12DOVE Newsletter
Weekly digests, tales from the communities you love, and more
