Throne and Liberty tips and tricks
Don’t miss any important gameplay mechanics with this Throne and Liberty guide

Need Throne and Liberty tips to strengthen your character, obtain better gear, and improve your chances of survival? Like most MMORPGs, Throne and Liberty introduces a ton of gameplay mechanics in the first few hours of the game. All those armor upgrades, character stats, and dynamic events can certainly be fun, but they can also become a bit overwhelming and confusing.
To help you understand the most important gameplay information and ensure you don’t miss out on the essentials, here are our best Throne and Liberty tips and tricks.
1. Stack up on World Tree Leaves to stay alive
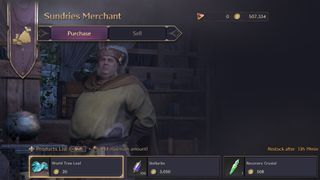
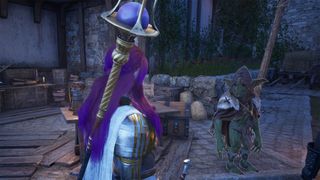
Wondering why you’re constantly on the brink of death, even though you were absolutely fine a short while ago? It’s probably because you’ve run out of World Tree Leaves. Your little Amitoi sidekick automatically heals you when you’re low on HP, but each of its skill uses consumes one World Tree Leaf. If you run out of World Tree Leaves, the Amiroi will stop healing you without warning.
The number of World Tree Leaves you’ve got is displayed on the skill bar at the bottom of the screen, right next to the Amitoi icon. To stack up on World Tree Leaves, buy them from the ‘Sundries Merchant’ in any city. One World Tree Leaf costs 20 gold, which isn’t very expensive.
2. Use the stats that play to your class

Instead of using a traditional class system, your Throne and Liberty weapon combos determines your class and combat role in Throne and Liberty; you can be a ranged DPS ‘Liberator’ (wielding a staff and a bow), a ‘Crusader’ tank (greatsword and sword), an ‘Invocator’ healer (staff and wand), and more. While this unlocks infinite possibilities, it also makes stat allocation rather tricky depending on what Throne and Liberty builds you're aiming for; should you invest in strength, wisdom, dexterity, or perception?
To help you get started, here’s an overview of Throne and Liberty’s main stat effects and the playstyles they’re typically used for:
- Strength: improves max HP, HP regeneration, and defensiveness, which is particularly useful to tank builds.
- Dexterity: improves attack speed, critical hit chance, and evasion. It’s particularly useful for highly mobile melee DPS builds or ranged builds.
- Wisdom: increases maximum mana and mana regeneration, and decreases skill cooldown time. It’s especially useful for most healer builds.
- Perception: improves buff duration, hit chance, and the chance to inflict debuffs. It’s great for most DPS builds, but also supportive classes trying to apply buffs or inflict debuffs.
If you’re playing as a tank, strength and perception should probably be your priority stats as you’ll need the defensiveness and buff application. Wisdom and perception are typically the best stats for healers as they need lots of mana, quick mana recovery, and a high chance to inflict buffs and debuffs. For DPS characters, consider the type of damage you want to focus on; if you’re a melee player, strength can be very helpful, but if you prefer long-range attacks, dexterity becomes more important. Likewise, you can tweak a DPS character to deal more critical damage (prioritise dexterity) or inflict more debuffs (perception).
3. Transfer gear upgrades to get the best stuff

It’s very important to keep upgrading your equipment as you progress through Throne and Liberty’s campaign - you can do so by spending Growthstones in the ‘equipment enchanting’ menu. Although gear upgrades aren’t free, don’t be stingy with your Growthstones since you can transfer the upgrade progress from old to new equipment pieces of the same type. In other words, there’s no need to ‘save’ your Growthstones for rare-quality pieces by refusing to spend them on uncommon-quality pieces. This will only make it harder to obtain weapons, armor, or accessories of rare quality, and will prevent you from gaining an instant upgrade boost on the rare equipment.
Throughout the campaign, it’s best to upgrade the current equipment rarity, then swap to the next rarity piece-by-piece and use the ‘transfer’ option in the equipment enchantment menu every time. Upgrade uncommon (green) gear to level 6, then transfer it to the rare (blue) replacement piece. Fully upgrade this gear piece as well, then transfer it to the epic (purple) replacement piece.
4. Don’t destroy gear, exchange it for upgrade materials or dissolve it for crafting materials
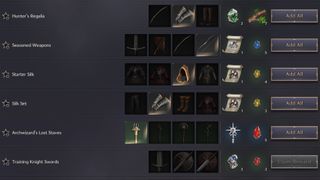
If you get any armor or weapons you don’t need, don’t be too quick to discard them as they may be used for Lithograph Book rewards. If you collect certain combinations of armor and weapons, such as the ‘Sparring Sword’, ‘Sparring Greatsword’, and ‘Reforged Sword’, you can claim a reward in the form of upgrade materials. To see the gear collections and their rewards, open the Lithograph Book from the main menu.
If you can’t exchange a gear piece as part of the Lithograph Book collection, it isn’t upgraded (otherwise you may be able to transfer the upgrades), and you don’t need it for your build, go to the inventory and be sure to ‘dissolve’ the gear rather then ‘destroy’ it - this will return some crafting materials.
5. Expand the storage, not your inventory
Running out of inventory space? There’s a seemingly easy way to expand your inventory by clicking on the tiny ‘+’ sign in the bottom right, but beware that this costs a whopping 250,000 gold. As if that isn’t ridiculous enough, you only get five extra inventory slots for that price, so you’ll only go from 130 to 135 inventory space.
Unless your Throne and Liberty character is loaded with gold, you get much more bang for your buck from the Storage Manager. It’s more of a hassle, but you can find the Storage Manager in any city and drop off the items you don’t need. The first five extra storage slots cost a measly 5,000 gold - although the price increases for every additional expansion, it’s still much less than 250,000 gold.
6. Use cooking recipes
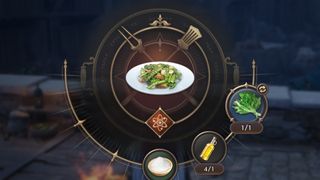
It’s easy to ignore the stoves that are present in any Throne and Liberty town, but you’re missing out on amazing buffs if you don’t do your cooking. Upon visiting a cooking station for the first time, you’ll find that you lack most of the required ingredients, but you can farm them in the wilds or buy them from Sundries Merchants in any city. The best way to gather cooking ingredients passively is to send your Amitoi on expeditions (click on the Amitoi icon on your skill bar). Use hourly expeditions to quickly stack up on various ingredients.
Here are some of the best foods to use in early game:
- Vegetable Stir-Fry: improves maximum HP and HP regeneration.
- Fried Egg: hit chance and critical hit chance against bosses is improved.
- Herb-Marinated Chicken Drumstick: improves critical and heavy attack chance.
- Healthy Milk: quickly recovers mana.
7. Check the event calendar
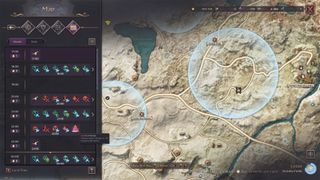
Throne and Liberty organises plenty of dynamic events throughout the day, many of which are linked to exploration quests. However, the event schedule is irregular and it may take hours before an event restarts. Therefore, whenever you wish to participate in a specific community challenge or defeat a certain boss, it’s best not to hang around hoping for the event to begin, but to check the in-game event calendar.
The event calendar is well-hidden, but here’s how to find it: open your map and click the small legenda icon in the top left, then select the ‘timetable’ option. You will see the hourly event schedule listed on the left. Hover over the icons to see the event’s description, type, name, location, and territory level. If you click on an event, you’ll see the exact location displayed on the map. Beware that the default zoomed-in calendar doesn’t display every hourly event - be sure to scroll to the right or use the ‘zoom out’ button to ensure you don’t miss anything!
If you’re new to Throne and Liberty, the Wolf Hunting Contest, Starlight Stones Ritual, and Lantern Seed Festival are the best events to tackle first.
8. Edit the HUD
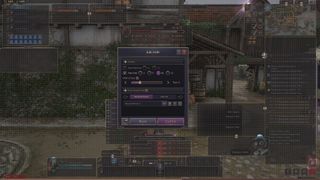
This is perhaps the easiest but most overlooked way to improve your Throne and Liberty experience; adjust the HUD. If you open the menu and click the ‘edit HUD’ option at the bottom, you can drag and resize every overlay according to your preferences. You can change this anytime you want, so feel free to try different layouts, but here are some suggestions:
- Save at least two personal presets: one for questing and exploring and one for serious PvE/PvP challenges.
- Change HUD UI size to tier 1 for exploration and basic PvE, as it may provide a more immersive experience.
- Change HUD UI size to tier 3 or 4 for difficult combat challenges, as it’ll be easier to check cooldowns, buffs, debuffs, etc.
- Place your profile next to your skills, so you can check your cooldowns, HP, and mana in one glance during battle.
© 12DOVE. Not to be reproduced without permission
Sign up to the 12DOVE Newsletter
Weekly digests, tales from the communities you love, and more

I'm GamesRadar's Managing Editor for guides, which means I run GamesRadar's guides and tips content. I also write reviews, previews and features, largely about horror, action adventure, FPS and open world games. I previously worked on Kotaku, and the Official PlayStation Magazine and website.

Following a high-profile guild quitting WoW Classic Hardcore, Blizzard makes the unprecedented decision to revive MMO characters that die during DDoS attacks "at our sole discretion"

Dune Awakening launches for $50 without a stay in early access, and while the survival MMO "will not have a monthly subscription" it will have "optional" paid DLC
