How to beat the Destiny 2 Vesper’s Host Dungeon
The Vesper’s Host Destiny 2 Dungeon sends players to another BrayTech space station to investigate an anomaly
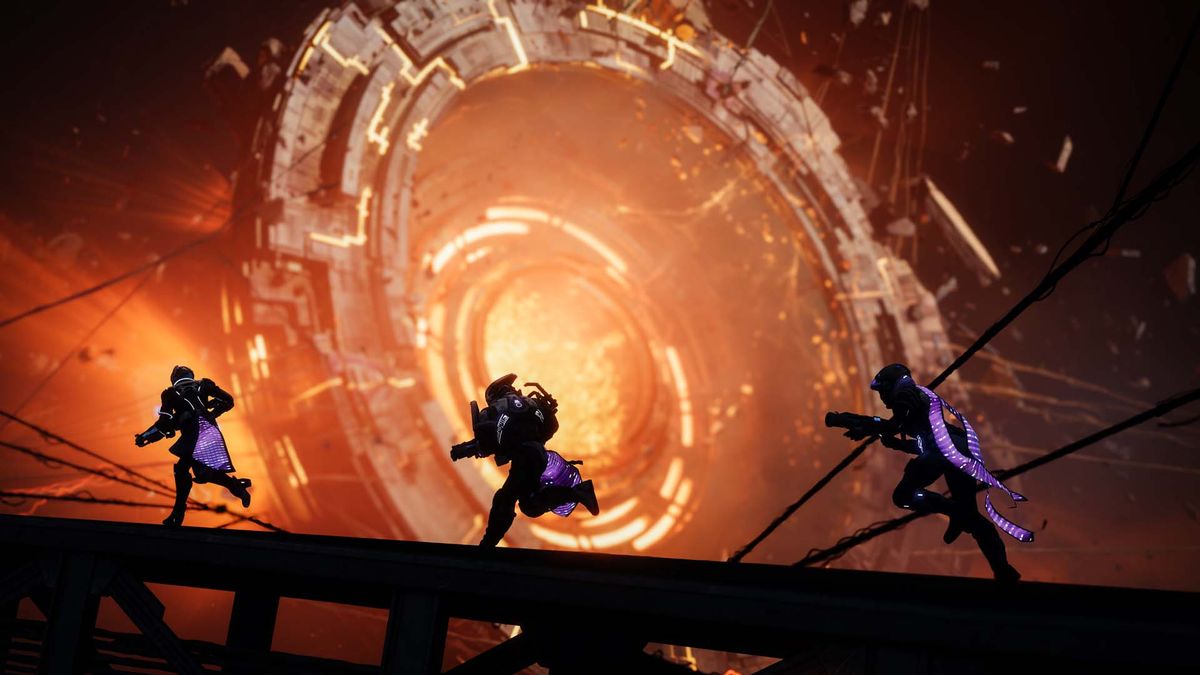
Destiny 2 Vesper’s Host is a tricky endgame Dungeon, requiring you to switch between augments, carry nukes, and defeat the Corrupted Puppeteer, all aboard a destroyed space station. If you’ve played the Deep Stone Crypt Raid in Destiny 2 Beyond Light, Vesper’s Host will be mechanically quite familiar as Scanner, Operator, and Suppressoor all make a comeback in each of the three main encounters, but there are plenty of new tricks that make this Dungeon the most challenging yet in Destiny 2. Here’s a complete guide for every major encounter in Vesper’s Host.
Destiny 2 Vesper’s Host guide

If you’re yet to start Vesper’s Host at all, you need to make sure you’ve grabbed the “Rogue Network” quest from Spider, who’s lurking in the back room of the Eliksni bar in the Last City. Once you’ve started that, you’ll find the Vesper’s Host Dungeon activity node on the Europa map.
Firstly, it’s important to familiarize yourself with the core mechanics of the Dungeon. As in the Deep Stone Crypt Raid, Vesper’s Host sees you collecting three augments used to perform different tasks within each encounter. Each player can hold only one augment at a time and augments can be deposited at the white terminals. A terminal can hold only one augment, but it allows other players to collect the augment if necessary or just holds the augment safely if you need to grab a different one.

However, when you collect any augment, a 60-second timer starts which will kill you if it reaches zero, though depositing an augment at a terminal and then immediately collecting it resets the timer. Here’s how each individual augment works:
- Scanner (yellow): Marks certain objects on your minimap with yellow hexagons. Approaching a marked object with this augment will cause the marker to either disappear or turn white. If it turns white, this indicates it is the “correct” object.
- Operator (red): Lets you shoot red control panels to activate them.
- Suppressor (blue): Highlights certain enemies in bright blue and replaces your grenade ability with a decoy bomb. Activate this new ability to create a hologram on your position, then shoot it to blow it up. Any highlighted enemies hit by the explosion are made vulnerable to damage.
With the basics out the way, here’s how you complete the three main encounters of the Vesper’s Host Dungeon in Destiny 2.
Destiny 2 Vesper’s Host Activation
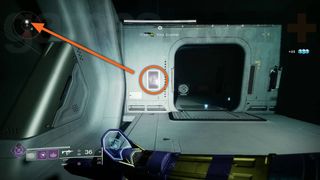
When you start Vesper’s Host, you’ve got to get inside Vesper Station before you can begin reactivating it. After running along some gantries, you’ll enter a dark hangar with a blocked door at the far end. This mini “Embarkation” encounter just introduces you to the Scanner and Operator augments, and all you need to do is use Scanner to find five red control panels scattered around the hangar and identify which ones are correct, then shoot them while holding Operator. Once you’ve done that, the barrier blocking the airlock ahead will deactivate.

Carry on into the station and you’ll eventually reach the Activation encounter, which uses the same logic as above, just with a bit more danger and the added nuclear core mechanic. Your objective here is to dunk three nuclear cores into three white bins behind the white sphere robot in the middle of the room, but you need to use Scanner and Operator to release those cores. You’ll also notice this room has three doors, each with a different organ above them – heart, lungs, and brain – and you can find a nuclear core through each one. Approach the robot and follow the “Reboot System” prompt to start the encounter and then do the following:
- Kill the Brig that spawns in, then kill the Viral Carrier and collect Scanner.
- Run into any of the three open doors – heart, lungs, or brain – and kill any Machine Priest’s Assistants and other enemies you find along the way.
- Proceed into the next area and kill more Machine Priest’s Assistants until another Viral Carrier spawns with Operator.
- Using Scanner, follow the yellow hexagon markers to the various red control panels in this area. You should be left with four white hexagons on your minimap corresponding to different control panels.
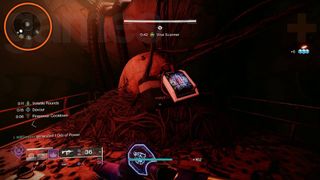
- Using Operator, shoot the four correct control panels. This will cause a nuclear core to appear.
- Deposit Scanner and Operator into the white terminals. This will make them readily available in any of the other organ rooms too, saving you from having to collect them every time.
- Pick up and carry the nuclear core back to the starting room, then quickly kill the Brig to remove the shields on the bins behind the white robot.
- Deposit the nuclear core it into one of the three bins.

- Repeat steps 2 to 8 for the other two rooms to complete the encounter.
How to beat Raneiks Unified in Destiny 2 Vesper’s Host

After another mini encounter called “Infiltration”, which sees you coming face-to-face with Raneiks Unified and depositing five nuclear cores in a small maze, you’ll then have to fight this hideous Servitor boss. When you enter the boss fight room, you’ll notice 10 red control panels numbered zero to nine (zero represents 10 in this case) – these are important for later as you’ll be entering a code to begin the damage phase of this encounter. Here’s what you need to do to beat Raneiks Unified:
Code Phase: Uncover the four-digit code.
- Kill the Viral Carrier and collect Operator, then place it in a terminal for later.
- Continue killing enemies until a Machine Priest miniboss spawns. Kill them to get teleported to another area.
- Kill all the Shanks including the Viral Carrier holding Suppressor.
- Use the Suppressor decoy bomb ability while standing next to Raneiks Unified to cause it to split apart into 10 smaller Servitors.
- Identify the two Servitors which have red lights surrounding their central eye and note the number in their names. For example, Raneiks-2 and Raneiks-7 would give 2 and 7.
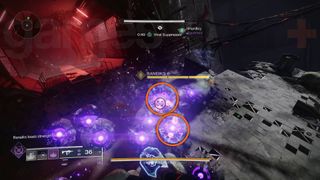
- Get back to the starting room by running through the red tunnel or side door.
- Repeat steps 2 to 6 once, leaving you with four different numbers.
- Collect Operator and shoot the red panels corresponding to the four numbers you identified on the Servitors in any order. This’ll trigger the damage phase, which has a little bit of setup first.
Damage Phase: Destroy Raneiks Unified.

- Collect Suppressor from the Viral Carrier that spawns.
- Use the decoy bomb on Raneiks Unified again to cause it to split apart into the smaller Servitors and make it vulnerable.
- Damage the Servitors until they reform.
Once the damage phase ends, you’ve just got to repeat these two phases until Raneiks Unified’s health bar has only a sliver remaining. At this point, you need to destroy each individual Servitor to complete the boss fight, but there’s no time limit. Now you can collect your loot and begin platforming your way around the Vesper Station exterior to reach the Anomaly area where you’ll have to defeat the Corrupted Puppeteer.
How to beat the Corrupted Puppeteer in Destiny 2 Vesper’s Host

The final boss of Vesper’s Host has a lot of setup before you even reach the damage phase, combining almost all the previous mechanics. Also, with so many ways to die, this is a marathon and not a sprint, requiring extreme care and constant awareness to avoid starting over.
The main addition here is that the boss can spawn “puppets” which are effectively smaller clones of itself that can only be killed once they’ve been hit by a Suppressor decoy bomb. Additionally, whenever you’re close to a puppet, you’ll gain stacks of the Radiation effect at an alarming rate.
The fight is split into three distinct phases which cycle until the Corrupted Puppeteer dies. Here’s how each one works:
Entrance Phase: Use all three augments to reach the lower stacks.
- Collect Suppressor from the first Viral Carrier.
- Use the decoy bomb to kill all puppets until another carrier spawns with Scanner.

- Using Scanner, approach the blue numbered monitors (1-4). Whichever one remains marked on your minimap is the number you need to remember.
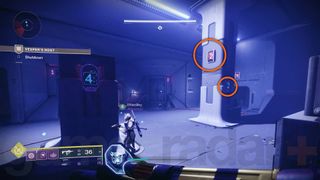
- Kill more puppets using Suppressor, then collect Operator from the next carrier.
- Shoot the four red panels scattered throughout this room with the corresponding number from the blue panel. For example, if the blue panel that remained marked on your minimap was 2, you need to shoot the four red panels with 2 on them.
- Place all three augments in the white terminals as this will save you having to collect them again in the next phase.
If you do all that correctly, the Corrupted Puppeteer will retreat to the lower levels of the station, and you can follow by jumping down either of the tubes with red, flashing lights in. You’ll drop into a maze-like area, which is actually just a big loop roughly halved into two sections distinguished by the blue or orange walls. Here you’ll begin the longest phase, which sees you bringing down the Puppeteer’s shield using nuclear cores.
Shield Phase: Destroy the Puppeteer’s shield.
- Jump down one of the two pipes near the flashing red lights on the wall. The pipes on the blue wall will take you to the blue central room in the middle of the map while the pipes on the orange wall will take you to the orange central room.
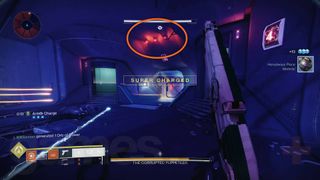
- Find the Puppeteer in either the large blue room or large orange room.
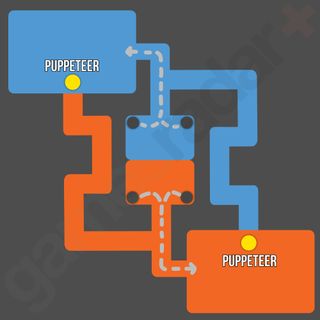
- Collect Operator and shoot the four red panels scattered around the room the Puppeteer is in. This starts the “Sector Purge Countdown” and causes several puppets to appear around the room.
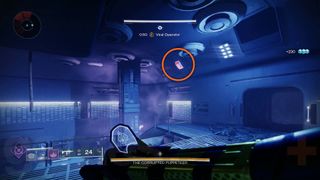
- Using Scanner, follow the yellow hexagons on your minimap until you find the puppet marked with a white hexagon, then kill that puppet. It will drop a nuclear core.

- Deposit Scanner back into a terminal, then grab the nuclear core.
- Run into the central bunker area, deposit the core into the bin, then wait until you can exit.
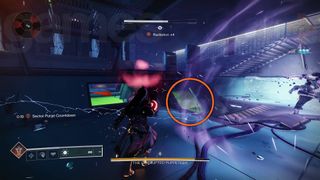
- Run to the other large room to find the Puppeteer again, then repeat steps 2 to 5.
- After a nuclear core has been used in both large rooms, run back to either of the central rooms and go through the teleporter to get back to the entrance room, then run into the airlock you initially entered from to prepare for the damage phase.
Shield Phase: Defeat the Corrupted Puppeteer and avoid the Anomaly.
- After standing in the airlock, you’ll get shot into the air and will see the Corrupted Puppeteer standing on a platform – damage them as much as possible at this point. Lightning will start striking the arena which can be lethal, so make sure you’re always moving.

- The Puppeteer will soon spawn several puppets, which you should try and kill. Explosive weapons are ideal for damaging both the Puppeteer and their puppets at the same time.
- The Puppeteer will eventually spawn a larger group of puppets, one of which will drop a nuclear core when destroyed.
- When the Puppeteer “communes with the Anomaly”, grab the nuclear core, run into the bunker on the left, and deposit the core to survive the lethal pulse.

- Leave the bunker and continue damaging the Puppeteer.
- When the Anomaly pulses again, retreat into the airlock.
That’s one full cycle for this final boss fight, so now you must start the entrance phase again and repeat all the above steps until the Corrupted Puppeteer is dead. It’s an incredibly long process, with a lot that can kill you, particularly during the brutally difficult damage phase. However, if you’re successful, you have a chance of getting the reprised Destiny 2 Ice breaker Exotic Sniper Rifle, and there’s plenty more to do for the Rogue Network quest.
© 12DOVE. Not to be reproduced without permission.
Sign up to the 12DOVE Newsletter
Weekly digests, tales from the communities you love, and more

Will Sawyer is a guides writer at 12DOVE who works with the rest of the guides team to give readers great information and advice on the best items, how to complete a particular challenge, or where to go in some of the biggest video games. Will joined the GameRadar+ team in August 2021 and has written about service titles, including Fortnite, Destiny 2, and Warzone, as well as some of the biggest releases like Halo Infinite, Elden Ring, and God of War Ragnarok.

When Destiny 2 "weekly active users dropped lower and faster than we'd seen since 2018," Bungie assembled an A-Team to put out some fires: "We needed to do something"

"A fun example of a bug becoming a feature": Destiny 2 accidentally made Exotic Glaives free to all classes, and Bungie says "we're going to let this ride"


