How to beat Mohg, Lord of Blood in Elden Ring
You'll need to find and beat Mohg in Elden Ring to access the DLC
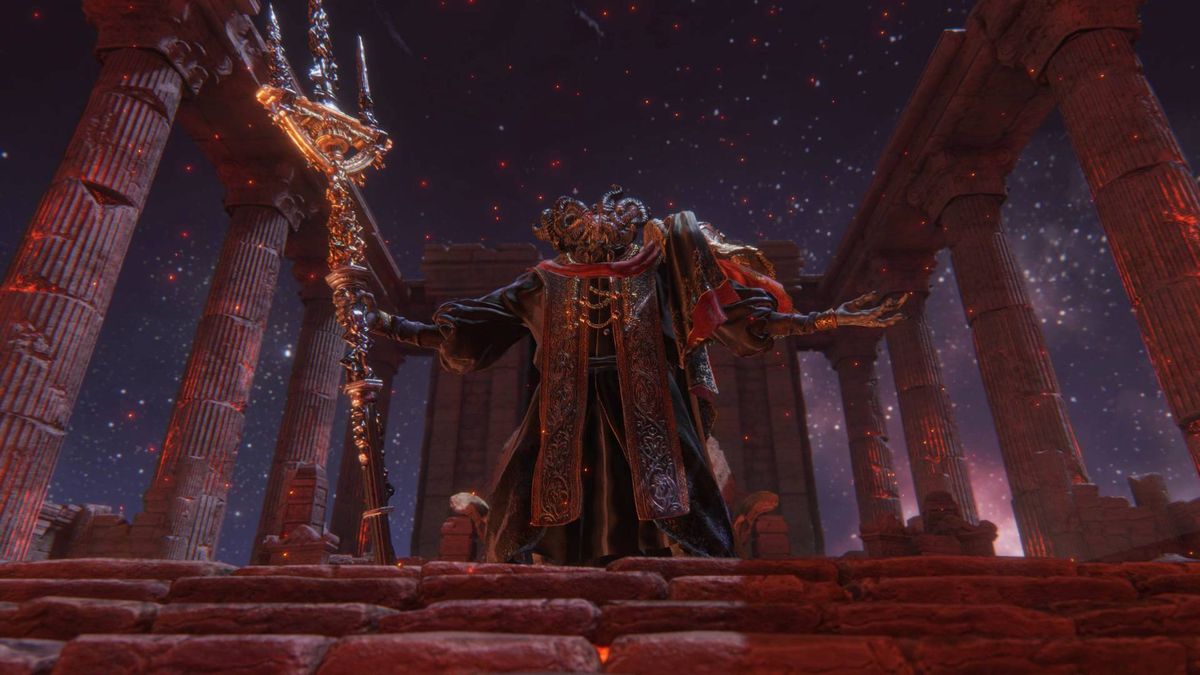
The Elden Ring boss Mohg, Lord of Blood is a massive, optional encounter that becomes a lot less optional when players realise that they have to beat Mogh - because that's to how to access the Elden Ring Shadow of the Erdtree DLC. The bloody demigod is a potent force to be reckoned with, guarding Miquella's egg / cocoon, and those who fight his haemorrhage and bloodfame attacks will need to be ready. If you want to know how to find Mohg in Elden Ring and beat him, our guide has you covered - as well as info on the special item that will render him much easier to beat.
How to reach Mohg in Elden Ring

To get to Mohg in Elden Ring you'll have to complete the Elden Ring Varre questline to get an key item. It can be started anytime after defeating Godrick the Grafted, and activating the Grand Lift of Dectus. So, if none of that sounds familiar, then you might want to check that all out first.
Varre's requests mainly involves invading other players, and dealing with an invading NPC, and will eventually earn you the Pureblood Knight’s Medal, which will take you to Mohg's location when you use it. This area is also the most lucrative Elden Ring Rune farming location in the game so it's well worth having.
The Pureblood Knight’s Medal will take you to an underground area called Mohgwyn Palace, and a site of grace called Palace Approach Ledge-Road. To the north of the site of grace you'll see a path lined with Albinaurics, which is the main farming source for this area - each one will net you around 2400 runes if you have the Elden Ring Golden Scarab to boost your gains, so this little stretch of ground will earn around 40K runes per run. With the site of grace right next to it you can quickly and easily farm thousands of runes in minutes.
Mohg's location in Elden Ring
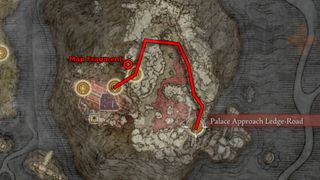
To get to Mohg, jump on Torrent and head north, past the Albinaurics, and into a large open area full of pooled blood. Keep going north and the way ahead will start to veer left/west. You'll know you're on the right track when Giant Skeleton Spirits start appearing. You can kill the club wielding Albinaurics summoning them if you want, or just ride past. Eventually you'll see a tall stone arch. Head up those stairs (Torrent will disappear) and you'll reach Mohgwyn Dynasty Mausoleum, with a new site of grace just up some more stairs on the left.
From here you can keep heading straight until you reach a large entrance in the cliff side. Most of the Blistered Putrid Corpses you find here won't do anything and you can just walk past, but a few will charge and explode so be ready to dodge the blood loss effect they cause. When you see a big slime monster you can jump around the gravestones to completely bypass it without a fight.
When you reach the cliffside entrance things will get a little tougher as there are two Sanguine Nobles between you and the next site of grace. You can fight them but they're tough enemies that pile on the bleed damage so it's best to avoid them. Head into the door and up the slope. You'll hear the Sanguine Noble start to appear just as you reach a turning to your right, so take that and then veer left, taking this path into the dark space:
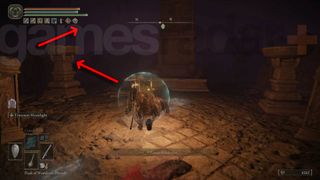
You should see the stone slabs of an old road on the ground so follow them and look out for stairs as well to find the route through. Another Sanguine Noble will appear so don't stop - keep following the faded road and stairs and you'll eventually see the light of door out. You'll know you're on the right track if you see a bright white Ghost Glovewort.
Once through the door you'll see the Dynasty Mausoleum Midpoint site of grace straight ahead so activate it to lose the Sanguine Noble if it's still following you. All you have to do now to reach Mohg is take the stairs up and follow the path around to the right to reach an elevator that will take you to him. You'll see a group of Albinaurics facing a Sanguine Noble which is worth avoiding unless you want an insanely tough fight. However, the Sanguine Noble is facing a chest with a Sombre Ancient Dragon Smithing Stone in it, which is probably worth a quick suicide run to grab before you're torn to pieces.
How to prepare for Mohg, Lord of Blood in Elden Ring
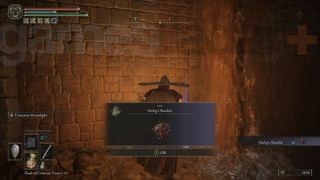
Being able to beat Mohg, Lord of Blood in Elden Ring can be made much easier with three items:
- Mohg's Shackle - this can be used twice to pin Mohg to the ground in his first phase.
- Stanching Bolus recipe - this lets you craft Stanching Boluses to negate blood loss build up.
- Purifying Crystal Tear - this can be used in a Wondrous Physick flask to negate Mohg's blood curse.
On top of that you can also use a summon when fighting him (The Elden Ring Mimic Tear ashes are probably best here) and get help from the Summoning Pool just before the stairs leading to the lift.
Let's take a look at how to get each of these three items now.
How to get Mohg's Shackle in Elden Ring
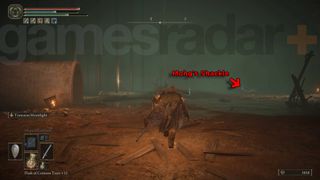
You can get Mohg's Shackle from the Subterranean Shunning Grounds in Leyndell, the Royal Capital, specifically the Underground Roadside site of grace. When you leave the room the site of grace is in, you'll see a ladder in an alcove just to the left. This will lead down to a large space full of pipes. There are gargoyles on the pipes and two Giant Crayfish on the ground level below, so you'll need to be careful. But, if you drop between the pipes to reach the floor (you'll take some fall damage but should survive), and take the left turn, Mohg's Shackle will be against a wall to the far south east by some falling water.
How to get the Stanching Bolus recipe
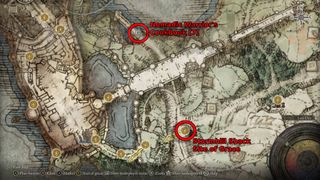
Stanching Boluses will stop blood loss build up and, while you can find a few, it's easier to craft them yourself. The recipe is in the Nomadic Warrior's CookBook [7] which can be found north of the Stormhill Shack site of grace in Stormhill. It's on a body at the end of the ruined bridge past the finger crone.
To make Stanching Boluses you'll need these ingredients:
- Herba
- Cave Moss
- Land Octopus Ovary
How to get the Purifying Crystal Tear in Elden Ring
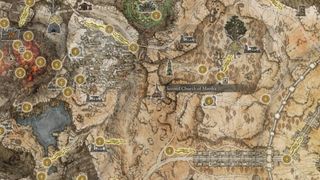
With the Purifying Crystal Tear you can create a Flask of Wondrous Physick that "purifies the curse from Mohg, Lord of Blood's terrifying rite of blood". This counters the Bloodboon Ritual that Mohg stacks up to heal himself and deal massive amounts of damage to you during the fight.
To get it, travel to the Second Church of Marika in Altus Plateau and defeat Eleonora, Violet Bloody Finger, the invading NPC that appears there. As well as the Tear you'll also get Eleonora's Poleblade, a twinblade that applies blood loss and scales with Dexterity and Arcane stats, which can be a useful weapon against Mohg as well see below.
How to beat Mohg, Lord of Blood in Elden Ring

The Mohg boss fight will be much easier with all the items listed above: Mohg's Shackle, Stanching Boluses and a Wondrous Physick flask with the Purifying Crystal Tear mixed in. So it really is worth getting them if you haven't.
You'll have plenty of time in the arena to take the flask and summon any ashes (Mimic Tear is recommended), as Mohg doesn't rush you when you enter. But obviously make sure you summon any player help if you want it before you go in.
There are a few options to actually taking him down. The safest and most effective option I used is with a magic build using Comet Azur to blast Mohg from a distance while he's distracted with summons. It took me just under two minutes to take him down this way, at level 144.

However, if that's not an option then Mohg is weakest, ironically, to blood damage. So any build that uses weapons or abilities to layer that on will quickly bring his health down. Defeating Eleonor, Violet Bloody Finger to get the Purifying Crystal Tear will also earn you Eleonora's Poleblade which causes blood loss buildup on attacks, so you'll have that option. However, there's no end of blood based weapons, spells, skills and items though, so check what you've already got before you head off in search of anything specific.
Mohg is also weak generally to physical attacks and a few other things like gravity, frostbite and poison, so there's a lot of options you can use to get some extra damage in. Just avoid anything built around fire and scarlet rot which he is strong against.
If you are going toe to toe then phase one is all about avoiding Mohg's slow and telegraphed trident sweeps. If you're quick you can dodge around him and get hits in between attacks, but slower, heavier weapons will have to wait for larger openings between combos.
You'll also need to watch out for bloodflame attacks, either through a slashing talon attack, or flaming pools on the floor. Both will cause blood loss build up. In this opening stage he'll also apply his blood curses which appear as rings around the player, which is what the Purifying Crystal Tear will cancel out. You'll want to use the shackle here as well to pin him down and get some free hits in. It'll only be usable twice in this first phase.
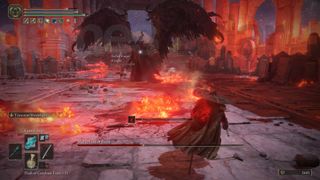
At around half health phase two begins, which largely involves Mogh adding bloodflame splashes to most of his attacks, and sprouting wings to add some airborne swoops to his repertoire. With more blood loss stacking up this is where the Stanching Boluses will come in handy, so keep them equipped and ready to go. You'll want to stay mobile throughout but especially once he takes the air. Also with his attacks covering a wide area try not to dodge away from them as you'll just catch the end of it - instead dodge through them.
The main thing is that while Mohg can seem massively overwhelming if you're not prepared for the stacking bleed damage, preparing for that will actually take much of the sting out of this encounter. So, get all the right gear, and keep out the way of his slow but far reaching attacks, and you should down him in no time.
Once's he's defeated you'll be able to access the cocoon behind him which will grant you access to the Shadow of the Erdtree DLC area.
© 12DOVE. Not to be reproduced without permission
Sign up to the 12DOVE Newsletter
Weekly digests, tales from the communities you love, and more

I'm GamesRadar's Managing Editor for guides, which means I run GamesRadar's guides and tips content. I also write reviews, previews and features, largely about horror, action adventure, FPS and open world games. I previously worked on Kotaku, and the Official PlayStation Magazine and website.







Monster Hunter Wilds' first major update rights its greatest wrong by adding a proper Palico cooking animation, and it's letting you change Alma's glasses

Monster Hunter fans lose their minds as Monster Hunter Wilds confirms Lagiacrus will return this summer, finally answering 7 years of prayers

