Fun projects for your NES
Clean your console, replace the 72 connector pins, and mod your controllers!
What you’ll need:
NES controller
USB Retro Kit
Soldering iron
Wire cutters
Wire strippers
Hot glue gun
Phillips screwdriver
Isopropyl alcohol
Q-tips
Don’t have an old NES? You can still enjoy classic games on your PC by turning an old NES controller into a USB gamepad. NES controllers are easy to find online and run for about $5.00 on eBay. For this project, you’ll also need a USB kit. We got ours from RetroZonefor about $17. There’s a great tutorial videoon the site. But since some of you may not be familiar with how to use a soldering iron, we figured we’d run you through the steps in further detail with lots of pictures.
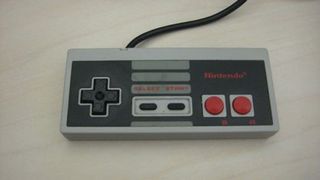
Above: We’re going to mod this controller so you can play classic games on your PC properly
If this is the first time you’ve used a soldering iron, or if you’ve just put on a new tip, you’re going to want to coat your tip with a thin layer of solder. This process is called “tinning” and will help transfer heat between the tip of your soldering iron to the components you’re about to solder together.
Step 1: Get some cardboard or aluminum foil for your work area. This will protect your table from any solder that drips while you’re tinning your iron. You’ll also want a damp sponge nearby. This is because after you’re done tinning your tip, you’ll want to wipe it down to prevent the melted solder (or flux) from drying. If you allow the flux to dry, it will turn into a crust that will prevent your tip from conducting heat properly.
Step 2: Heat up your soldering iron and apply your solder to the tip until it’s completely coated.
Step 3: Wipe your tip off on the wet sponge to prevent the flux from drying up. Now, you’re ready to solder. Before you jump right into this job, practice over your cardboard or aluminum foil. It’s easy to apply too much solder, creating a giant glob that bleeds over to other parts on the circuit board and ruining your work. So apply the solder to the soldering iron tip and watch how it melts and drips. If this is your first time soldering, you'll be glad you did.
Sign up to the 12DOVE Newsletter
Weekly digests, tales from the communities you love, and more
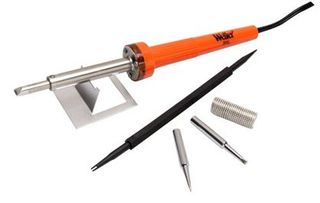
Above: A typical soldering iron kit like this can be found at your local hardware store for about $10 or $15
Step 4: Unscrew the six screws on the back of your controller and remove the board. Flip over the board and clean the connectors with your Q-tips and rubbing alcohol. Remove the button connectors and buttons below the board and clean the top and bottom shells of your case. You can use Q-tips or some cotton balls with alcohol to wipe down the buttons and button connectors too.
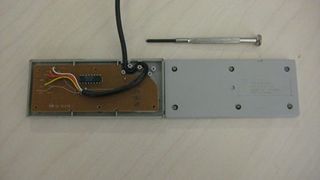
Step 5: Stretch the controller's cord out and snip the wire with your wire cutters just past the point where the board gets skinny.
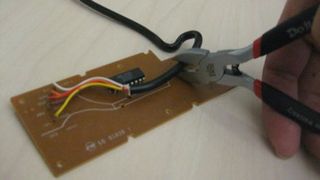
Step 6: Use your wire strippers to remove the tips of the casings on all your wires and apply a tiny dab of solder to each wire tip. Soon, we’re going to solder each of these wires tothe connectors on the board that came with your USB kit.
Step 7: Now it’s time to apply some solder to the board that came with your USB kit. Look at top side of the board from your USB kit in the image below. You’re going to want to add a tiny drop of solder onto each of the two middle connectors on the left. Eventually, you’re going to solder the brown and white wires from your NES controller board to these two connectors. A clamp to hold the board steady will be extremely helpful, but isn’t necessary.
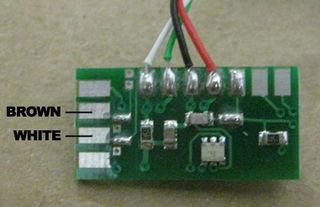
Step 8: Now flip the board over. Add a drop of solder to each ofthe three middle connectors on the right in the image below. Soon, you’re going to solder the orange, red, and yellow NES controller wires to the connectors on this board.
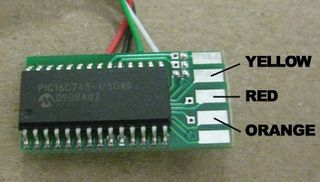
Step 9: Now, take the brown NES wire and hold the tip to the appropriate connector. Press your iron tip against the connection for just a moment to soften the solder. Let it dry, and continue soldering each wire to the appropriate connector on the USB kit board.
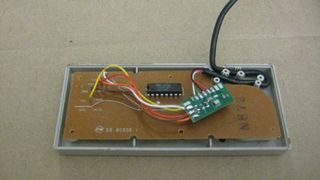
Step 10: Use your glue gun to put a dab of glue on the black part of the USB kit’s board, and fasten it your NES controller board just below the part where the wires come out. Now, all you have to do is reassemble your NES controller and put all the screws in. When you’re done, it should look like this.
Or just buy an adapter
Modding your NES controller into a USB gamepad is a rewarding project. But if you don’t already have all the tools you’ll need, it can be a bit pricey. You might want to consider ordering a USB adapter for your classic gaming controllers instead. We got one from RetroZone for $22.
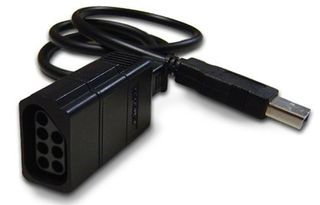
Above: We tested it out, and this adapter from RetroZone works great
We’ve heard that you can search for terms that sound like “bemulator” and “BROMs” on google, and find all kinds of interesting programs and files that’ll work well with your new USB compatible NES controller. But instead, we’ll recommend that you visit GameTap, where you can play classic games like Pac-Man for free.
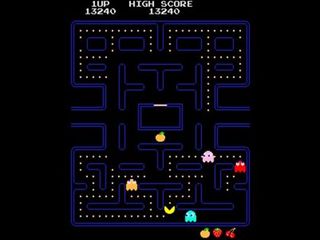
Above: Get your waka-waka on with your new controller
Oct 30, 2009


What sexy meant pixelated

Real gamers take note – Nintendo's oft-ignored console still demands your respect

Gay Robocop, naked Mario and several other homebrewed oddities that might be illegal
Elden Ring's seamless co-op modder takes their talents to Dark Souls 3, letting you "play with friends" from start to finish with "no resummoning or interruptions"

13-year WoW vet left Blizzard for the indie life because "I didn't really feel like a game developer in some way," agrees it's harder for AAA giants to "maintain this connection to the player"
Most Popular


