How to repair the Final Fantasy 7 Rebirth Grasslands windmill
Repairing the Grasslands windmill settlement in Final Fantasy 7 Rebirth requires some footwork
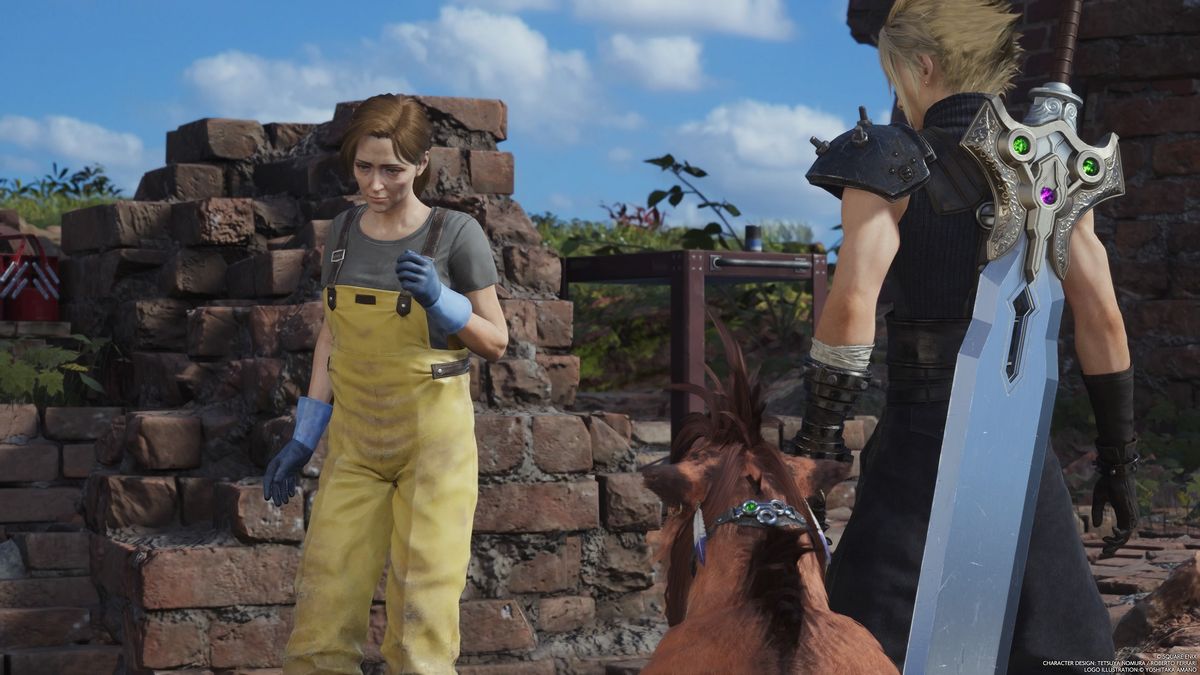
Knowing how to repair the Grasslands Windmill in Final Fantasy 7 Rebirth will help you complete this Chapter 2 'Where the Wind Blows' Odd Job. It all starts when you follow the green trail marking a place of interest to The Windmill settlement. There a woman named Mildred will ask you about getting the windmills moving again. There are a number of steps you need to go through to complete this task, which I can help you with.
It's one of the more involved side quests in Final Fantasy 7 Rebirth, and you won't be able to provide assistance until you've worked through some of the main objectives and completed certain World Intel tasks.
So, whether you're in need of help completing the steps for the Where the Wind Blows quest, or you're looking to unlock it, read on below as I outline how to repair the windmill in the Grasslands in Final Fantasy 7 Rebirth.
How to unlock the Where the Wind Blows quest in FF7

When you arrive in the Grasslands, you'll have some main scenario objectives after leaving the town of Kalm. While you're free to explore, it's worth tackling these right away. Once you've progressed enough, you'll soon find your way to Bill Ranch's where you can unlock the Final Fantasy 7 Rebirth Piko the Chocobo mount. After this you'll get your very first Odd Job and Kalm will be accessible again. You'll get a prompt telling you that more Odd Jobs are available in the area, and you can unlock these by returning to Kalm and finding the notice board.
When it comes to getting the Where the Wind Blows quest, you'll need to first complete other Odd jobs - namely the 'Livestocks Bane' quest from the notice board. It's worth noting that it's recommended you be level 18 or higher for this Odd job. Once you've finished the quest, the last side quest will appear on the notice board in Kalm for you to claim. Again, since this is the very last Odd Job in the area, the recommended level is higher at 22 - so it's best to complete earlier Odd jobs and spend some time fighting in the world.
How to repair the Grasslands windmill in Final Fantasy 7 Rebirth
After speaking with Mildred at the Windmill settlement, your first task will be scanning some Lifesprings in the area. You should already have the location of one spring on your Final Fantasy 7 Rebirth map after activating the first World Intel tower for Chadley during the main story objective at Bill's Ranch. In order to discover more, you'll need to activate more towers, but you'll only need to scan two Lifesprings to progress.
You'll unlock Excavation intel that will tell you the location of a Bygone Settlement which is where you'll want to head to. With the help of your chocobo you can hold down on the D-pad to sniff out and then dig up three buried Artifacts here. The quest will guide you, but keep an eye out for a blue question mark as you go about the site to locate the three items you need to find - one of which will be a Transmuter chip that will help you repair the windmill.
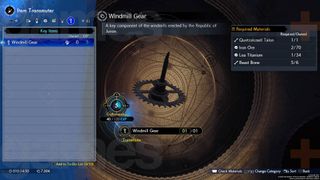
If you open up your Transmuter in the menu and look at the key items section, you can see the required materials to craft the Windmill gear chip you have located in the excavation site. You'll need to find the following:
- You can find Iron Ore and Lea Titanium on the ground throughout the Grasslands.
- Beast Bone can be picked up by fighting enemies roaming around.
- The Quetzalcoatl Talon will once require you to scan two more Lifesprings to unlock a special combat assignment on your map. This gives you the creature's location and you'll have to fight it to earn your talon. Being level 22 or higher here will make your life easier.
Once you have all the required materials, you can craft the gear and fast travel back to the settlement to deliver it to Mildred to repair the windmill. Doing so will bag you a new Materia - you should notice it drop from the windmill fan, and you can go and loot it from the ground below upon completion.
© 12DOVE. Not to be reproduced without permission.
Sign up to the 12DOVE Newsletter
Weekly digests, tales from the communities you love, and more

I started out writing for the games section of a student-run website as an undergrad, and continued to write about games in my free time during retail and temp jobs for a number of years. Eventually, I earned an MA in magazine journalism at Cardiff University, and soon after got my first official role in the industry as a content editor for Stuff magazine. After writing about all things tech and games-related, I then did a brief stint as a freelancer before I landed my role as a staff writer here at 12DOVE. Now I get to write features, previews, and reviews, and when I'm not doing that, you can usually find me lost in any one of the Dragon Age or Mass Effect games, tucking into another delightful indie, or drinking far too much tea for my own good.






CD Projekt boss says "cutting-edge single-player games" – you know, like The Witcher 4 and Cyberpunk 2 – will "continue to enjoy great popularity" despite industry shifts

Despite releasing exactly zero new games, CD Projekt bagged $120 million in profit for 2024 – the Witcher and Cyberpunk studio's third-best result ever
