Evil Dead The Game Mission 3 walkthrough
How to beat the Kill Em All mission and the deadly Demi Eligos in the Evil Dead game

Our Evil Dead game Mission 3 walkthrough will help you beat the Demi-Eligos demon and complete the Kill Em All mission, not easily done. It's worth it though, as cracking this mission is how to unlock Amanda Fisher in the Evil Dead game, and earn the chance to earn further (equally tough) missions further on. Here we'll show you how to beat the Evil Dead game Mission 3, Kill 'Em All, with a full walkthrough and tips, as well as how to beat the Demi-Eligos and Eligos boss fights.
Evil Dead game Mission 3 walkthrough
To beat the Evil Dead game Mission 3, Kill 'Em All, take the following steps:
- Quickly scout the farm for resources.
- Drive the Oldsmobile carefully to the first location.
- Fight off the Deadites from the highest point.
- Drive carefully to the second location.
- Grab the fire axe and more ammo before starting the conflict.
- Kill the demons with precision headshots and melee attacks.
- Kill Demi-Eligos with careful evasion techniques.
- Drive carefully to the third location.
- Grab more Amulets and ammo.
- Kill the final Deadites and defeat Eligos.
Clearly a lot of this is easier said than done, which is why you can click on the individual tips for more information on those steps and how to do them, or just scroll down.
There are three intrinsic challenges to this mission - preserving your ammo and resources, understanding how the demons do melee combat to preserve said ammo, and doing the whole thing in the time limit - a nail-biting twelve minutes that tick down no matter what you're doing (hence why preserving the Oldsmobile/Delta is so important). We'll explain the different steps below and how you can stand the best chance at success.
1. Quickly scout Faison Farm for ammo, Shemp's Cola and Amulets
When the mission starts, you'll have a twelve minute timer that immediately kicks in, along with a legendary Lever-Action Rifle and no melee weapon beyond your fists. The car is just ahead of you, but first you need to (very quickly) filter through the various barns of Faison Farm for ammo (there should be just enough to max out your limit), as well as three cans of Shemp's Cola and three Amulets, and even some matches to use in case your fear gets out of control. Be wary of the tree on the West side that might occasionally swipe at you, and the moment you have all you can carry, use an Amulet and head to the car.
2. Carefully drive the Oldsmobile to the next location without crashing
This is important: because the timer is so ruthless, you want to use the car for as long as possible - but it's not in good condition. Crashing it into something or being hit by a Deadite risks breaking it permanently, meaning you'll have to run for the rest of the mission and lose more time that could be spent progressing. Take the main roads to the next location marked, being careful not to hit anything, and park a decent distance from the actual arena so it doesn't get caught in the crossfire.
3. Fight off the Railway Loop Deadites from the high point advantage
Once you're at the wheatfield near Railway Loop, you'll have to kill twelve standard Deadites. Head to the platform near the top where ammo is abundant and try to pick off the Deadites that spawn in - a single headshot should kill each one, and a few melee attacks will kill them in a pinch. Stay evasive and watch your flank - they can spawn in behind you easily. Feel free to be a little more liberal with your rifle in this phase, as ammo is more abundant - though it won't be going forward. Otherwise, here are some useful tips:
- These Deadites explode when they die, unless you kill them with a takedown. It's a short range blast, so dodge backwards to avoid it.
- They lunge forward with many attacks, so sidestep with your dodges rather than dodging directly backwards, or they'll get you anyway.
- You can kill them with four or five unarmed punches.
- Listen carefully for their telltale noises if they're behind you, and look for the directional arrows that mark that they're about to swipe from out of view.
- Use Shemp's Cola whenever you're below 50% health (this applies to the whole quest).
4. Drive to the next location cautiously again
The next area is a field between Dead End and Royal Oak Cemetery - and again, you want to be very careful not to damage your Oldsmobile. Take the main road, as even though it's not a straight line, you won't hit anything and it's still fast enough not to make a huge difference. Park a little way from the field - you don't want it caught in the carnage - and head over to the covered area.
5. Grab the fire axe and more ammo before starting wave 2
There are several common melee weapons for you to grab nearby - and we suggest the fire axe. It's got slightly better stats, and a single standard attack will leave the enemy vulnerable to a takedown. Alternatively, a single heavy attack will kill standard Deadites instantly. Scoop up nearby ammo and head to the marker to begin the second wave.
6. Kill demons with precision headshots and melee attacks
Now ammo conservation becomes much more important, as it's going to be rare. Use your axe to end enemies whenever possible, and if you have to shoot, aim for the head to get an instant kill. Check out the tips for phase 1 to see how to beat the standard horrors. About halfway through, the Demi-Eligos boss will show up - evade it as much as possible and kill the remaining Deadites before dealing with it one-on-one.
7. How to kill the Demi-Eligos
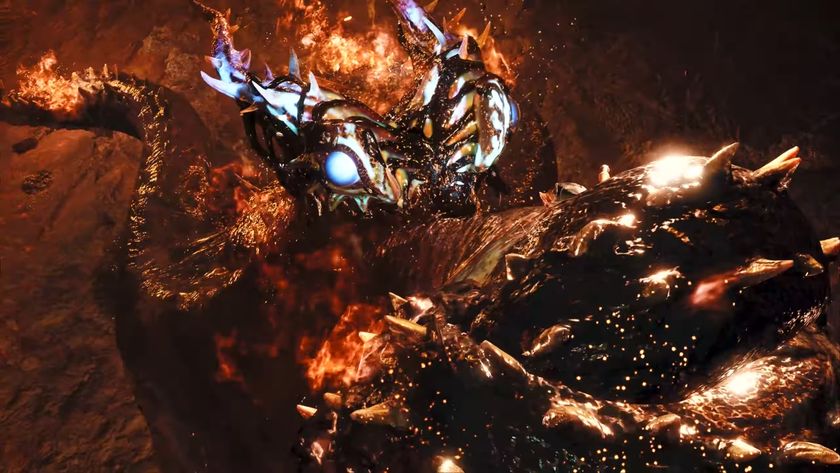
The Demi-Eligos can do massive damage with every strike - and as good as your Rifle is, you'll want to use your axe for this fight to preserve the ammo for what's next. Here are some basic tips on how to beat Demi-Eligos, arguably the hardest encounter in this mission.
- Like before, dodge sideways rather than backwards when it lunges at you. You can follow this up with at least one melee attack. Be careful, it might do a quick backwards swipe to follow.
- When it crackles with electricity, simply pick a direction and move that way - it's about to bring lightning down on your location for massive damage, so get out fast. Dodging isn't necessary if you just keep moving.
- Demi-Eligos can create a clone of itself that has far less health, but all the same attacks. Kill it instantly when you see it! It's always the one created to the left (assuming Demi-Eligos is facing you). A few melee swings should kill it before it can start fighting.
- Again, drink a Cola whenever your health is below 50%.
8. Drive the car (a little) carefully to the third location
Finally head to the last location, Fairview Campground. Again, you should drive carefully, though considering this is the last location, you can probably drive a little less carefully, as there's no need for the Oldsmobile after this point. If it's been broken before this point, cut across the wilderness and sprint as much as possible - you'll want as much time for the final fight as you can get. If your fear is going haywire, start a VERY quick fire to get yourself under control.
9. Grab more Amulets and ammo before starting the final wave
At the Campground is a bit of ammo and at least one Amulet. Grab it and use it if your shield is broken, and ignore the spear lying invitingly nearby - we still think the fire axe is the superior melee weapon. Once you're ready, head to the marker and the final battle begins. Hopefully you'll still have up to five minutes for this section - if it's three or less, you'll need to be careful.
10. How to kill the Eligos
Finally, you'll battle three Deadites and the Eligos boss simultaneously. Again, start by meleeing the Deadites to death so they're out of the way, then it's time to fight Eligos, a largely ranged monster and the reason you've been conserving ammunition. Here's some basic tips:
- Eligos teleports around the battlefield, and each time it does, there's about a second's pause before it fires a projectile at Ash. Dodge to the side and you should learn the attack patterns quickly. Eligos will then have a couple of seconds cooldown for you to retaliate.
- Occasionally Eligos will teleport right next to you and try to do a melee attack for massive damage. Dodge it as a priority! This is potentially a game-ender and not worth risking for a few quick axe strikes.
- Use your rifle and pick careful headshots, considering the scarcity of ammo.
- If you run out of bullets, you'll have trouble - Eligos' short cooldown means you'll struggle to melee it before it teleports away.
It's a very difficult mission even with all these tips, but with some skill and luck, you should have completed Mission 3: Kill 'Em All. Groovy.
Mission 3 Rewards

Complete Mission 3 unlocks a few extras, and even if you're finding it a nightmare, it's probably worth pushing through for these bonuses:
- Amanda Fisher (Hunter character)
- Knowby Recording 3
- Newly unlocked mission 4: "It's not gonna let us go!"
Evil Dead game tips | Evil Dead game classes | Evil Dead game single player | Evil Dead Game Crossplay | Is the Evil Dead game on Game Pass?
Sign up to the 12DOVE Newsletter
Weekly digests, tales from the communities you love, and more

Joel Franey is a writer, journalist, podcaster and raconteur with a Masters from Sussex University, none of which has actually equipped him for anything in real life. As a result he chooses to spend most of his time playing video games, reading old books and ingesting chemically-risky levels of caffeine. He is a firm believer that the vast majority of games would be improved by adding a grappling hook, and if they already have one, they should probably add another just to be safe. You can find old work of his at USgamer, Gfinity, Eurogamer and more besides.











After 2 years of silence, the next mainline Silent Hill game is getting a dedicated stream this week with "the latest news"

After a years-long battle with its publisher, Ukraine-based studio reveals first gameplay footage of survival horror sequel The Sinking City 2, launches Kickstarter, and hits $100,000 goal in hours
