Enslaved Mask Location Guide
Get the Mask Curator Achievement/Trophy with our handy chapter by chapter guide to Enslaved's hidden masks
In an unusual fashion, Enslaved: Odyssey to the West gives you a bye for the first two Chapters and lets you enjoy the game without having to hunt for the eerie collectible masks. However, once those first two chapters are up, you’ll be up to your earballs searching for masks that will thrust Andy Serkis’ ghoulish visage upon you. Some of the masks will be given to you easily and simply cannot be missed, while others will take a bit of searching to nail down. For the more problematic masks, we've done the searching for you and slapped it all together for you in this handy and somewhat dandy guide so you can enjoy the game in all its beauty without having to worry about where the little buggers are hiding.

Chapter 3: The Metal Tower
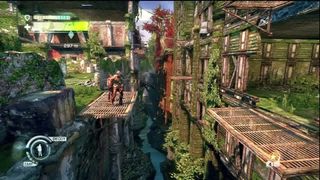
Mask 1: This is the first mission where the masks start to show up and although at first they seem to be nice and easy collectibles, they quickly show their pain in the ass side. The first mask is automatic as you and Trip enter the ruined building. Watch the short scene that introduces you to what the masks are and from here on out, the hunt is on!
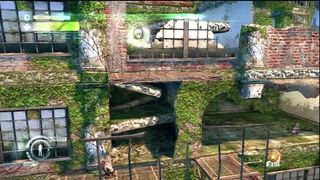
Mask 2: The second mask is just past the first. You will come to a part where you and Trip are at more ruined buildings. You will need to toss Trip up to a room with a health Vial and a ladder. Once she knock down the ladder, climb it and jump across to the crumbly wall. Once on the platform there, turn around and look across the gap to see the mask there. Hop across to the platform and the mask is yours.
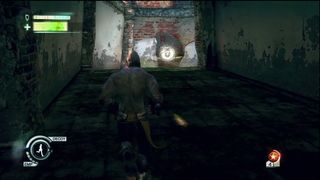
Mask 3: The third and final mask of this mission is another easy one that’s right in your path. Once you take out the turret that was firing at you while collecting the previous mask, Trip will unlock a door for you two to proceed. The mask is down the stairs and directly in front of you in the hallway there.
Chapter 4: Wherefore Art Thou?
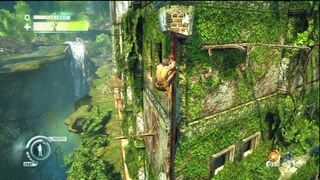
Mask 4: At the start of the mission, you will need to hop up a wall and a pipe to go upwards and into the building. Before doing that though, climb the pipe and then head to the left. Make your way around the corner of the building and the mask will be on a platform down a ways. Make your way over to it and then head back the way you were going to proceed.
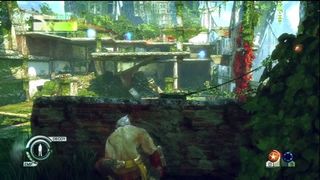
Mask 5: You will come to a large room with several mechs in it. Most are up on a higher level and you will need to use your stun to get to them without getting smoked. Once you take out the mechs, you will continue along the left side of the room and there will be a mask therein the middle of a hallway, not hiding all so well from you.

Mask 6: For the final mask of this mission, when you are fighting the dog in the theatre, the mask will be at the far side of the room, in the middle of the stage. When you grab it is up to you, but it will be sitting there waiting for you to do so.
Chapter 5: The Crash Site

Mask 7: As you zip around the water on your cloud, there will be lots of places to explore. To get the first mask here though, you will want to head to the left side of the area. There will be a couple small patches of land and the mask is on the farthest one, just past the capsized boat. Once you go past the boat, you will see the mask sitting on an open piece of land.

Mask 8: Once you get Trip across, you will lift a blockage and then start your way climbing up. While climbing, you will get to a part where things start to collapse and Trip will say she is scared. Once you grab and climb up onto the red platform, look to the right and you will see a large wooden sign and a few girders sticking out of the wall. Make your way across them and up to the platform there with a bad and a chair. Hop down to the platform below and grab the mask there in its little hidey-hole.

Mask 9: The third and final mask of this mission is a breeze since you don’t actually have to do anything to get it. Monkey will grab it during the final scene of the mission while zipping around on his motorbike. This is the 9th mask you will have grabbed so far and they really aren’t getting any less creepy.
Sign up to the 12DOVE Newsletter
Weekly digests, tales from the communities you love, and more
Jeff McAllister is a freelance journalist who has contributed to 12DOVE over the years. You'll typically find his byline associated with deep-dive guides that are designed to help you scoop up collectibles and find hidden treasures in some of the biggest action and RPG games out there. Be sure to give Jeff a thanks in the comments while you're completing all of those tricky Achievements and Trophies.

The devs of a legendary indie Zelda-like have a new retro action game with "bumpslash" combat, and its Steam Next Fest demo is a gem: "Fans of Ys, take note!"
And you thought Hollow Knight: Silksong is late – 37 years in the making, this retro Metroidvania has a whip-smart Steam Next Fest demo that's as Castlevania as it gets
