10 Darktide tips to help you please the God-Emperor
How to get better at Warhammer 40k Darktide
Need some Darktide tips to become the best Operative you can be? Warhammer 40k Darktide combat is pretty tough, and many gameplay details are easily overlooked. Naturally, if you want to get better at Darktide, it’s important to be aware of things like the Corruption system, the misleading friendly fire voice lines, and enemy sounds.
From difficulty level to weapon stats, this list of Darktide tips will guide you through the City of Tertium. As for other things you might need we've also got Darktide error codes covered and the best Darktide settings to keep things running smoothly.
1. Stick with the team to stay alive
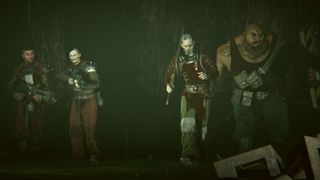
This may be a general rule for all co-op games, but in Darktide’s case, it’s twice as important: stick with your teammates. The main reason is the Toughness mechanic, your character’s damage-reducing shield (the blue bar). Besides killing enemies, Toughness replenishes whenever you’re near an ally. Note that Toughness doesn’t stop all damage, but it’s infinitely easier to survive a mission if you manage to keep it up.
2. Communicate about items and goals
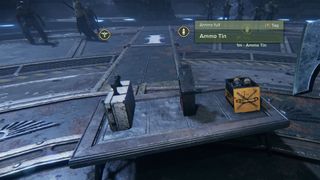
Another team-related Darktide tip: communicate about items and missions. Sure, team communication is pretty important in any co-op game, but there are a few specific things you should always discuss while running through the city of Tertium:
- If you don’t pick up an item, let your teammates know by pinging the location for them.
- Likewise, if you’re in need of ammo, share this info with the squad.
- Discuss objectives. Think you should explore a different area? Or would you rather give up an a secondary objective? Discuss it with the team!
- Be especially wary of the secondary objective involving Grimoires, as collecting them will cause the whole team to gain Corruption. Before picking one up, ask your teammates if they’re okay with this.
3. Beware of Corruption build up as too much will get you captured

If you get downed, but your teammates revive you, there’s no harm done, right? Unfortunately, Darktide’s Corruption mechanic says differently. Every time you get knocked out, your HP bar will become a bit more purple, thereby reducing your max health. A fully-corrupted HP bar results in immediate capture, preventing you from playing until the team rescues you. Beware that Corruption is also caused by certain enemy attacks or picking up a Grimoire.
As Corruption can’t be healed with med kits, the only way to get rid of it is to recover HP at a Medicae Station (see picture). Naturally, if you find one, share the location with the team.
4. Don’t be afraid of friendly fire - it's not a thing despite the voice lines

Why? Because there is none. Many new players don’t realize this, because the characters will react to getting shot. It’s nothing more than voice lines though, you won’t actually damage your allies. And this is a good thing, because it means you can safely use flamethrowers and grenades.
However, even without friendly fire, beware that allies may block bullets. A big Ogryn standing in a Veteran’s line of sight is still not ideal.
5. Learn the Darktide class system
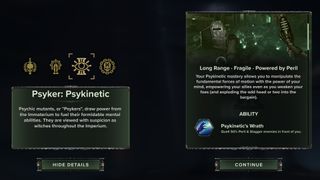
Understanding your teammates’ abilities is just as important as learning your own Darktide class. Here’s a brief overview of Darktide classes:
- Veteran Sharpshooter: specializes in ranged combat, strongest when landing headshots.
- Psyker Psykinetic: a mage-like, ranged damage dealer who’s great against bosses.
- Zealot Preacher: a melee-specialist with high damage potential, relies on Toughness.
- Ogryn Skullbreaker: another frontline fighter, good at staggering hordes and dealing heavy melee damage.
As the best way to familiarize yourself with each class is to play them, it’s recommended that you try them all. You can’t switch classes with an existing character, but you can use up to five Operative (character) slots. Yes, the introduction and tutorial are skippable.
6. Use the Psykhanium
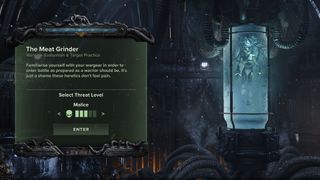
After spawning in the main hub, turn right to find the Psykhanium practice area. Besides basic tutorials, you should use the Meat Grinder training field to test different weapons and practice your skills on the target dummies. Although the dummies won’t engage in combat, you can still use them to find weak spots or test their armour strength. The Meat Grinder unlocks at level 2 (in other words, after completing one mission).
7. Understand Darktide weapon stats
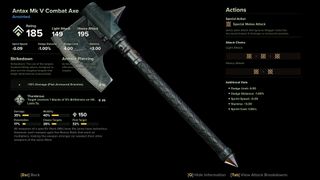
Darktide weapons come with a main ‘rating’, which is actually a number of points divided over a selection of stats. A higher rating doesn’t necessarily mean that the weapon has the best stats for your character, so make sure you understand their meaning. Here’s an overview of common Darktide weapon stats:
- Damage: increases damage.
- Reload Speed: increased reload speed.
- Ammo: extra magazine size.
- Mobility: sprint speed, dodge limit, and dodge distance.
- Stability: affects recoil, spread, and sway of bullets.
- Finesse: increases attack speed and adds extra critical hit and weak spot damage.
- Critical Bonus: increases critical hit damage.
- Penetration: additional attack damage against Flak and Carapace armour.
- Cleave damage: damage dealt to secondary targets hit by the same strike.
- Stopping Power: enhances stagger and impact upon hit.
- Radius: affects the range of area-of-effect weapons.
- Collateral: increases stagger, impact, and suppression.
- Defences: affects the weapon’s block ability.
- First target: how much damage is dealt against the first target hit.
Click on a weapon in your inventory and then press ‘V’ to see more detailed weapon stats. Use Tab to get an overview of attack combos.
8. Choose the right difficulty
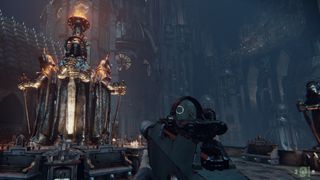
Before starting a new Darktide mission at the mission terminal, beware of the difficulty level. Each mission displays a skull icon with one to five stripes, one stripe being the easiest, and five the most difficult.
So, when will you be ready to try a higher level? Although it’s different for every player, here’s a general guideline:
- Difficulty level one: new characters
- Difficulty level two: level 5+
- Difficulty level three: level 15+
- Difficulty level four: level 25+
- Difficulty level five: level 30
9. Recognize enemy sounds
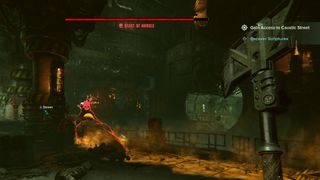
Darktide enemy types come with their own unique sound. As they will make this sound before they reach your team, you can tell what’s coming simply by listening. Although this is a learn-through-experience thing, try to keep an ear out for these early-game enemy sounds:
- Deep growl, sounds like multiple voices: a Horde
- Howling sound: Pox Hound
- Singular deep growl: Mutant
- Bomb-like ticking noise: Pox Burster
- Absolutely terrifying growl: it’s a Boss, such as the Beast of Nurgle
10. Don’t be too eager to jump
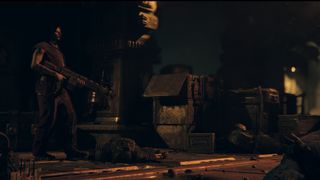
Most Darktide missions feature points of no return. Once you jump down a ledge (yes, it’s mostly due to dropping down), you can’t go back to the previous area. Be careful not to fall down accidentally, but also don’t be too eager to do it on purpose. First of all, you need to make sure that you didn’t miss any loot. Secondly, you need to check whether your teammates are ready. If your mate gets attacked after you’ve moved on, there’s nothing to be done about it.
And that concludes our list of Warhammer 40k Darktide tips. Good luck out there, Operative!
Sign up to the 12DOVE Newsletter
Weekly digests, tales from the communities you love, and more
I’m a freelance journalist who (surprise!) kind of has a thing for videogames. When I’m not working on guides for GamesRadar, you can probably find me somewhere in Teyvat, Novigrad, or Whiterun. Unless I’m feeling competitive, in which case you should try Erangel. You can also find my words on PCGamesN, Fanbyte, PCGamer, Polygon, Esports Insider, and Game Rant.

Life is Strange director says Don't Nod returned to its episodic roots in Lost Records because he's not "invested" in Netflix's binge model
Lost Records: Bloom and Rage – Tape 1 review: "This Life is Strange successor is Stephen King, Blair Witch, and Yellowjackets all rolled into one – delicious"

