Dark Souls Remastered full walkthrough guide: every area, boss, secret and more
Survival tips for Dark Souls Remastered - how to beat the game from start to finish
Dark Souls Remastered full walkthrough: GREAT HOLLOW AND ASH LAKE (OPTIONAL)
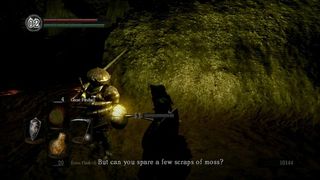
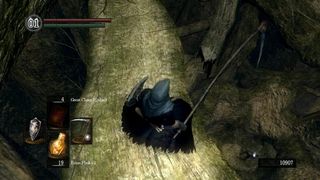
Remember those breakable walls inside that giant tree at the bottom of Blighttown? Head there now (warp to the Daughter of Chaos bonfire). Very near the tree, next to a support column, you’ll find Siegmeyer (seen above). Give him some purple moss clumps and he’ll reward you with a Pierce Shield. This also progresses his path through the game.
Now head into the tree and through the secret passages. Before you do, however, consider equipping the Fall Control spell if you have it, for the entire area is one massive drop and a wrong step can easily lead to death. Proceed until you reach the bonfire.
The great hollow is a series of winding roots that lead far below Lodran. There are several items found in precarious places, but they are all either souls or titanite chunks of various colors - with one exception: the Cloranthy Ring. This is the only item we are going to show you how to get, since it can only be found here.
From the bonfire, walk forward until the path curves to the right. Look down to your right. Inside a hollow stump you’ll notice a corpse with an item (see above). Simply roll off the ledge here and aim for the corpse. The fall should do minimal damage and you can grab the ring.
The rest of the area contains Basilisks (which can inflict curse) and, at the bottom of the tree, Mushroom Men (the larger of which can kill you in a single punch). After the Mushroom Men, you’ll find a for door leading to Ash Lake.
Ash Lake is incredible - especially when you try and understand where exactly it is that you are. Once you emerge from the tree, you’ll notice a Hydra in the water to your left. Before taking it on, head right to find a bonfire on the beach.
BOSS – SECOND HYDRA
This Hydra is identical to the first one you encountered in Darkroot Basin, though it may be stronger. Make sure to equip some heavy armor and bring a bow if you have one. Get close enough (at the water’s edge, but not too far in as this lake has an earlier drop-off than Darkroot Basin’s) so that the Hydra attacks you with its heads. Block the attack, then once the heads are stuck in the ground, hack away.
This Hydra tends to vary its distance from you more often than the previous one. If it seems to be backing off, move in to avoid its projectile attacks. If it starts to move forward, back off a bit so that you don’t get hit from behind by its head attacks. Maintaining the proper range is key here. If you are standing in the water, you will almost always draw out a melee attack – though we don’t recommend staying there when the strikes actually hit. We also suggest using Iron Flesh during the first part of the battle, as you inevitably tend to get hit from behind when all of the heads are attached and attack at once.
Once you take out a few heads, you can simply stand at the water’s edge and use a bow to finish the job. You will get two Dragon Scales for winning this fight.
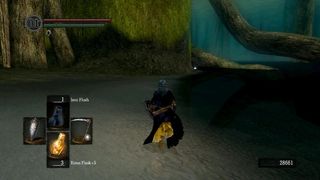
If you run left along the water’s edge, back towards the tree, you’ll find another Dragon Scale (seen above). There is yet another scale in the hollow log in the middle of the beach.
Continue along the beach until you see another hollow tree. If you stay to left side of the sandbar, you’ll find another Dragon Scale on a corpse at the water’s edge. Backtrack from there then head for the tree mentioned above.
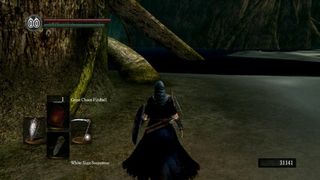
Instead of going through the ‘front’ entrance, loop around the right side and up the root you see in the picture above. About half way up, look down to your right for a hollow broken root that you can fall into. This path leads inside the tree and to the Miracle: Great Magic Barrier.
Continue along the beach until you finally reach the Everlasting Dragon. This is an NPC, not an enemy. You can speak to him to join the Path of the Dragon Covenant. This covenant exists solely as a means of obtaining Dragon Scales.
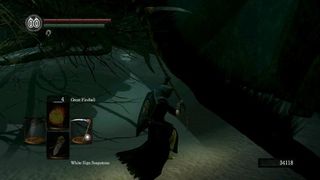
Above: Sorry, pal
You can cut off the dragon’s tail in order to obtain the Dragon Greatsword. This does not anger him or break your covenant, but it does count as a sin and will require absolution from Oswald of Carim. At this point, that shouldn’t matter; take the sword! Use the bonfire to warp out of this place.
Jump to Section
- Firelink Shrine
- Undead Burg part 1
- Undead Burg part 2
- Undead Parish part 1
- Undead Parish part 2 (First Bell)
- (OP) Grinding for Souls & Finding Goodies in Darkroot Garden
- Lower Undead Burg
- (OP) Returning to the Undead Asylum
- The Depths
- Blighttown
- (OP) Exploring Blighttown's Swamp
- (OP) Undead Dragon & Valley of the Drakes
- Quelaag's Domain (Second Bell)
- (OP) Moonlight Butterfly & the Divine Ember
- (OP) Darkroot Basin, the Hydra, and Dusk
- Sen's Fortress part 1
- Sen's Fortress part 2
- Anor Londo part 1
- (OP) Painted World of Ariamis part 1
- (OP) Painted World of Ariamis part 2
- Anor Londo part 2
- Return to Firelink Shrine & Placing the Lordvessel
- Sif and the Darkroot Garden
- New Londo Ruins
- The Catacombs
- Tomb of the Giants part 1
- Tomb of the Giants part 2
- (OP) Dark Sun Gwyndolin & the Blade of the Darkmoon Covenant
- Duke's Archives
- Crystal Cave
- Demon Ruins part 1
- Demon Ruins part 2
- Lost Izalith
- (OP) Sanctuary Garden (New Content)
- (OP) Oolacile Sanctuary & Royal Wood (New Content)
- (OP) Oolacile Township (New Content)
- (OP) Chasm of the Abyss (New Content)
- (OP) Black Dragon Kalameet (New Content)
- Kiln of the First Flame & Gwyn, Lord of Cinder
Current page: Dark Souls: Great Hollow and Ash Lake (Optional)
Prev Page Dark Souls: Demon Ruins Part 2 Next Page Dark Souls: Lost IzalithSign up to the 12DOVE Newsletter
Weekly digests, tales from the communities you love, and more
Dark Souls Remastered seamless co-op is officially coming from the creator behind the same Elden Ring mod, and it's set to include everything from PvP to scaling
There's a whole world of Dark Souls-style lore hidden in this series of dress-up games, and I bet you can't tell which is which

