Dark Souls Remastered full walkthrough guide: every area, boss, secret and more
Survival tips for Dark Souls Remastered - how to beat the game from start to finish
Dark Souls Remastered full walkthrough: DEMON RUINS PART 1
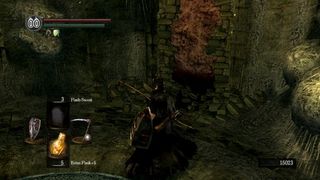
The Demon Ruins are accessed from the hole in the wall near Quelaag’s Sister’s bonfire in Quelaag’s Domain. Light the bonfire at the beginning of the ruins and descend down the slope, around the corner, and across the bridge until you reach the fog door.
BOSS – CEASELESS DISCHARGE
Above: Entering the arena of Ceaseless Discharge after he becomes hostile
I’m going to be completely honest. I do not care to try and beat this boss legitimately. It is a horrific monstrosity of game design, created only to make your life a living hell. Thankfully, the exploit to defeat it easily still exists in the latest version of the game. Here we go!
First, once you pass through the fog door, the boss will not attack you until you pick up the Gold-Hemmed Armor set at the back of the area or attack him. Even though we knew better, we made the mistake of picking up the item first (that hood is so COOL), which resulted in Ceaseless Discharge killing us within four seconds. Be prepared for that. Seriously.
After the boss becomes hostile, he will attack you every time you enter the fog door from then on. It is important to run up the stairs to the right while taking as little damage as possible. This initial dash can be difficult some times and easy others, so again, don’t harbor any hopes of keeping any souls or humanity during this fight.
Once you reach the spot, lure him so that he slams his tentacle down. Simply attack it a few times, back off, and repeat. If you stand near this spot upon entering the arena for the first time and leave the armor alone (for now), you can turn him hostile by firing an arrow at him. Using such a method, you could conceivably defeat the boss on your first attempt without taking any damage.
Congratulations! You beat one of the most intimidating bosses in the game. And we didn’t make a single joke about his name…
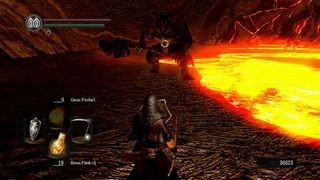
Cross back over the bridge you used to enter the boss arena and descend further, into the dried lava bed. Once in the dried bed, you can stick to the right edge to reach your primary destination or the left edge to take on several Minor Taurus Demons (pictured above) to obtain the Chaos Flame Ember. Note that when fighting these demons, it is always better to dodge as opposed to block, and only try for one strong R2 attack whenever you have an opening. Losing patience against these guys will get you killed.
Also, make sure to lure them out one by one. Arrows work great for that. In order to cross over the lava and reach the items without dying, you should equip the Rusted Iron Ring, the Flame Stoneplate Ring, and fire-resistant armor such as the Gold-Hemmed set you just picked up. Also consider using the Pyromancy spell Flash Sweat. You can also return here after you receive the Orange Charred Ring from the Centipede Demon boss.
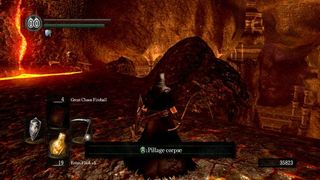
After you’ve claimed the ember (if you wanted to), return to the area pictured above, along the right side of the dried lava bed. This path is very straightforward, though you’ll have to go through several Minor Capra Demons. These behave very similarly to the Capra Demon boss you fought earlier, only now you have more space to maneuver and are a lot stronger. Don’t be intimidated; treat them like any other normal enemy (circle-strafe is your friend).
Like the Taurus Demons, you can lure one Capra Demon out at a time using arrows. Don’t try to take on more than one at a time.
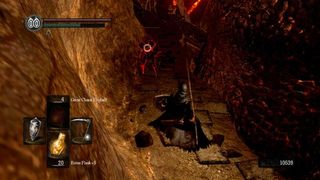
If you are in human form, the black phantom Kirk, Knight of Thorns will invade once again as you make your way along the narrow cliff edge. This is a necessary battle if you want to later claim his armor. Once it shows on screen that he has invaded, turn around to face him. You can quite easily kick him off the ledge, though you won’t get the Humanity that he drops (plus it's totally dishonorable).

When you reach the point pictured above, you can drop down to reach the bonfire early. In fact, we recommend doing so. The Burrowing Rockworm that appears nearby can be easily and safely dispatched with any ranged attack.
Continue towards the fog door, which you can see from the bonfire. You could make a break for the fog door (and you will later on, most likely), but there are some good items to be had, which we'll cover on the next page. The Demonic Statues that attack as you descend the stairs can be easily dispatched if you circle-strafe and attack when they pause to breathe fire.
Jump to Section
- Firelink Shrine
- Undead Burg part 1
- Undead Burg part 2
- Undead Parish part 1
- Undead Parish part 2 (First Bell)
- (OP) Grinding for Souls & Finding Goodies in Darkroot Garden
- Lower Undead Burg
- (OP) Returning to the Undead Asylum
- The Depths
- Blighttown
- (OP) Exploring Blighttown's Swamp
- (OP) Undead Dragon & Valley of the Drakes
- Quelaag's Domain (Second Bell)
- (OP) Moonlight Butterfly & the Divine Ember
- (OP) Darkroot Basin, the Hydra, and Dusk
- Sen's Fortress part 1
- Sen's Fortress part 2
- Anor Londo part 1
- (OP) Painted World of Ariamis part 1
- (OP) Painted World of Ariamis part 2
- Anor Londo part 2
- Return to Firelink Shrine & Placing the Lordvessel
- Sif and the Darkroot Garden
- New Londo Ruins
- The Catacombs
- Tomb of the Giants part 1
- Tomb of the Giants part 2
- (OP) Dark Sun Gwyndolin & the Blade of the Darkmoon Covenant
- Duke's Archives
- Crystal Cave
- Demon Ruins part 2
- (OP) Great Hollow & Ash Lake
- Lost Izalith
- (OP) Sanctuary Garden (New Content)
- (OP) Oolacile Sanctuary & Royal Wood (New Content)
- (OP) Oolacile Township (New Content)
- (OP) Chasm of the Abyss (New Content)
- (OP) Black Dragon Kalameet (New Content)
- Kiln of the First Flame & Gwyn, Lord of Cinder
Current page: Dark Souls: Demon Ruins Part 1
Prev Page Dark Souls: Crystal Cave Next Page Dark Souls: Demon Ruins Part 2Sign up to the 12DOVE Newsletter
Weekly digests, tales from the communities you love, and more
Dark Souls Remastered seamless co-op is officially coming from the creator behind the same Elden Ring mod, and it's set to include everything from PvP to scaling

There's a whole world of Dark Souls-style lore hidden in this series of dress-up games, and I bet you can't tell which is which

