Dark Souls Remastered full walkthrough guide: every area, boss, secret and more
Survival tips for Dark Souls Remastered - how to beat the game from start to finish
Dark Souls Remastered full walkthrough: DUKE’S ARCHIVES
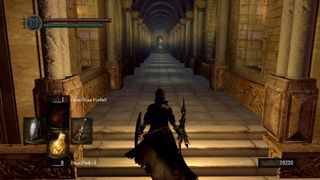
To reach this area, warp to the Anor Londo bonfire, exit the building, and turn left. Enter the building you see and leave out the right side entrance. Follow this path up to the archives. The hall leading into the archives is guarded by an Armored Tusk. Wear light armor, move forward until the tusk charges, then turn around and run out of the hallway. The tusk cannot pass the threshold of the hall entrance, so you can shoot spells/Pyromancy at it while it flounders helplessly.
Around the second corner, there will be another Armored Tusk. You can’t use the same trick, but simply circle strafe around it and use Pyromancy to deal with it quickly - this isn’t the most maneuverable enemy. Move into the archives and light the bonfire.
Take the lift up to the next level. This is where you are introduced to Crystal Skeletons. They are like any other skeleton knights, only they deal much more damage. Go for backstabs and always have your shield up.
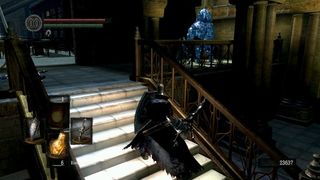
In this room is a Blue Crystal Golem. This particular enemy is exclusive to the Prepare to Die Edition, and the Broken Pendant it drops is required to access the new content. If you want to access that content now, proceed to the appropriate section of the walkthrough. Otherwise, continue on into the Duke’s Archives.
Rush the Channeler in between his spell casting. Channelers tend to teleport away if you don’t finish them quickly enough. Climb up the stairs and explore this floor, then head up the elevator. Once on the top floor, proceed through the crystalized hallway, aware that an NPC will rush to attack once you do. Before you proceed through the fog door, equip a Ring of Sacrifice if you have one.
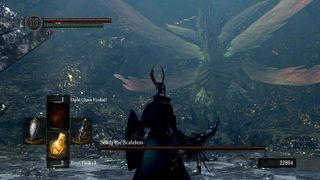
You will now face Seath the Scaleless. You cannot win this fight and will inevitably die, so just let it happen.
You’ll revive at a bonfire in the prison section of the archives. Kill the Serpent Soldier through the bars and loot his corpse for the key needed to escape your cell. Upon your escape, a guard will sound an alarm, releasing the Picasa. These enemies should be dealt with from a distance, as they have a grab attack that instantly kills. However, it is easy enough to dodge if you wish to take them out with melee weapons.
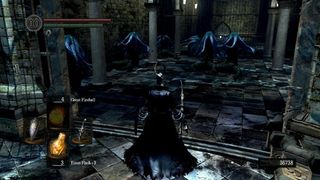
Descend to the bottom of the area, checking the cells along the way for loot. At the very bottom, enter the room full of Picasa and destroy them all. The crying Picasa drop the Bountiful Sunlight and Soothing Sunlight miracles. Speak to Big Hat Logan through the bars. The key to his cell can be found later in the level.
Climb up to where the alarm is and loot the nearby chest for the Archive Tower Giant Door Key. Now go all the way back up the stairs to the top of the tower and climb the ladder there. Before you go through the giant double doors, look to your left or a wooden plank walkway. Follow this to its end and carefully drop down to find the Maiden Armor set and a White Seance Ring (which grants additional attunement slots). Now go back up and through the double doors.
Continue on until you are back in the library. Head left and deal with the Channeler (deal with the one above you with arrows, if you have them), then keep heading in this direction until you can go up some stairs to your right.
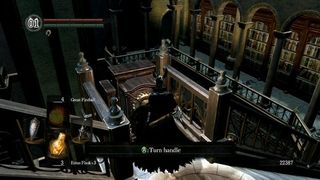
Halfway up these stairs is a lever. Turn it to rotate the staircase. Continue up the stairs and head left. Follow this path until you see a gap to your left. Drop down onto another rotating staircase, only don’t use the lever. Run up the stairs and head right to find a chest containing Sorcery: Strong Magic Shield.
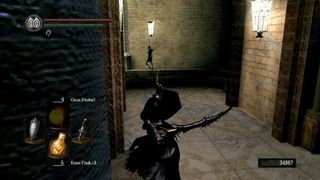
Go halfway down the stairs and rotate them, then continue down and turn right. You should see a doorway (see above) that leads to a ladder. Take the ladder all the way down and pull the nearby lever. You can now run to the bonfire outside then come back here and explore the two rooms.
In the smaller of the two rooms, you’ll find a lone chest containing a Blue Titanite Chunk. Enter the bigger room and check the chest to your immediate left to find the Channelers Armor set. The chest further down and to your left contains the Archive Tower Giant Cell Key. The chest in the far right corner of the room is a Mimic, who should drop an Enchanted Falchion and a Symbol of Avarice. Pull the nearby lever to reveal a path leading to your next destination.
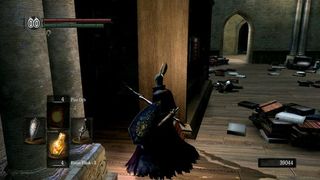
Before heading down the stairs, check for a hidden path behind where the Mimic was placed. There’s a chest to be found which contains the Crystal Ember.
We also recommend taking the Archive Tower Giant Cell Key back to the prison section and freeing Big Hat Logan. You’ll also gain access to the item in his cell, which is a Fire Keepers Soul. Logan will now move into the small room where you found the Blue Titanite Chunk and sell new spells.
Head down the newly revealed staircase (make sure to grab the 20 Prism Stones from under the stairs) , through the fog door, and out into the open air. This area is inhabited by many Blue Crystal Golems and, if you have been following this walkthrough, a Golden Crystal Golem.
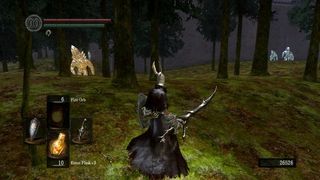
Destroying the Golden Golem reveals Sieglinde of Catarina, daughter of Siegmeyer. Talk to her and tell her you’ve seen her father. Search the open area nearby for a corpse holding the Crystalline Armor set, then continue on down the slope into the Crystal Cave.
Jump to Section
- Firelink Shrine
- Undead Burg part 1
- Undead Burg part 2
- Undead Parish part 1
- Undead Parish part 2 (First Bell)
- (OP) Grinding for Souls & Finding Goodies in Darkroot Garden
- Lower Undead Burg
- (OP) Returning to the Undead Asylum
- The Depths
- Blighttown
- (OP) Exploring Blighttown's Swamp
- (OP) Undead Dragon & Valley of the Drakes
- Quelaag's Domain (Second Bell)
- (OP) Moonlight Butterfly & the Divine Ember
- (OP) Darkroot Basin, the Hydra, and Dusk
- Sen's Fortress part 1
- Sen's Fortress part 2
- Anor Londo part 1
- (OP) Painted World of Ariamis part 1
- (OP) Painted World of Ariamis part 2
- Anor Londo part 2
- Return to Firelink Shrine & Placing the Lordvessel
- Sif and the Darkroot Garden
- New Londo Ruins
- The Catacombs
- Tomb of the Giants part 1
- Tomb of the Giants part 2
- (OP) Dark Sun Gwyndolin & the Blade of the Darkmoon Covenant
- Crystal Cave
- Demon Ruins part 1
- Demon Ruins part 2
- (OP) Great Hollow & Ash Lake
- Lost Izalith
- (OP) Sanctuary Garden (New Content)
- (OP) Oolacile Sanctuary & Royal Wood (New Content)
- (OP) Oolacile Township (New Content)
- (OP) Chasm of the Abyss (New Content)
- (OP) Black Dragon Kalameet (New Content)
- Kiln of the First Flame & Gwyn, Lord of Cinder
Current page: Dark Souls: Duke's Archives
Prev Page Dark Souls: Dark Sun Gwyndolin (Optional) Next Page Dark Souls: Crystal CaveSign up to the 12DOVE Newsletter
Weekly digests, tales from the communities you love, and more
Dark Souls Remastered seamless co-op is officially coming from the creator behind the same Elden Ring mod, and it's set to include everything from PvP to scaling

There's a whole world of Dark Souls-style lore hidden in this series of dress-up games, and I bet you can't tell which is which


