Dark Souls Remastered full walkthrough guide: every area, boss, secret and more
Survival tips for Dark Souls Remastered - how to beat the game from start to finish
Dark Souls Remastered full walkthrough: DARKROOT BASIN, THE HYDRA, AND DUSK (OPTIONAL)
On your way back to the Undead Parish from the Darkroot Garden, you may notice a path to your left just before you hit the Parish. This leads to a series of downward slopes that takes you to the Darkroot Basin. Alternatively, you can reach the basin through the bottom of the tower where you fought Havel the Rock.
Once you reach a large, open area, you’ll spot several Crystal Golems and, more importantly, a massive, water-spewing Hydra. Clear out the golems by luring them away from the hydra, then get ready for a fight.
BOSS: HYDRA
Equip the Rusted Iron Ring and a shield that has 100% physical resistance.
You’ll want to approach the Hydra from the left side of the basin, staying out of range of the very harmful projectiles for as long as possible. Eventually, you’ll have to make a break for the Hydra. Roll at the right time to avoid any projectiles. Once you’re in the water, the Hydra will start stop trying to shoot you and start trying to bite you. Simply block the bites and attack while the heads are still nearby. The Great Chaos Fireball Pyromancy works well, as does any high-damage, two-handed weapon.
As the number of heads reduces, it becomes easier to tell where each one will slam into the ground when the Hydra lunges forward. At this point, it’s just a matter of running over to the proper location and hitting the heads while they’re stationary. Be careful not to wander too far into the lake for there is a deadly drop off.
The Hydra drops a Dragon Scale and a Dusk Crown Ring, the latter of which “grants extra sorcery castings, but halves HP.”
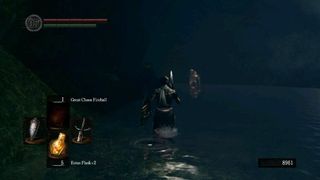
We’re not done here yet. Quit the game and reload, then run left around the perimeter of the lake. Pass the waterfall and keep on going until you find a Golden Crystal Golem. Destroying this golem frees an NPC called Dusk of Oolacile. Answer yes to her question. She will then disappear. Run over to the shore from which you fought the Hydra and look for a summon sign near a rock.
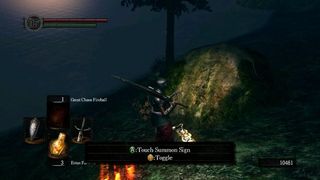
This is Dusk’s sign, and if you summon her, she will offer to sell you some spells and a special catalyst. Finally, after speaking to Dusk, return to where you fought the Golden Crystal Golem to find the Antiquated Armor Set.
Jump to Section
- Firelink Shrine
- Undead Burg part 1
- Undead Burg part 2
- Undead Parish part 1
- Undead Parish part 2 (First Bell)
- (OP) Grinding for Souls & Finding Goodies in Darkroot Garden
- Lower Undead Burg
- (OP) Returning to the Undead Asylum
- The Depths
- Blighttown
- (OP) Exploring Blighttown's Swamp
- (OP) Undead Dragon & Valley of the Drakes
- Quelaag's Domain (Second Bell)
- (OP) Moonlight Butterfly & the Divine Ember
- Sen's Fortress part 1
- Sen's Fortress part 2
- Anor Londo part 1
- (OP) Painted World of Ariamis part 1
- (OP) Painted World of Ariamis part 2
- Anor Londo part 2
- Return to Firelink Shrine & Placing the Lordvessel
- Sif and the Darkroot Garden
- New Londo Ruins
- The Catacombs
- Tomb of the Giants part 1
- Tomb of the Giants part 2
- (OP) Dark Sun Gwyndolin & the Blade of the Darkmoon Covenant
- Duke's Archives
- Crystal Cave
- Demon Ruins part 1
- Demon Ruins part 2
- (OP) Great Hollow & Ash Lake
- Lost Izalith
- (OP) Sanctuary Garden (New Content)
- (OP) Oolacile Sanctuary & Royal Wood (New Content)
- (OP) Oolacile Township (New Content)
- (OP) Chasm of the Abyss (New Content)
- (OP) Black Dragon Kalameet (New Content)
- Kiln of the First Flame & Gwyn, Lord of Cinder
Current page: Dark Souls: Darkroot Basin, The Hydra, and Dusk (Optional)
Prev Page Dark Souls: Moonlight Butterfly and the Divine Ember (Optional) Next Page Dark Souls: Sen's Fortress Part 1Sign up to the 12DOVE Newsletter
Weekly digests, tales from the communities you love, and more
Dark Souls Remastered seamless co-op is officially coming from the creator behind the same Elden Ring mod, and it's set to include everything from PvP to scaling
There's a whole world of Dark Souls-style lore hidden in this series of dress-up games, and I bet you can't tell which is which


