Braid walkthrough
Tim's love life is a mystery, but at least getting to the end of Braid won't be
World 5: Time and Decision
5-1 – The Pit
This world introduces a Nega-Tim of sorts, except instead of being evil, he’ll repeat your actions and help you out. Drop down below and grab the puzzle piece. Rewind until you’re back at the top; the piece returns, but Nega-Tim will grab it for you. Hop across the gap and out the door.
5-2 – So Distant
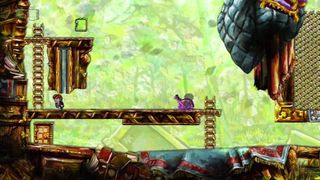
Climb the first ladder and stand next to the orange barricade on the left. Then walk over to the lever and hit B. Rewind until you’re back at the barricade. When Nega-Tim repeats your actions and pulls the lever, run past the open barricade and up the ladder to grab the first puzzle piece. Drop down and go to the right.
Jump on the monstar to reach the platform on the left with the lever. Hit the lever and immediately rewind so the monstar is still alive. As Nega-Tim repeats and hits the lever, jump on the monstar again, this time reaching the left platform. Climb the grating for the next puzzle piece. Exit the level on the bottom right.
5-3 (No Name)
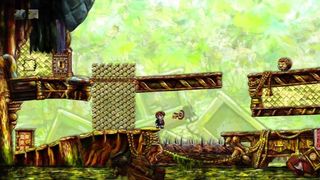
See the section in the middle, past the pit of spikes? There’s an annoying bunny under the area with the puzzle piece that won’t stop guarding the entrance. Climb the grating near the door and hop over the gap, coming around to the other side. Awaken the bunny in the middle and back out to the right, just out of its reach. Rewind until you’re on top again. As Nega-Tim distracts the guard bunny, run underneath from the left, grabbing the key, going up the ladder, and getting the puzzle piece. From the middle ladder, you or Nega-Tim can finally get above that pesky rabbit to kill it.
Rewind until you’re back near the entrance. Make your way to the key, then jump as far into the pit on the left as you can. You’ll die, but it’s okay. Rewind until you’re on the other side, then stand at the very edge of the pit. As Nega-Tim leaps with the key, he’ll hand it off to you, allowing you to go up the grating and finally get the other puzzle piece behind the locked door. Go right and use the platforms to reach the exit door in the upper right of the screen.
5-4 – Crossing the Gap
Walk to the first ladder and climb it. Continue to the right. Climb the second ladder and go left, hitting the lever and using the moving platform to cross the gap. From there, fall below and jump on the monstar, then rewind until you’re back at the top. Shadow Tim will repeat your actions, and a new monstar will pop out of the cannon next to you. Jump on its head to reach the platform above, then hop over to the puzzle piece.
Another monstar will emerge, so quickly move to the platform underneath the lever and hit the monstar from underneath. Again, rewind and have Nega-Tim repeat, and the monstar will be on the platform with the lever. Use it for a boost to get to the higher platform, and climb the ladder for the next puzzle piece.
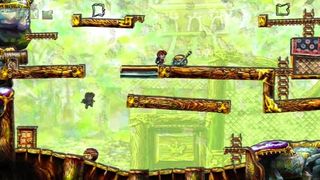
The next monstar will make its way to the far left; wait for it underneath where it falls, and jump into it. Rewind, giving yourself enough time to climb the ladder above you, and when Nega-Tim repeats, hop on the monstar to the platform with the puzzle piece. Exit the level.
5-5 – Window of Opportunity
Walk to the right and climb the ladder. Make your way to the platform with the monstar holding a key, above the puzzle board. Hop on the foe and grab the key. Make your way left and unlock the pink glowing door, then rewind until you’re back up at the platform where you got the key. This time, unlock the non-glowing door, and use the glowing door as a platform before Nega-Tim unlocks it. Climb the ladder and head to the lever on the left. Hit it to move the platform blocking the first puzzle piece. Make your way back to the first ladder and go down to grab your prize.
Go back to the platform where you got the key and hop across to the right. Hit the lever and quickly rewind yourself back to the ladder. Go down to the next level, and when Shadow Tim hits the switch above, you can make your way across the rising platform to the bottom lever. Hit that, and quickly rewind until you’re at the top again. Once again, hit the top lever for Nega-Tim, and wait on the platform to the right. When he hits the bottom lever, you’ll rise up, allowing you to grab the puzzle piece. Exit the level on the bottom right.
5-6 – Lair
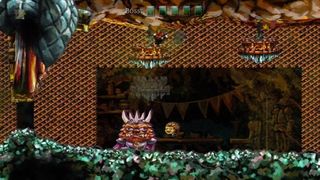
This level has the same core concept as the last boss fight, but this time rewinding your chandelier drops takes away the boss’s hits. Every time you want to drop one on the creature below, hit B, then immediately rewind and have Nega-Tim take care of it. After five hits, grab the key and go to the left, above where you entered the level. Use the key to unlock the door and hit the lever, then quickly rewind until you’re back on the other side of the level. As Nega-Tim makes his way to the lever, unlock the door on the other side and wait by the blocked puzzle piece next to the exit. When Nega-Tim hits the switch, the barricade will rise, letting you get the piece. Exit the level.
5-7 – Fragile Companion
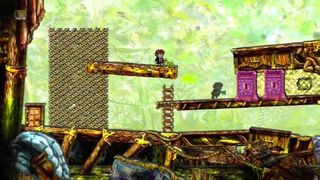
Once again, the key is an unreliable friend. Climb the grating next to the entrance and hop on the monstar, grabbing its key. Walk to the two locked doors on the right, approaching the first as closely as you can, and rewind back up to the platform. Nega-Tim with a key will unlock the first door, allowing you to unlock the second. Grab the puzzle piece.
Make your way to the flag below and talk to the dinosaur for a strange end to the level and the world.
Sign up to the 12DOVE Newsletter
Weekly digests, tales from the communities you love, and more
Sarah is a freelance writer, editor, and consultant. Her work has appeared on websites including IGN, Polygon, Variety, NBC News, Nerdist, Ars Technica, GamesRadar, and more.
