Braid walkthrough
Tim's love life is a mystery, but at least getting to the end of Braid won't be
World 4: Time and Place
4-1 – The Pit
You’ll find a new time manipulation mechanic here. Time stands still as you do, so the foe below won’t move unless you walk or jump left or right. Moving back and forth across the top platforms, have it grab the key below. As it walks beneath you with the key, hop onto its head, grab the key, and rewind until you’re on the platform above. Unlock the door and exit.
4-2 – Jumpman
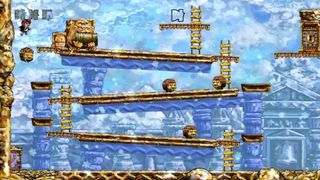
Climb the first ladder to the second level. Hop over the monstars to the next level and climb that ladder. Use the platform to the left to jump on the falling enemy and make it to the top level. Watching out for bad guys, grab the puzzle piece and hop across to the platform next to the locked door. Then jump to the ground.
Carefully make your way up the set of platforms to the right, stopping and starting to make your way around the projectiles. At the top, grab the glowing key and the puzzle piece. With the key in hand, rewind until you’re back on the platform with the locked door. Unlock it and grab the puzzle piece. Then make your way to the far right of the level to exit.
4-3 – Just of Out Reach
Climb the ladder to the first platform and hit the lever. Go back to the ladder and continue climbing. Walk to the right, and as the falling foe moves backwards, jump on it and bounce back onto the platform you came from. The enemy on this platform should now be lined up so that you can jump on it and over the first barrier. Go under the second barrier and grab the puzzle piece.
Time your jump so that you bounce off of the falling foe to the right and onto the top platform with the ladder. Then walk back to the left until the foe rises back up. Back from the dead, direct it to the key on the right, and then walk left again. Jump back to the platform where you got the last puzzle piece. Jump on the falling foe again, grabbing the key, and climb the ladder on the platform to the right. Unlock the door and get the puzzle piece, then exit through the very bottom door.
4-4 – Hunt!
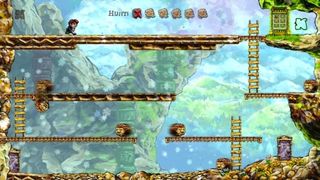
Again, you’ll need to kill all of the foes to unlock the door to the puzzle piece, though the time mechanic makes things a little more difficult. Ignore the monstars on the first and second level as you climb and jump your way to the third. On the third-level drop, get a boost by jumping on the monstar directly below to reach the platform on the other side, right underneath the puzzle piece. Climb the ladder. The monstar you just killed will return, but ignore that.
Follow the top monstar to the left side of the screen, and then jump on it while moving right. Descend the ladder, and use the same monstar from before to get a boost to the other side. Without going so far left that the top monstar returns, jump on this one. Walk to the right and fall to the platform below, then jump across the gap and get the monstar above the entrance. Take out the one on the very bottom level and use it to elevate you to the next platform.
For this, you’ll need to double jump on the same monstar. Jump on it while moving left, and then right. You’ll take it out and get a boost up to the platform with the last monstar on it. Hop on this guy and climb the ladder, fetching the puzzle piece. Exit at the bottom right.
4-5 – Movement by Degrees
Manipulate the foe on the bottom level so that it survives the snapping plants and gets the key on the other side. You’ll have to climb to the platforms above and eventually move to the far right in order to do this. Once the key is out in the open, go and grab it, keeping in mind that the plants move independently of your time manipulation. Climb to the top platform above the plants and unlock the door. Grab the puzzle piece.
Go down past the plant and climb the ladder. Stand on the platform underneath the puzzle piece; notice that the nearest plant in the upper right is down. Walk to the right until a foe pops out, then rewind so that it—and you—arrive safely back on the platform, manipulating the plants to give your foe a clear path. Use the monstar to get a jump boost and hit the second puzzle piece. Then exit through the bottom right door.
4-6 – Movement, Amplified
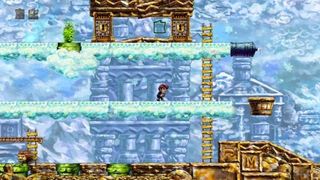
Move across the screen, avoiding snapping plants, and hop over the monstar on your way. The monstar might be killed by plants as you walk; climb the ladder and walk back to the left, and it should be revived. From the clouds above, direct the monstar to the key at the very left of the screen. The clouds move time faster, allowing the monstar to get past the second set of plants. You may have to walk out of view of the plants and key to do this.
Make your way left again; either the monstar has the key, or has dropped it on the ground below. Go get it. Climb the ladder to the next level of clouds (not all the way to the top), then walk left and climb that ladder. You’ll have to be quick to jump past the snapping plant guarding the left door, but you can do it. Unlock the door and grab the puzzle piece.
Climb down and up the ladder on the other side. Take a running jump to the right and you’ll land on a large cloud. Use this to hop to the platforms on the right, grabbing the other puzzle piece in this level. Assemble the puzzle below the platforms. Exit to the right.
4-7 – Fickle Companion
Moving backwards will cause key shenanigans in this level, making it tough to hold on to (hence the title). Grab the key and skip the first section, heading to the right. Unlock the door on the platform above the monstar, walk through it, drop below, and then walk back to the left. Kill the monstar. The door will be locked again, the key will be on the platform above, and a new monstar will grab it. Wait for it to come to the lower level between the two doors, then jump on it and take the key, being careful not to move backward.
Rewind until you’re back out of this section with the key in your hand; you’ll keep the puzzle piece. Hit the lever on the platform above, then drop down below. Kill the monstar there. You want to manipulate the platform so that the new monstar popping out of the cannon above makes it to the platform with the lever on it. It should also grab the key as it flies out of your hands.
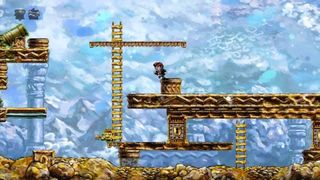
Once the monstar is safely across, back up, climb the ladder, wait until the foe is past the next ladder, and kill it. You’ll pop onto the platform above. Rewind until you’re below and grab the key. Climb up, unlock the door, and grab your puzzle piece. Go back to the section where we got the first piece, climb the ladder, and walk to the right, past the flag. Keep walking to see dino’s important message and eventually the level will end. Once outside, you can organize all of your puzzle pieces to see the completed picture.
Sign up to the 12DOVE Newsletter
Weekly digests, tales from the communities you love, and more
Sarah is a freelance writer, editor, and consultant. Her work has appeared on websites including IGN, Polygon, Variety, NBC News, Nerdist, Ars Technica, GamesRadar, and more.
