Assassin's Creed Valhalla unseal the well: How to open the well in the Well-Traveled quest
How to unseal the well in Assassin's Creed Valhalla

Working out how to complete the Assassin's Creed Valhalla unseal the well puzzle isn't easy during the Well-Traveled quest. What you're meant to do, or how you do it, is barely explained, leaving you trying everything just to work out what it all means. It's easy to get stuck as a result because none of the things you need, how they work or what they do is clear. The game, and the character you're with provide no help, leaving you poking just about everything you can reach in the hope of.... something happening. It makes this one of the more obscure Assassin's Creed Valhalla puzzles to complete. However, don't worry: we're about to breakdown the Assassin's Creed Valhalla unseal the well objective and what you have to do to complete it. If you've found this guide then I'm willing to bet you made the same error I did at the start of the puzzle, so read on for everything you need to know about how to complete the Assassin's Creed Valhalla unseal the well.
Assassin's Creed Valhalla Orlog guide | Assassin's Creed Valhalla opal | Assassin's Creed Valhalla arrows | Assassin's Creed Valhalla legendary animals | Assassin's Creed Valhalla comb | Assassin's Creed Valhalla cargo | Assassin's Creed Valhalla Gorm | Assassin's Creed Valhalla Grantebridgescire Fly Agaric | Assassin's Creed Valhalla Leofrith | Assassin's Creed Valhalla traitor
How to unseal the well in Assassin's Creed Valhalla
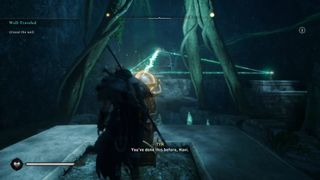
If you've done some exploration in Asgard or found any of the open-world anomalies in England, you may have seen these light beams before. Point them at something to power it up, is the basic gist of it. The problem here lies in the fact you only have one light beam and you need to hit two separate targets. So how do you split the beam?
From the source of the light beam, look towards the entrance where you came in. Nestled in the ceiling is a glowing prism. When you fire the beam at it, it splits in two, with each beam connecting with the two closer reflectors.
Go to the reflector to the right of the prism when looking at it from the source and spin it so it hits the next reflector at the back of the room. Then you can angle that to connect with the first target by the well.
With the second beam shooting off to the left, you first need to position the reflector on the ground-level so it ricochets into the target. You can do this by going down to the well and dragging it, like you would a stack of shelves blocking a doorway in England.
The correct positioning is to pull it back then slightly round the corner, so it's almost in line with the stone pillar. If your beam is slightly off, just keep adjusting it slightly until it connects. When it does, the seal around the well will disappear and you can take a leap of faith into it, causing a big splash at the bottom.
Assassin's Creed Valhalla review | Assassin's Creed Valhalla tips | Assassin's Creed Valhalla map | Assassin's Creed Valhalla length | Assassin's Creed Valhalla best skills | Assassin's Creed Valhalla romance guide | Assassin's Creed Valhalla settlement guide | Assassin's Creed Valhalla silver | How to earn XP in Assassin's Creed Valhalla | Assassin's Creed Valhalla carbon ingots | Assassin's Creed Valhalla resources
Sign up to the 12DOVE Newsletter
Weekly digests, tales from the communities you love, and more
Give me a game and I will write every "how to" I possibly can or die trying. When I'm not knee-deep in a game to write guides on, you'll find me hurtling round the track in F1, flinging balls on my phone in Pokemon Go, pretending to know what I'm doing in Football Manager, or clicking on heads in Valorant.










Getting Assassin's Creed Shadows on PS5 and Xbox Series X was all about adding "dynamism" to the open world, but the devs seem most proud about the trees

Following Assassin's Creed Shadows controversy, Baldur's Gate 3 publishing director says "every big AAA game could be better," but players shouldn't be mad "just because some dude told you to"


